If you are a:
- fitness trainer
- personal coach
- or gym owner
Chances are your day does not end with training sessions alone.
You are also replying to:
- Instagram DMs
- chasing leads on WhatsApp
- sending reminders manually
- tracking payments across different tools
- and constantly following up with clients who “will get back to you.”
This is where most fitness businesses struggle – not because they lack clients, but because they lack systems.
Leads come in from Instagram, Facebook ads, referrals, or your website. Some book consultations, others disappear. Clients miss sessions. Payments fail. Past clients go quiet. And everything depends on how fast you respond and how well you follow up.
The problem is not your training skills. The problem is that your business is running on manual effort instead of automation.
GoHighLevel for Fitness Trainers solves this by giving you one platform where you can:
- Capture every fitness lead automatically
- Follow up with prospects and clients without chasing them
- Schedule consultations and training sessions
- Automate reminders to reduce no-shows
- Collect payments, manage memberships, and deliver workout programs
- Track your entire fitness business from one dashboard
Instead of juggling Instagram DMs, Google Forms, spreadsheets, payment links, and reminder apps, you run everything from one system built for growth.
This guide shows you, step by step, how to use GoHighLevel specifically as a fitness trainer. Not theory. Not generic CRM advice. Real workflows you can implement whether you offer:
- One-on-one personal training
- Group fitness classes
- Online coaching programs
- Hybrid training (online + in-person)
By the end of this guide, you will know exactly how to turn your fitness business into a predictable, automated, and scalable system – without working longer hours.
How to Set Up GoHighLevel for Fitness Trainers
Let’s keep it simple – we’ll both set up your account first, then follow the step-by-step strategies to put everything in place.
Your goal here is simple:
Create a clean, functional foundation that can capture leads, communicate with clients, and support automation as you grow.
Here’s exactly how to do it:
Step 1: Create HighLevel Account for 30 Days Free
Since you’re just starting with GoHighLevel, you would need to properly set up your account.
And you can do that for free through our exclusive 30-Day Free Trial link here.
In order to start, head over to gohighlevel.com/30-day-free-tial free trial and click on “30 DAY FREE TRIAL” as you can see below.

Upon clicking on “30 DAY FREE TRIAL“, a page will pop that looks exactly like the image below.
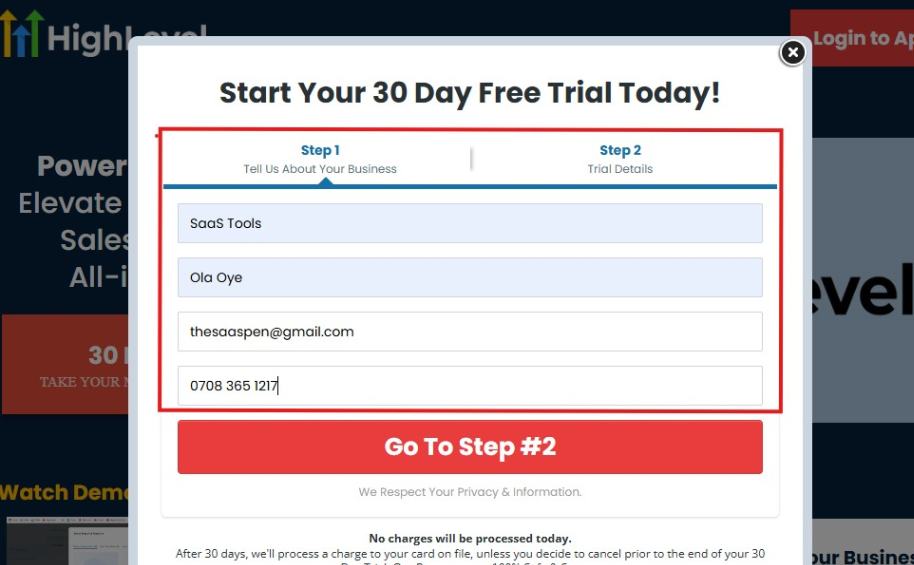
If you take a closer look at the image above, you will see that you need to supply your:
- Business name
- Company name
- Company email
- Phone number
Supply all the pieces of information and click on “Go To Step #2.”
On the next page, you will be required to select the plan you want to opt in for.
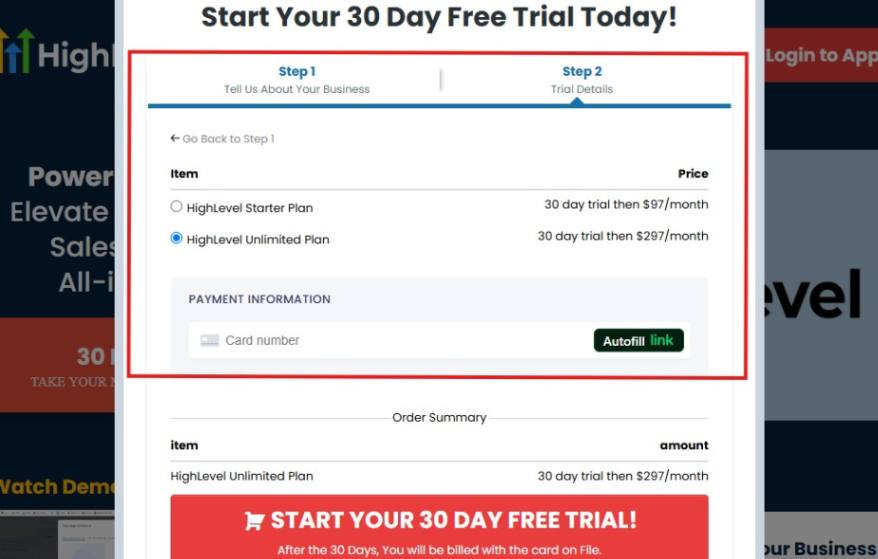
As you can see from the image above, you can either choose from:
- HighLevel Starter Plan
- HighLevel Unlimited Plan
Select the HighLevel Unlimited Plan and continue – you can always upgrade to the SaaS Mode later if you want that or downgrade.
The next thing you want to do is supply your credit card information.
Note: You will not be debited anything today until the end of your trail that is if you don’t cancel. Keep in mind that $1 will be debited and refunded back instantly into your account just to test your card is working.
After you have supplied the information accordingly, click on “START YOUR 30 DAY FREE TRIAL” and you will be asked to confirm you’re not a robot.
After that, the page below will pop up.
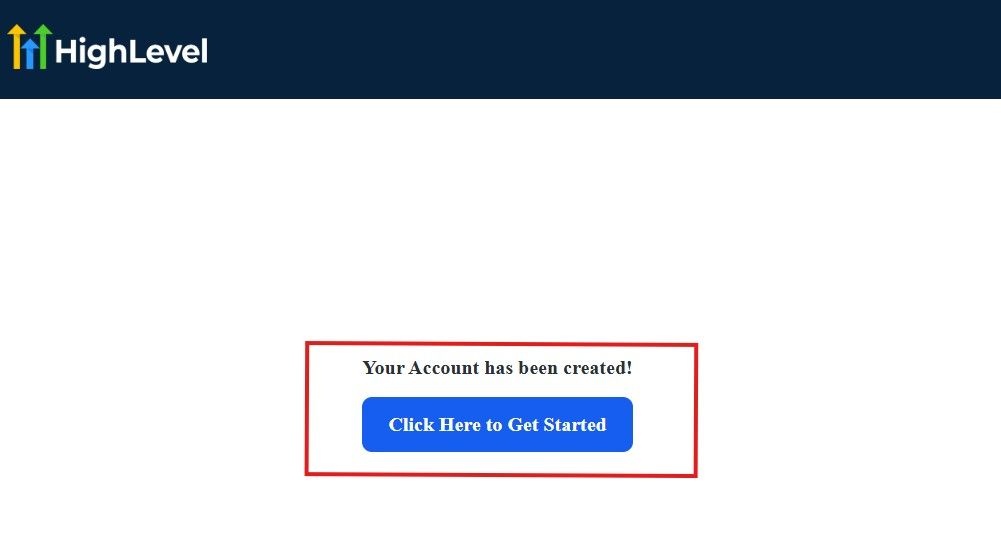
The image above says, “Your Account has been created!” Now, you need to click on the blue button that says “Click Here to Get Started.“
Click on the blue button to start your onboarding process.
Step 2: GoHighLevel Onboarding Process
The onboarding questions help GoHighLevel understand why you have signed up for the platform so that it can tailor your experience accordingly.
This is all you need to do:
After you click on the blue button above, the page below will pop up.
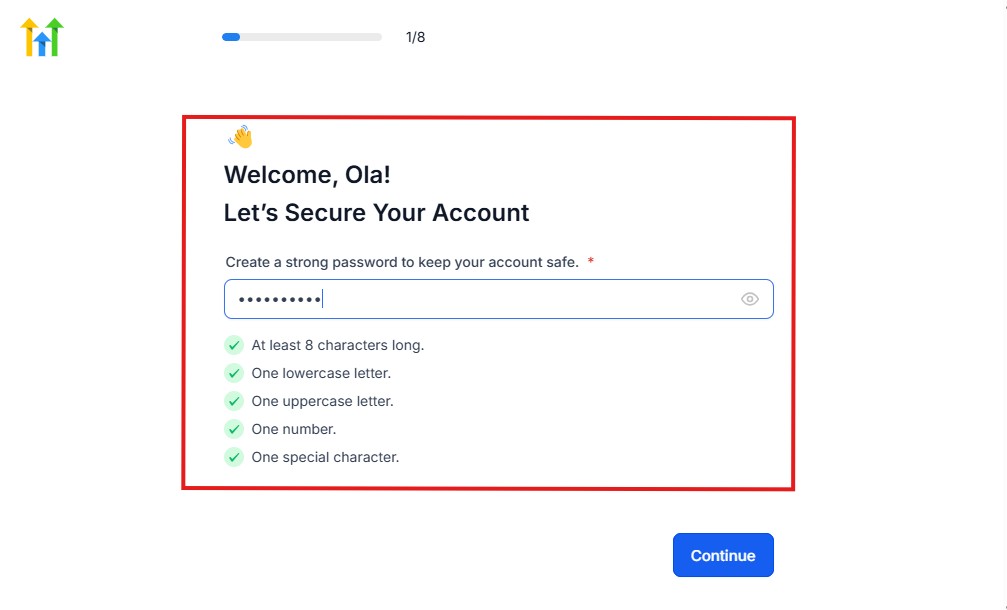
As you can see above, you need to set up your password, and the password has to be:
- At least 8 characters long
- One lowercase letter
- One uppercase letter
- One number
- One special character
If you have input the password and it matches all the description above, everything will be green just the way it’s in the image.
Click on “Continue” there after, and the image below will pop up.
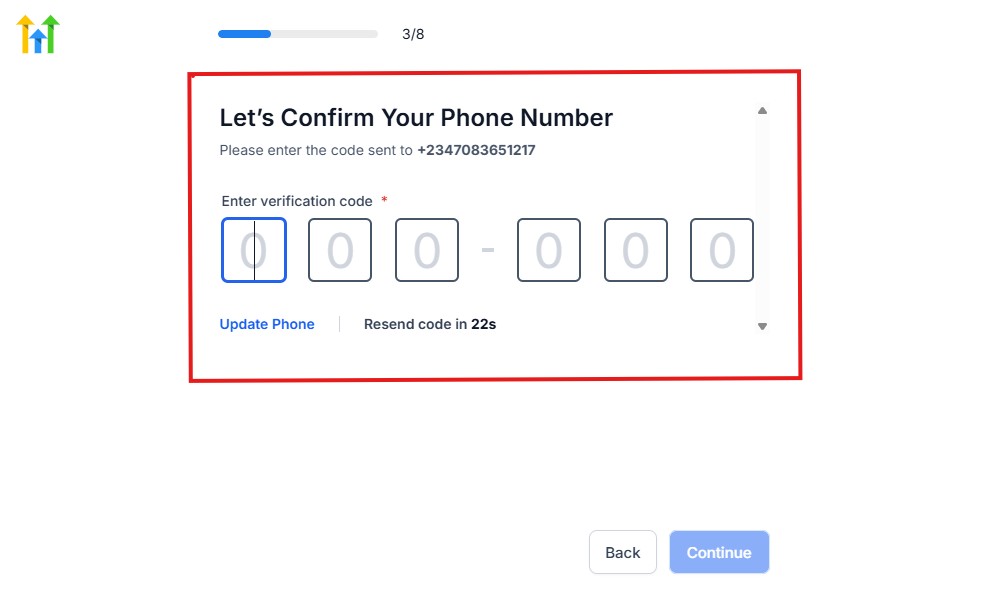
As you can see, a code will be sent to you to confirm your email address and phone number. The process is the same for the 2.
The next thing you need to do is to select how you plan to use GoHighLevel, as you can see below.
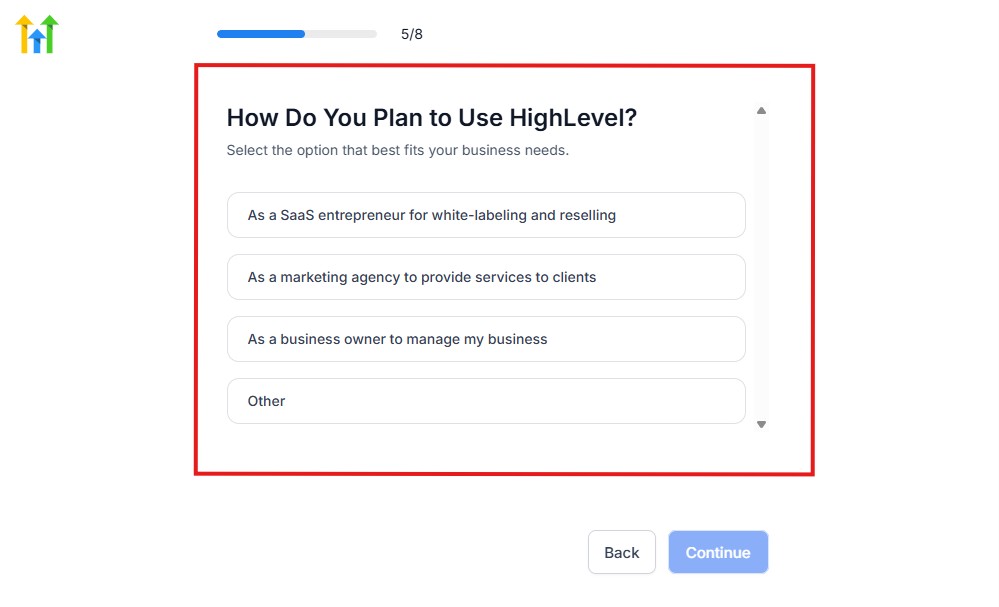
Select what best matches why you have signed up and click on Continue.
On the next page, you will be asked if you plan to resell GoHighLevel or not.
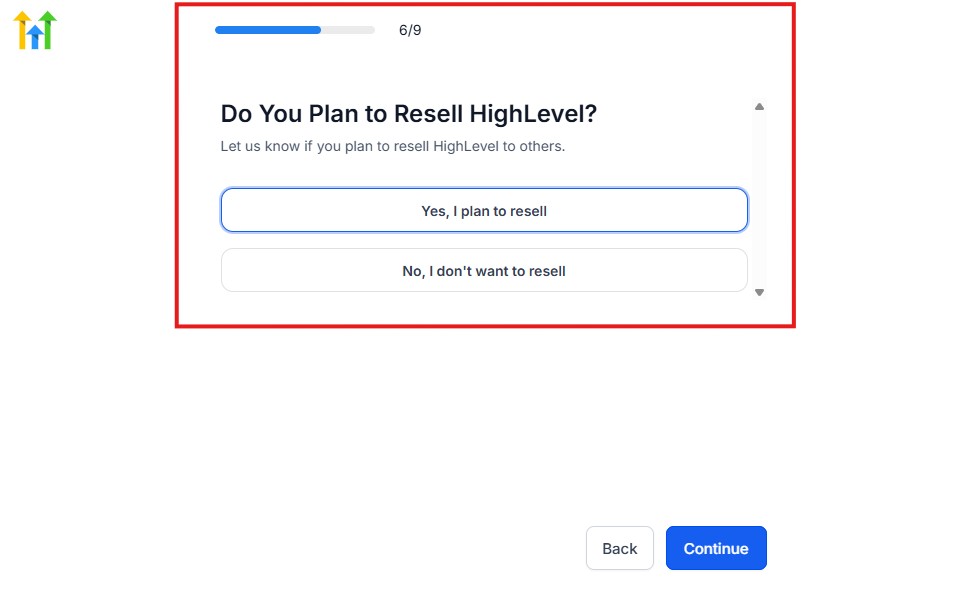
Select the answer based on the reason why you have signed up and click on “Continue”
Then, the page below will pop up.
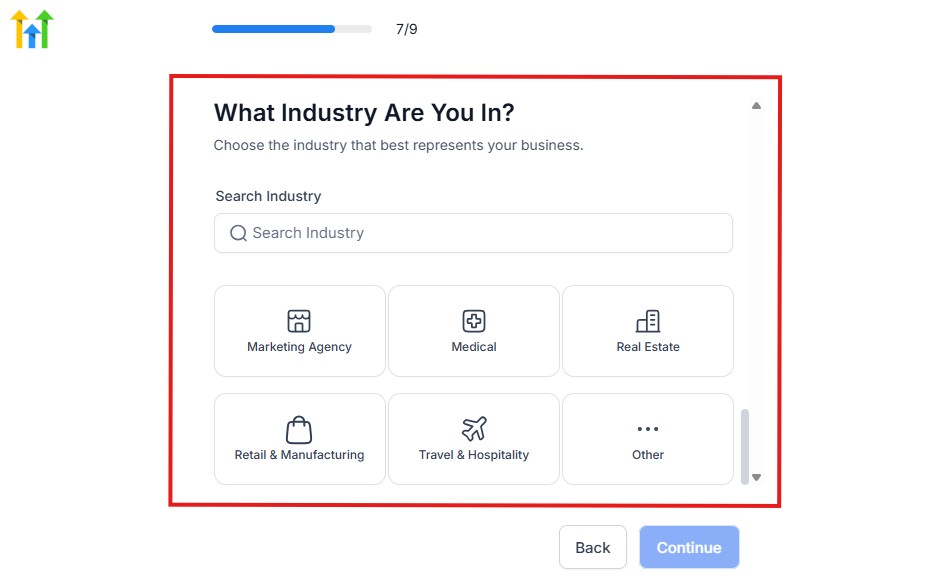
From the image above, you need to select the industry that you fall on. You can also make use of the search button if you can’t find it right away.
Then, click on continue after you select your industry.
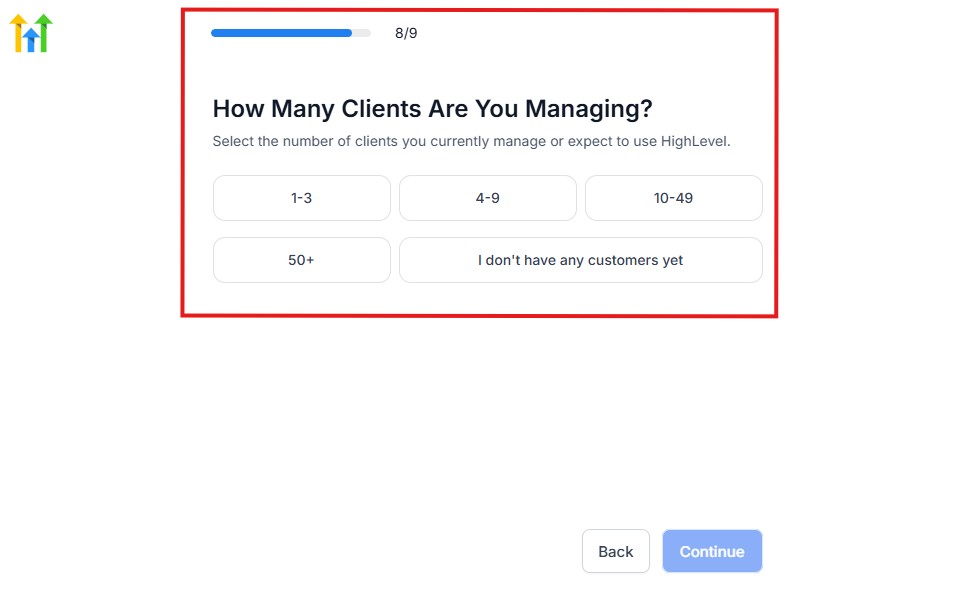
Then, the next thing you need to do is to select the number of clients that you currently have. Select “I don’t have any customers” yet if you currently don’t have one.
On the next page, you will be asked to select the platforms you currently use that you can integrate with GoHighLevel right away.
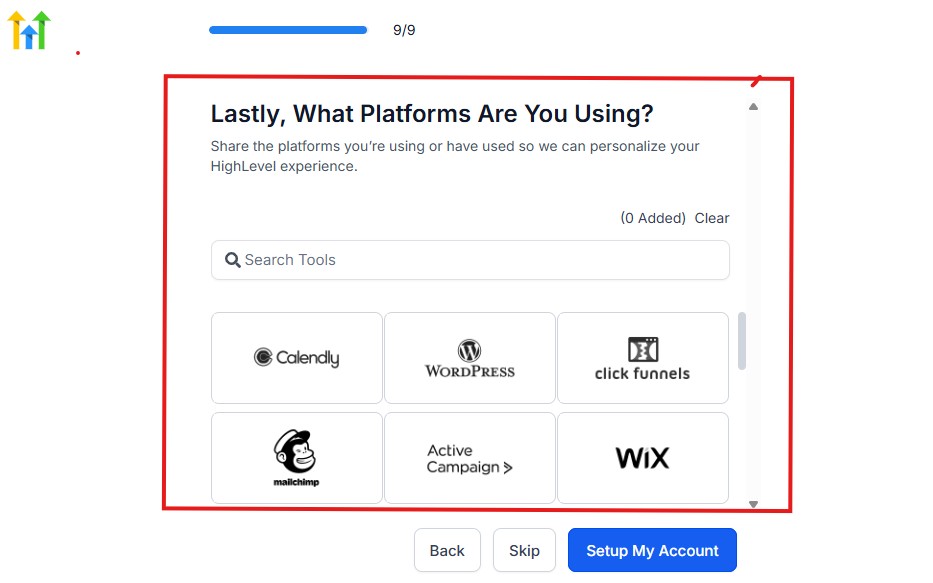
You can use the search button to search for any tools you want to add to your GoHighLevel account.
You can also skip this process and do it later if you want to.
After that, the page below will pop up.
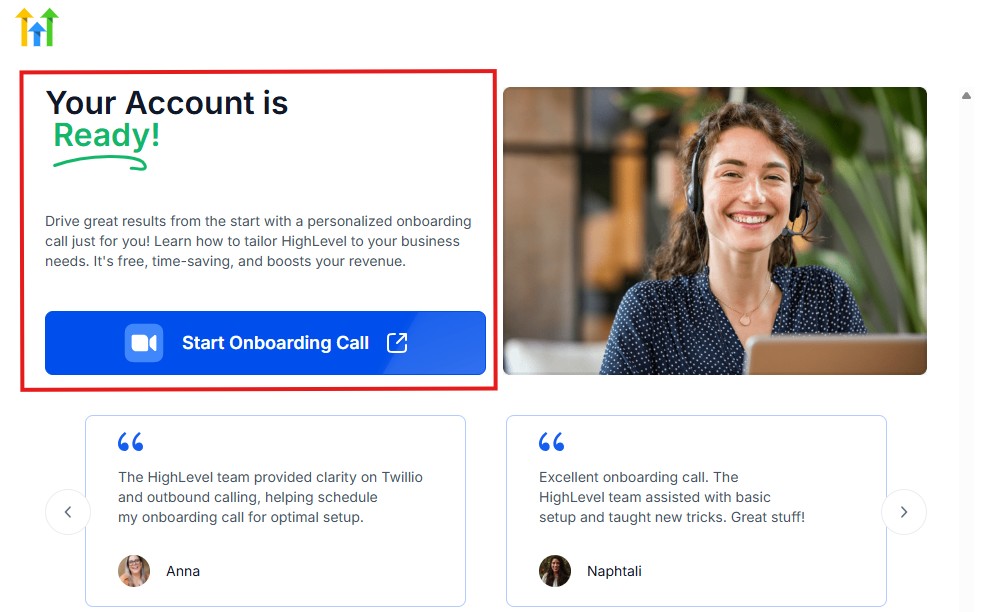
The page above says your account is ready and is asking you to “Start Onboarding Call.”
The “Onboarding Call” allows you to connect with the Go High Level team in order to discuss your account set-up process and everything regarding your plan in using HighLevel.
If you don’t want to start the “Onboarding Call” yet, just stroll down, and you will see the button in the image below.
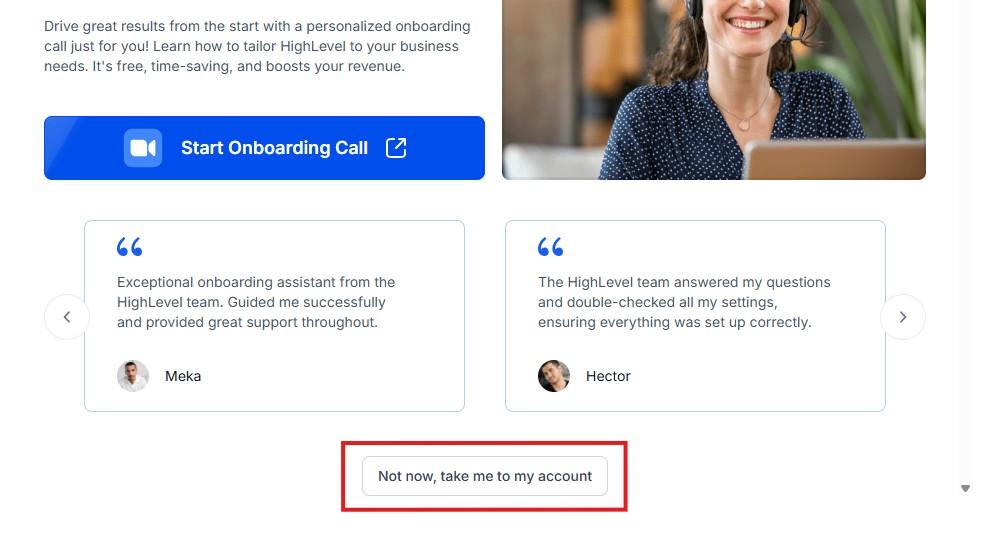
Simply click on “Not now, take me to my account“, and you will have access to your dashboard.
Note: If you have indicated that you want to resell HighLevel, you would have access to the agency dashboard by default, which looks like the image below.
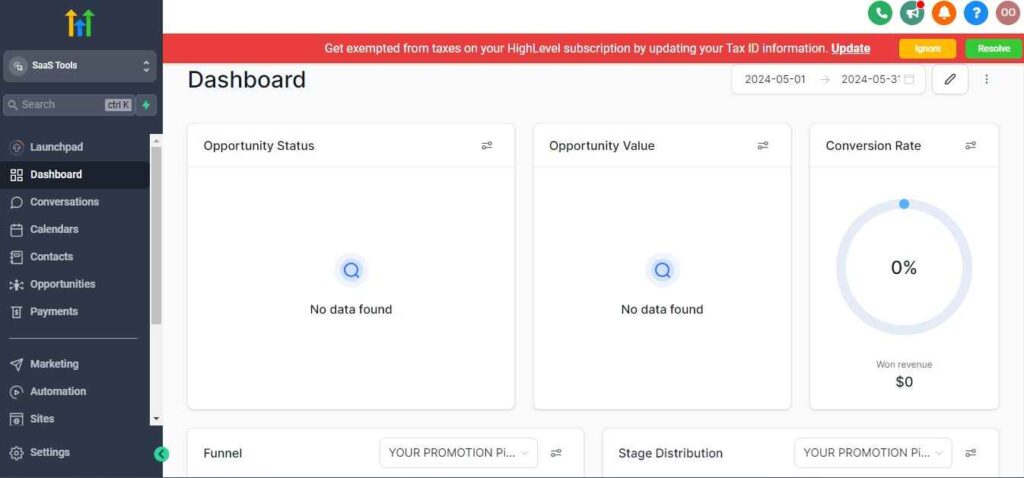
But if you didn’t indicate interest in reselling GHL, your dashboard will look like the image below.

You can switch between these dashboards at any time.
The data you see on the dashboard above are not real data, they’re snapshots that you can use to kickstart your account setup process.
I want to say congratulations. You have successfully set up your Go High Level account.
Step 3: Configure Your Business Profile
Go to Settings → Business Profile and complete the following:
- Business name
- Support email (used for client communication)
- Phone number (used for SMS and calls)
- Business address (important for Google reviews later)
Upload:
- Your logo
- Brand colors (optional, but recommended)
This information automatically appears on emails, forms, invoices, and review requests – saving you time later.
Step 4: Connect Email, SMS & Messaging Channels
Communication is the backbone of your fitness business. If this step is skipped or rushed, your automation will fail.
Email Setup
- Connect a dedicated business email
- Avoid free Gmail addresses if possible
- This improves email deliverability for onboarding, reminders, and campaigns
Use email for:
- Welcome messages
- Workout delivery
- Long-form fitness education
SMS Setup
- Connect SMS inside GoHighLevel (via your available provider)
- Verify your number properly
Use SMS for:
- Consultation reminders
- Session confirmations
- Payment follow-ups
- Motivation nudges
SMS is critical for reducing no-shows in fitness businesses.
WhatsApp (Optional but Powerful)
If your clients primarily communicate via WhatsApp:
- Connect WhatsApp through GoHighLevel
- Use it for confirmations and follow-ups
Do not automate aggressively on WhatsApp. Use it as a high-touch channel.
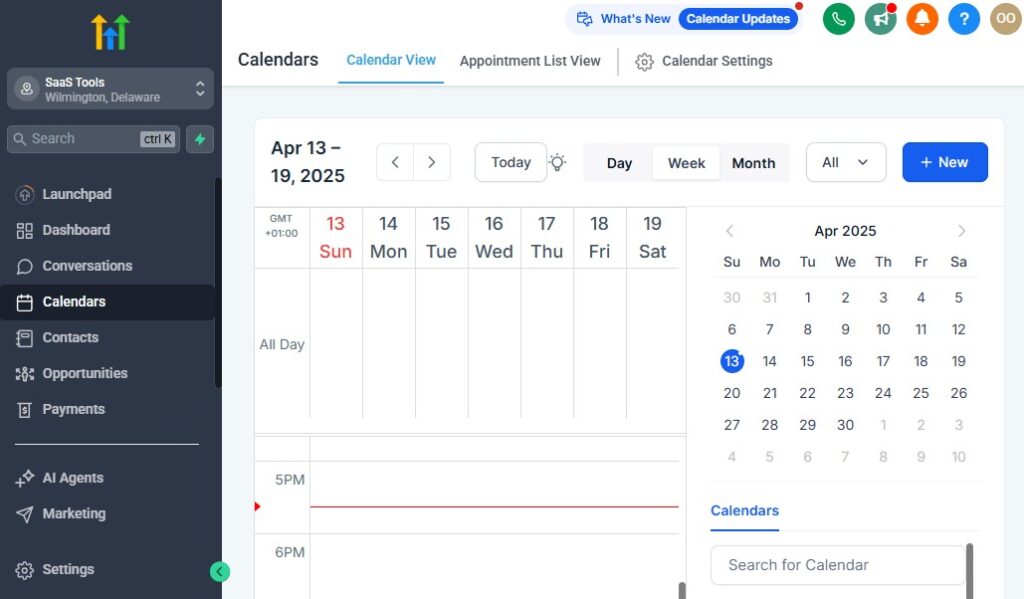
Step 5: Set Up Your Default Calendar Structure
Before creating funnels or automations, your calendars must be ready.
Create separate calendars for:
- Free fitness consultations
- Paid personal training sessions
- Group classes (if applicable)
For each calendar:
- Set availability hours
- Add buffer time between sessions
- Assign the correct trainer (if you have a team)
Enable:
- Email reminders
- SMS reminders
- Same-day confirmation messages
This single step drastically reduces no-shows.
Step 6: Create Basic Custom Fields for Fitness Clients
Custom fields allow you to store fitness-specific data in each client’s profile.
Create fields for:
- Fitness goal (fat loss, muscle gain, rehab, etc.)
- Training preference (online, in-person, hybrid)
- Injury or medical notes
- Program type
- Membership status
These fields power:
- Personalization
- Automation logic
- Targeted follow-ups
Without them, your CRM becomes just a contact list.
Step 7: Build a Simple Fitness Pipeline (Do Not Overcomplicate)
Go to Opportunities → Pipelines and create one pipeline:
Fitness Client Pipeline
- New Lead
- Consultation Booked
- Active Client
- Paused Member
- Program Completed
This pipeline lets you visually track where every lead and client sits – no guessing, no spreadsheets.
Step 8: What You Should NOT Set Up Yet
To avoid overwhelm, do not set up these in your first hour:
- Advanced automations
- Membership portals
- Complex funnels
- Integrations
Those come later and will make more sense once your foundation is solid.
What You Should Have After 60 Minutes
By the end of this setup, you should have:
- A fully configured fitness business sub-account
- Email and SMS connected
- Calendars ready for bookings
- Fitness-specific CRM fields
- A clean pipeline to track clients
This is enough to start booking consultations, managing clients, and preparing for automation.
Managing Leads, Clients & Fitness Members with the CRM

Once your foundation is in place, the CRM becomes the control center of your fitness business.
This is where every lead, client, and active member is tracked, followed up, and managed – without relying on memory, sticky notes, or endless DMs.
If you set this up correctly, you will always know:
- Who just became a lead
- Who booked a consultation
- Who is actively training
- Who paused or dropped off
- Who is ready to be reactivated
Step 1: Understand How the CRM Works for Fitness Businesses
In GoHighLevel, every person – lead or client – lives inside the Contacts area. What turns this into a fitness CRM is how you structure:
- Pipelines
- Tags
- Custom fields
- Automations
Think of the CRM as a live dashboard that shows client movement, not just contact details.
Step 2: Build a Fitness-Specific Client Pipeline
Your pipeline visually shows where each person is in your fitness journey.
Recommended pipeline stages:
- New Lead – Just submitted a form or messaged you
- Consultation Booked – Booked a call or assessment
- Active Client – Paying and currently training
- Paused Member – Temporarily stopped training
- Program Completed – Finished a coaching program
This allows you to:
- Instantly spot follow-up gaps
- See who needs attention today
- Track conversions from lead to paying client
Every time someone moves stages, automations can trigger behind the scenes.
Step 3: Use Tags to Organize Fitness Clients Smartly
Tags help you segment clients without cluttering your pipeline.
Create tags for:
- Lead source (Instagram, Website, Referral, Ads)
- Training type (Online Coaching, In-Person, Hybrid)
- Program type (Weight Loss, Muscle Building, Rehab)
- Client status (High Priority, At Risk, VIP)
With tags, you can:
- Send targeted campaigns
- Trigger specific workflows
- Personalize communication
Example:
Send reactivation messages only to clients tagged Paused Member.
Step 4: Store Critical Fitness Data Using Custom Fields
Fitness businesses require more than just names and emails.
Use custom fields to store:
- Fitness goals
- Starting weight or measurements
- Preferred training days
- Medical or injury notes
- Program start and end dates
This allows you to:
- Personalize onboarding messages
- Trigger reminders based on program timelines
- Track client progress more effectively
Your CRM becomes a true fitness management system.
Step 5: Manage Daily Operations from the Contact Dashboard
From a single contact record, you can:
- View messages (SMS, email, WhatsApp)
- See appointment history
- Check payment status
- Move clients between pipeline stages
- Add internal notes after sessions
This eliminates:
- Switching between apps
- Losing client context
- Forgetting follow-ups
Everything lives in one place.
Step 6: Prevent Leads from Falling Through the Cracks
Most fitness businesses lose leads because follow-up stops.
With the CRM:
- New leads are instantly visible
- Missed consultations are flagged
- Paused members are easy to identify
When paired with automations (covered later), you can:
- Auto-follow up with new leads
- Re-engage no-shows
- Bring inactive clients back
The CRM ensures no opportunity is forgotten.
Step 7: Best Practices for Fitness Trainers Using the CRM
- Update pipeline stages daily
- Use tags consistently
- Add notes after sessions
- Do not overload contacts with too many tags
- Keep your pipeline simple and actionable
Consistency here multiplies results later.
Automating Client Intake, Onboarding & Fitness Assessments
Client intake is one of the most time-consuming parts of running a fitness business.
Manually sending forms, chasing assessments, collecting waivers, and welcoming new clients drains your time and creates friction for the client.
This section shows you how to fully automate client intake and onboarding using GoHighLevel – so every new client enters your system professionally, consistently, and without manual effort.
Step 1: Create Fitness Intake & Assessment Forms
Go to Sites → Forms and create a Fitness Intake Form.
Include only essential fields at first:
- Full name
- Email address
- Phone number
- Fitness goal
- Training preference (online, in-person, hybrid)
- Injury or medical notes (optional but important)
Avoid overwhelming new clients with long forms. You can collect deeper assessments later.
Best practice:
- One form for leads
- One detailed form for paying clients
Step 2: Add Health Disclaimers & Waivers
For fitness trainers, waivers are non-negotiable.
Inside your intake process:
- Add a checkbox for health disclaimers
- Include a digital waiver or liability agreement
- Require acceptance before training begins
You can:
- Embed waivers directly in forms
- Or redirect clients to a waiver page after signup
This protects your business and creates a professional onboarding experience.
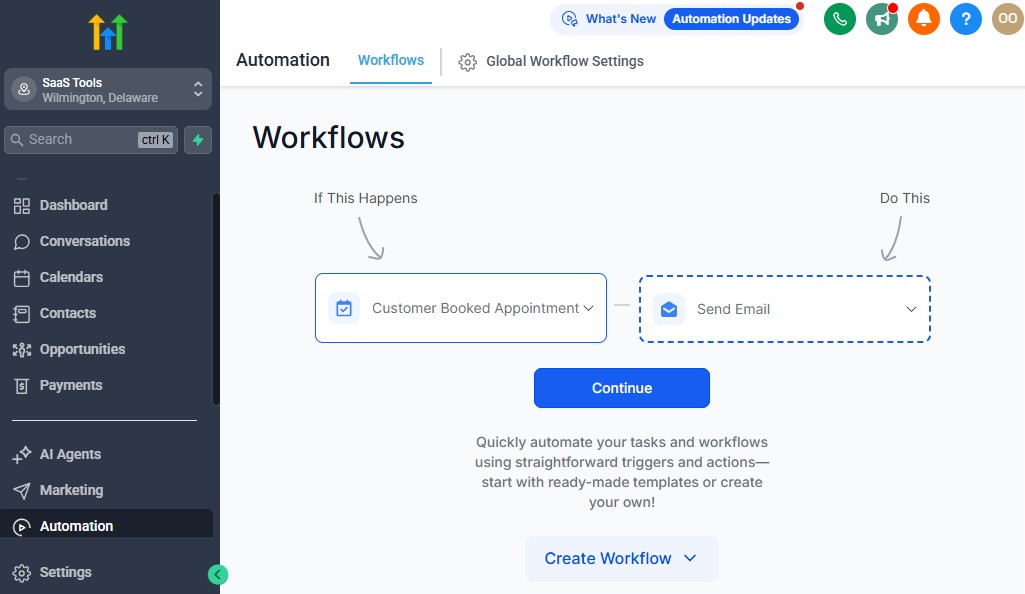
Step 3: Build an Automated Client Onboarding Workflow
Now go to Automations → Workflows and create a New Fitness Client Onboarding workflow.
Trigger examples:
- Form submitted
- Payment completed
- Pipeline stage moved to Active Client
Recommended onboarding sequence:
- Immediate welcome SMS
- Welcome email with next steps
- Link to fitness assessment form
- Reminder if assessment is not completed
- Calendar link for first session
This ensures every client receives the same experience – no matter how busy you are.
Step 4: Automate Assessment Reminders (No More Chasing)
Clients often forget to complete assessments.
Set automation logic to:
- Send reminder after 24 hours if assessment not completed
- Send final reminder after 48 hours
- Notify you internally if still incomplete
This removes awkward follow-ups and saves time.
Step 5: Auto-Assign Clients to Trainers or Programs
If you work with a team or multiple programs:
Use workflows to auto-assign clients
Route based on:
- Program type
- Availability
- Training preference
This keeps operations smooth as you scale.
Step 6: Personalize Onboarding Using Custom Fields
Pull data from custom fields into messages:
- First name
- Fitness goal
- Program type
Example:
“Welcome, John. We’re excited to help you reach your muscle-building goals.”
Personalization increases engagement and retention from day one.
Step 7: Track Intake Completion Inside the CRM
Use:
- Pipeline movement
- Tags (Assessment Completed / Pending)
- Internal notes
This lets you instantly see:
- Who is ready to train
- Who needs follow-up
- Who is stuck in onboarding
Common Mistakes to Avoid
- Sending everything manually
- Using long forms too early
- Skipping reminders
- Not tracking intake completion
Automation solves these issues when set correctly.
Appointment Scheduling for Training Sessions & Consultations
Scheduling is where many fitness businesses quietly lose money. Missed consultations, late cancellations, and forgotten sessions reduce revenue and disrupt your daily schedule.
When booking and reminders are handled manually, no-shows become unavoidable.
In this section, you’ll learn how to use GoHighLevel to automate appointment scheduling, reduce no-shows, and keep your training calendar fully organized – without constant back-and-forth messages.
Step 1: Create Dedicated Calendars for Each Fitness Service
Do not use one calendar for everything. Separate calendars give you clarity and control.
Create individual calendars for:
- Free Fitness Consultations
- Paid Personal Training Sessions
- Group Classes or Bootcamps
- Online Coaching Sessions (Zoom-based)
Each calendar can have its own:
- Availability
- Duration
- Confirmation messages
- Reminder logic
This prevents overbooking and confusion.
Step 2: Configure Availability & Buffer Time Correctly
Inside each calendar:
- Set working days and hours
- Add buffer time before and after sessions
- Limit daily bookings if needed
Buffer time is critical for:
- Session preparation
- Client transitions
- Preventing burnout
This keeps your schedule realistic and sustainable.
Step 3: Customize Booking Forms for Fitness Sessions
Each calendar includes a booking form.
Add:
- Training preference
- Fitness goal
- Session type
- Any last-minute notes
This information flows directly into the client’s contact record, allowing you to personalize the session before it starts.
Step 4: Automate Confirmation & Reminder Messages
This is where no-shows are reduced dramatically.
Set up:
- Instant booking confirmation (SMS + email)
- 24-hour reminder
- Same-day reminder (2–3 hours before)
Use SMS for reminders – it has the highest open rate.
Example reminder:
“Hi John, this is a reminder of your fitness session today at 5 PM. Reply YES to confirm.”
Confirmed replies can trigger internal notifications.
Step 5: Handle Reschedules & Cancellations Automatically
Allow clients to:
- Reschedule within a defined time window
- Cancel based on your policy
Automate:
- Confirmation of changes
- Internal alerts when a session is cancelled
- Follow-up offers for rescheduled sessions
This prevents last-minute surprises.
Step 6: Sync Calendars with Google Calendar
Always enable two-way sync with Google Calendar.
This ensures:
- Personal schedule stays accurate
- No double bookings
- Real-time updates across devices
This is essential if you manage sessions from your phone.
Step 7: Track Attendance & Session History
After each session:
- Add notes in the client record
- Update pipeline stage if necessary
- Track attendance trends
This data later supports:
- Retention strategies
- Upsell opportunities
- Performance reporting
Best Practices for Fitness Scheduling
- Use separate calendars for free vs paid sessions
- Keep reminders short and clear
- Avoid overbooking
- Review no-show data monthly
Building High-Converting Fitness Funnels & Landing Pages – GoHighLevel for Fitness Trainers
Leads do not convert because you “offer personal training.”
They convert because you guide them through a clear, structured journey that removes friction and builds trust.
This section shows you how to use GoHighLevel to build fitness-specific funnels and landing pages that turn cold traffic from Instagram, TikTok, Facebook ads, or referrals into booked consultations and paying clients – automatically.
Step 1: Understand the Fitness Funnel (Simple, Not Complicated)
A high-converting fitness funnel only needs three core steps:
- Landing Page – Captures attention and intent
- Booking Page – Schedules a consultation or session
- Confirmation Page – Sets expectations and next steps
Avoid multi-page, overdesigned funnels. Fitness prospects make decisions fast.
Step 2: Choose the Right Funnel Goal
Before building anything, decide the single goal of the funnel:
- Book a free fitness consultation
- Sell an online coaching program
- Register for a 30-day fitness challenge
- Book a paid assessment session
Each goal needs its own funnel. Do not mix objectives.
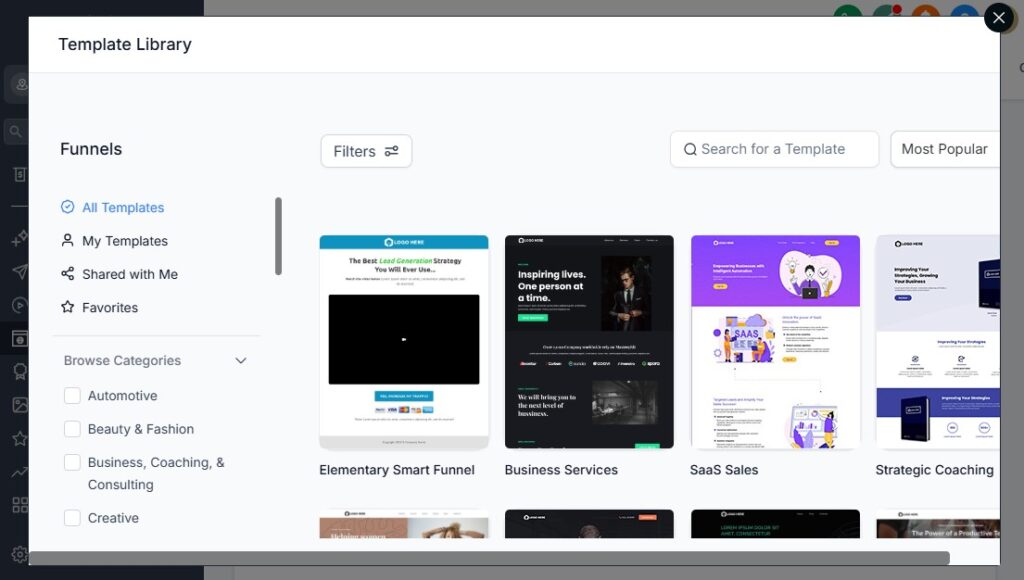
Step 3: Build the Fitness Landing Page (What Actually Converts)
Go to Sites → Funnels and create a new funnel.
Your landing page should include:
- A clear headline focused on results (not features)
- One primary call-to-action (Book, Apply, Join)
- Social proof (testimonials or transformation stories)
- Short form (name, email, phone)
Avoid:
- Long paragraphs
- Multiple CTAs
- Pricing on the first page (for consultations)
Example headline:
“Lose Weight, Build Strength, and Stay Consistent – Without Guesswork”
Step 4: Connect the Funnel to Your Calendar
Once the form is submitted:
- Redirect directly to your booking calendar
- Pre-fill contact details automatically
- Track the lead inside your pipeline
This removes delay and increases booking rates.
Step 5: Use the Confirmation Page to Pre-Frame the Client
The confirmation page is where many trainers miss opportunities.
Use it to:
- Thank the lead
- Explain what happens next
- Set expectations for the consultation
- Encourage calendar confirmation
Optional additions:
- Short welcome video
- Testimonials
- Preparation checklist
This increases show-up rates.
Step 6: Optimize for Mobile Traffic (Critical for Fitness)
Most fitness leads come from mobile.
Ensure:
- Buttons are large and clear
- Forms are short
- Text is easy to scan
- Pages load fast
Always preview funnels on mobile before publishing.
Step 7: Tag and Track Funnel Leads Automatically – GoHighLevel for Fitness Trainers
Set automation to:
- Apply a tag when a form is submitted
- Move the contact into the correct pipeline stage
- Trigger follow-up workflows
This allows you to:
- Measure funnel performance
- Improve conversion rates
- Run retargeting campaigns later
Common Fitness Funnel Mistakes
- Selling too early
- Asking for too much information
- Over-designing pages
- Sending leads to a generic homepage
Simple, direct funnels convert better.
Running Email & SMS Campaigns for Fitness Lead Nurturing
Most fitness leads do not sign up after the first interaction.
They think about it, get distracted, compare options, or simply delay the decision. If you do not follow up consistently, those leads are lost – even if they were genuinely interested.
This section shows you how to use GoHighLevel to run automated email and SMS campaigns that nurture fitness leads, increase conversions, retain clients, and bring inactive members back – without sounding pushy or spammy.
Step 1: Understand Fitness Lead Nurturing (What Actually Works)
Fitness nurturing is not about constant selling. It is about:
- Education
- Trust
- Consistency
- Accountability
Your messages should help leads believe:
- You understand their struggle
- Your program fits their lifestyle
- Results are achievable with your support
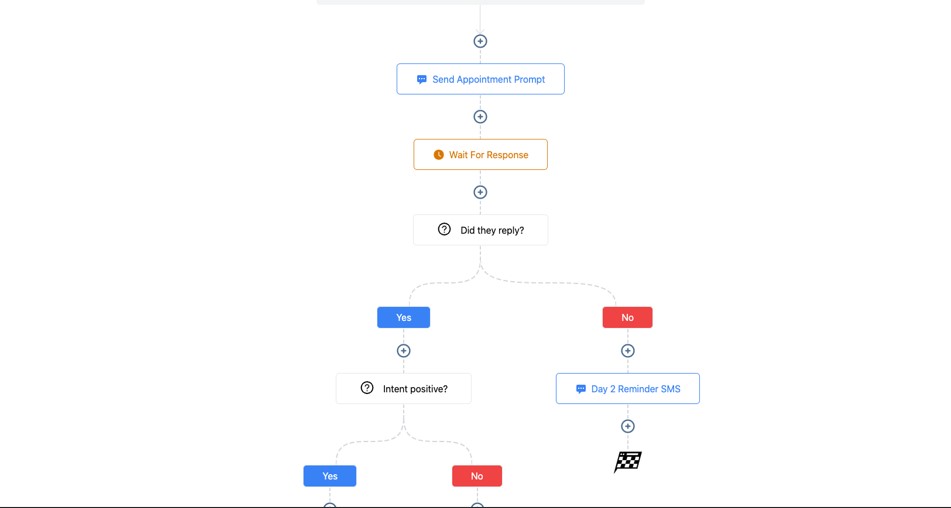
Step 2: Create a Pre-Consultation Nurture Sequence
For leads who book a consultation but have not yet shown up:
Recommended sequence:
- Instant confirmation SMS
- Educational email (what to expect)
- Reminder SMS (24 hours before)
- Motivation SMS (same day)
Purpose:
- Reduce no-shows
- Increase readiness
- Improve consultation quality
Step 3: Follow Up with Missed Consultations Automatically
Missed sessions do not mean lost leads.
Set a workflow to:
- Send a friendly “missed you” SMS
- Offer easy rescheduling
- Follow up again after 48 hours
Tone matters. Keep it supportive, not confrontational.
Example:
“Hey John, looks like we missed your fitness consultation today. No worries – here’s a link to reschedule when it works for you.”
Step 4: Nurture Cold Fitness Leads Over Time
Not everyone is ready now.
Create a 7–14 day nurture campaign with:
- Fitness tips
- Simple habit advice
- Client success stories
- Soft invitations to book a session
This keeps your brand top of mind without pressure.
Step 5: Retain Active Clients with Ongoing Communication
Retention is easier than acquisition.
Use campaigns to:
- Send weekly motivation messages
- Share progress reminders
- Reinforce accountability
- Celebrate milestones
Clients who feel supported stay longer.
Step 6: Reactivate Inactive or Paused Members
Paused clients often return when approached correctly.
Set automation to:
- Detect inactivity
- Send check-in messages
- Offer restart incentives
- Invite them back to training
Example:
“Hey Sarah, just checking in. If you’re ready to restart your fitness journey, I’d love to help you get back on track.”
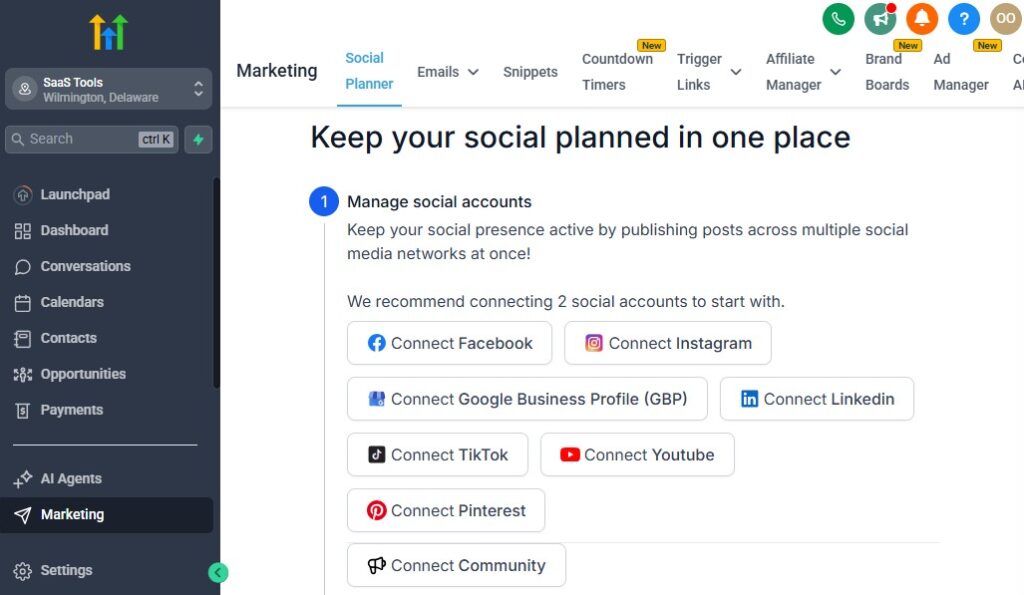
Step 7: Use Broadcasts for Announcements & Offers
Broadcasts are ideal for:
- Program launches
- Fitness challenges
- Schedule updates
- Limited-time offers
Segment broadcasts using tags so messages stay relevant
Step 8: Balance Email vs SMS Correctly
Best practice:
- SMS for reminders and short nudges
- Email for education and long-form content
Do not overload clients. Quality beats quantity.
Common Mistakes to Avoid – GoHighLevel for Fitness Trainers
- Sending only sales messages
- Overusing SMS
- Not segmenting contacts
- Ignoring inactive clients
Managing Payments, Memberships & Fitness Subscriptions
One of the biggest growth blockers for fitness trainers is inconsistent payment collection.
Late payments, failed cards, manual reminders, and awkward follow-ups drain your time and disrupt cash flow.
In this section, you’ll learn how to use GoHighLevel to automate payments, manage memberships, and stabilize your monthly income – whether you sell personal training, group classes, or online coaching programs.
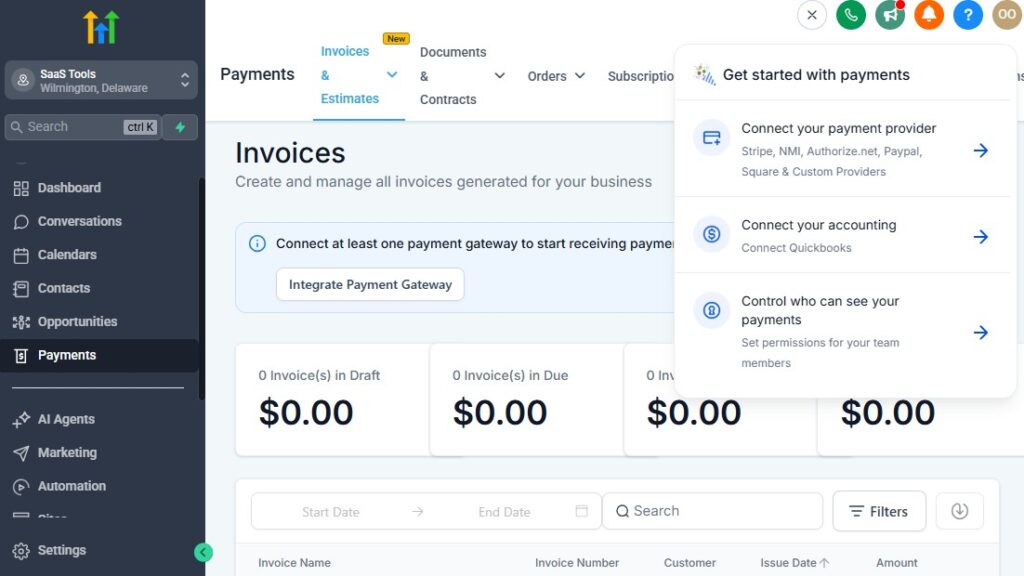
Step 1: Connect Your Payment Gateway
Go to Settings → Payments and connect your payment provider.
Most fitness businesses use:
- Stripe for card payments
- PayPal (optional, depending on your audience)
Once connected, you can:
- Accept one-time payments
- Set up subscriptions
- Automate invoices and receipts
This eliminates external payment tools.
Step 2: Create Fitness-Specific Products
Go to Payments → Products and create clear offers.
Examples:
- Monthly Personal Training Membership
- Online Coaching Program (12 weeks)
- Group Class Pass
- Fitness Challenge Entry
For each product, define:
- One-time or recurring payment
- Billing frequency
- Price
- Description
Clear product structure simplifies automation later.
Step 3: Set Up Recurring Memberships Correctly
For recurring coaching:
- Use subscription products
- Set billing cycles clearly (monthly, weekly)
- Avoid complex pricing structures initially
Subscriptions allow you to:
- Predict monthly revenue
- Reduce manual follow-up
- Improve retention
Step 4: Automate Failed Payment Follow-Ups
Failed payments happen. Manual chasing should not.
Create a workflow to:
- Notify the client immediately when payment fails
- Send follow-up reminders after 24 and 48 hours
- Notify you if payment remains unresolved
This protects revenue without damaging relationships.
Step 5: Restrict Access Based on Payment Status
Link payment status to:
- Membership access
- Content delivery
- Session booking
If a subscription is paused or cancelled:
- Access is automatically updated
- No manual intervention required
This prevents unpaid usage.
Step 6: Automate Payment Receipts & Confirmations
Immediately after payment:
- Send confirmation email
- Send SMS receipt
- Trigger onboarding workflow
This creates trust and professionalism.
Step 7: Handle Cancellations & Pauses Gracefully
Allow clients to:
- Pause memberships
- Cancel within policy limits
Use automation to:
- Update pipeline stage
- Apply appropriate tags
- Trigger reactivation campaigns later
This keeps your CRM clean and organized.
Step 8: Track Revenue Inside the CRM
Inside GoHighLevel, you can:
- View transaction history
- Track recurring revenue
- Identify churn
This data informs:
- Pricing decisions
- Offer optimization
- Business forecasting
Common Mistakes to Avoid
- Manual payment collection
- No failed payment follow-up
- Overcomplicated pricing
- Not linking payments to automation
Delivering Workout Plans, Nutrition Guides & Client Resources
Delivering workout plans and training resources manually – through WhatsApp, Google Drive links, or email attachments – quickly becomes messy and unprofessional as your fitness business grows.
Clients lose links, ask repeated questions, and struggle to stay consistent.
In this section, you’ll learn how to use GoHighLevel to automate the delivery of workout plans, nutrition guides, and client resources, while giving your clients a clean, structured experience that improves compliance and retention.
Step 1: Decide How You Want to Deliver Fitness Content
Before building anything, choose the delivery method that fits your model:
- Email delivery – Best for simple PDF plans
- Membership portals – Best for ongoing coaching and programs
- Hybrid delivery – Email access + membership portal
Avoid sending content manually after payment. Automation ensures consistency.
Step 2: Upload and Organize Fitness Resources
Go to Media Storage and upload:
- Workout PDFs
- Nutrition guides
- Progress trackers
- Exercise demo videos
Organize files by:
- Program type
- Training level
- Client stage
This keeps content easy to manage as you scale.
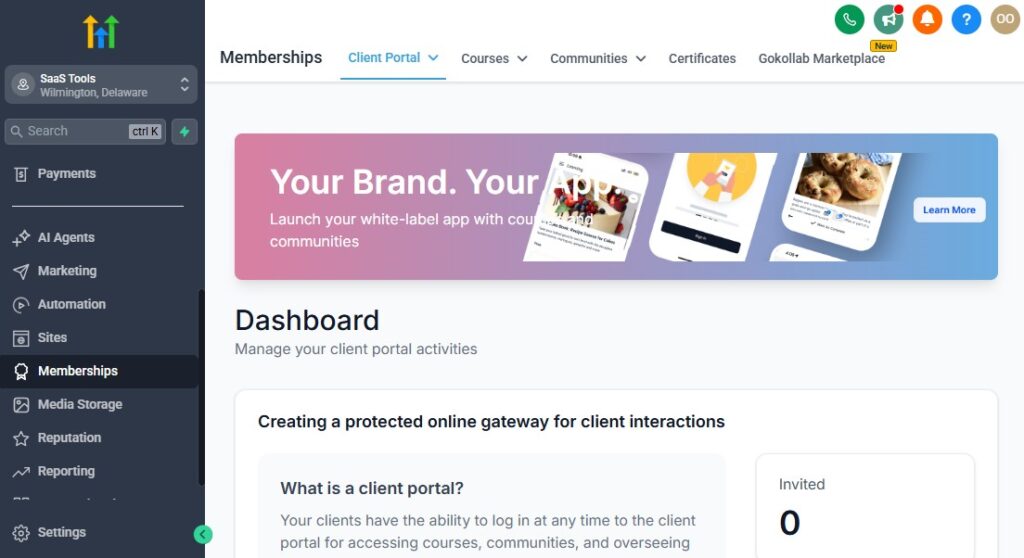
Step 3: Use Memberships for Structured Fitness Programs
Go to Sites → Memberships and create a Fitness Client Portal.
Use memberships for:
- Online coaching programs
- Monthly training content
- Challenge-based fitness programs
Structure content into:
- Modules (weeks or phases)
- Lessons (workouts, videos, guides)
Clients log in anytime and follow a clear path.
Step 4: Automate Content Access After Payment
Connect memberships to payment triggers:
- Payment completed → Grant membership access
- Subscription cancelled → Revoke access
This ensures:
- Only paying clients access content
- No manual admin work
- Clean transitions for paused or cancelled members
Step 5: Deliver Workout Plans Automatically via Email & SMS
For simpler setups:
- Send workout plans via automated email
- Include links to PDFs or videos
- Follow up with reminders to start
Example automation:
- Day 0: Workout plan delivered
- Day 3: Check-in message
- Day 7: Progress reminder
This increases compliance.
Step 6: Personalize Content Delivery Using CRM Data
Use custom fields and tags to:
- Deliver content based on fitness goals
- Adjust plans for training preference
- Send targeted tips and reminders
Personalized delivery improves results and client satisfaction.
Step 7: Track Engagement & Completion
Track:
- Login activity (for memberships)
- Email opens
- Link clicks
Use this data to:
- Identify disengaged clients
- Trigger accountability messages
- Improve program structure
Common Mistakes to Avoid
- Sending everything manually
- Overloading clients with content
- No structure or progression
- Not tracking engagement
Collecting Reviews, Testimonials & Fitness Transformations
Social proof is one of the strongest conversion drivers in the fitness industry. Prospects want to see real people, real results, and real experiences before they commit.
The problem is that most trainers collect reviews randomly – or not at all.
In this section, you’ll learn how to use GoHighLevel to automate review requests, capture client testimonials, and systematically collect fitness transformation stories that fuel your marketing and sales.
Step 1: Choose the Right Time to Ask for Reviews
Timing matters. Ask when clients are happiest.
Best moments:
- After visible progress (4–6 weeks in)
- After completing a program
- After a positive milestone or check-in
Avoid asking too early or when progress is still forming.
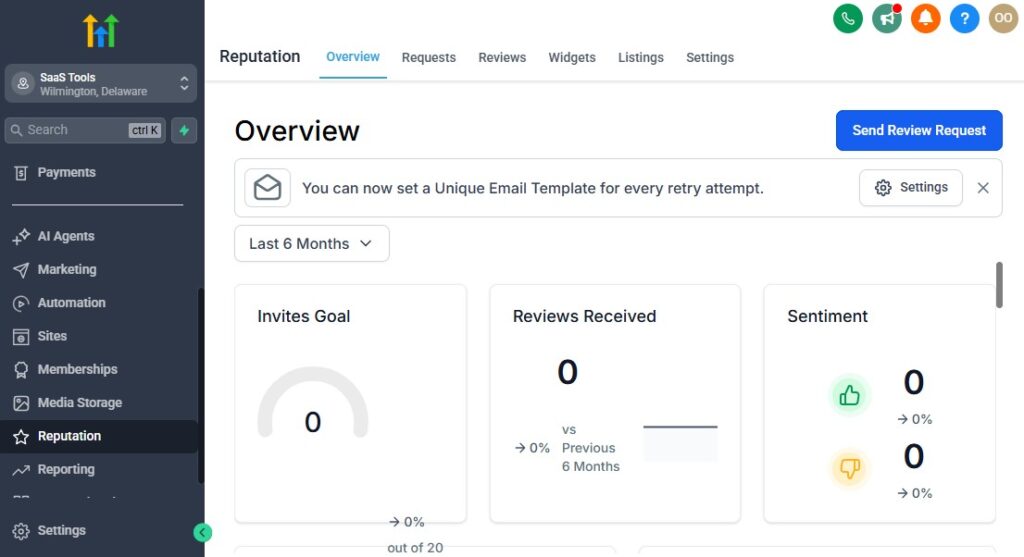
Step 2: Set Up Automated Review Requests
Go to Reputation → Review Requests.
Configure:
- Google review request
- SMS and email delivery
- Friendly, supportive language
Trigger review requests automatically when:
- Pipeline stage moves to Program Completed
- A tag like Transformation Achieved is applied
Automation ensures consistency.
Step 3: Filter Negative Feedback Privately
Not every client will leave a perfect review.
Set logic so:
- High ratings are sent to Google
- Low ratings are collected privately
This protects your online reputation while giving you feedback to improve.
Step 4: Collect Detailed Testimonials & Transformation Stories
Beyond star ratings, capture:
- Before-and-after photos
- Written testimonials
- Short video testimonials
Use forms to ask:
- What was your biggest struggle before training?
- What changed after working with us?
- Would you recommend this program?
Store these inside the CRM for easy reuse.
Step 5: Automate Testimonial Collection Workflows
Create a workflow that:
- Sends a testimonial request after program completion
- Follows up if not submitted
- Applies a Testimonial Received tag
This builds a growing library of proof without manual effort.
Step 6: Reuse Social Proof Across Your Business
Use testimonials in:
- Landing pages
- Fitness funnels
- Consultation confirmation pages
- Email campaigns
- Social media content
Automation ensures testimonials are always ready when needed.
Step 7: Track Review Performance Over Time
Monitor:
- Review volume
- Average rating
- Conversion impact
This helps you:
- Identify top-performing programs
- Improve client experience
- Increase trust with new leads
Common Mistakes to Avoid
- Asking for reviews manually
- Waiting too long to request feedback
- Not organizing testimonials
- Ignoring private feedback
Tracking Fitness KPIs, Client Progress & Business Performance
Growth without tracking is guesswork. If you do not know where leads come from, which offers convert, or why clients drop off, you cannot scale your fitness business confidently.
In this section, you’ll learn how to use GoHighLevel to track the right fitness KPIs, monitor client progress, and make data-driven decisions that increase revenue and retention.
Step 1: Identify the KPIs That Actually Matter for Fitness Businesses
Do not track everything. Track what impacts money and retention.
Core fitness KPIs:
- Leads generated (daily / weekly)
- Consultation booking rate
- Consultation show-up rate
- Lead-to-client conversion rate
- Active clients vs paused clients
- Monthly recurring revenue (MRR)
- Client retention rate
These numbers tell you where your system is working – or breaking.
Step 2: Track Lead Sources & Funnel Performance
Inside GoHighLevel, every lead can be tagged and tracked.
Track:
- Where leads come from (Instagram, ads, referrals, website)
- Which funnels generate bookings
- Which campaigns convert best
This allows you to:
- Double down on what works
- Stop wasting time on poor channels
- Optimize your marketing spend
Step 3: Monitor Appointment & Attendance Metrics
Missed sessions cost money.
Track:
- Booked consultations
- No-show rate
- Rescheduled sessions
- Completed sessions
Use this data to:
- Improve reminder workflows
- Adjust scheduling policies
- Identify unreliable booking sources
Step 4: Track Client Progress Inside the CRM
Client results drive retention.
Use:
- Custom fields (progress notes, milestones)
- Internal notes after sessions
- Tags for progress stages
This helps you:
- Identify at-risk clients early
- Personalize check-ins
- Improve program outcomes
Happy clients stay longer.
Step 5: Monitor Revenue & Subscription Health
Inside the payments and reporting areas, track:
- One-time sales
- Active subscriptions
- Failed payments
- Churn
This visibility allows you to:
- Predict monthly income
- Adjust pricing or offers
- Reduce revenue leakage
Step 6: Use Dashboards for Daily Visibility
Set up dashboards to see:
- New leads today
- Bookings today
- Revenue this month
- Active clients
This gives you instant clarity without spreadsheets.
Step 7: Turn Data into Action
Tracking alone is useless without action.
Examples:
- High leads, low bookings → Fix funnel messaging
- High bookings, low show-ups → Improve reminders
- High churn → Improve onboarding or communication
Let the data guide your decisions.
Common Mistakes to Avoid
- Tracking too many metrics
- Ignoring churn data
- Not reviewing numbers regularly
- Making decisions based on feelings
Integrating GoHighLevel with Fitness & Business Tools
One of the biggest mistakes fitness trainers make is overloading their business with tools. Integrations should simplify your workflow, not add complexity.
The goal is to let GoHighLevel act as your central hub – while only integrating tools that genuinely improve delivery, payments, or communication.
This section shows you which integrations matter for fitness businesses, how to use them correctly, and when not to integrate anything at all.
Step 1: Start with Core Integrations Only
Before exploring advanced tools, ensure your core integrations are solid:
- Payment gateways (for revenue)
- Calendars (for scheduling)
- Communication channels (for client engagement)
If these are not stable, nothing else will work smoothly.
Step 2: Payment Integrations (Non-Negotiable)
Most fitness trainers integrate:
- Stripe for card payments
- PayPal (optional, depending on region)
Use payment integrations to:
- Accept one-time payments
- Manage subscriptions
- Automate billing and receipts
Avoid using multiple payment tools unless absolutely necessary.
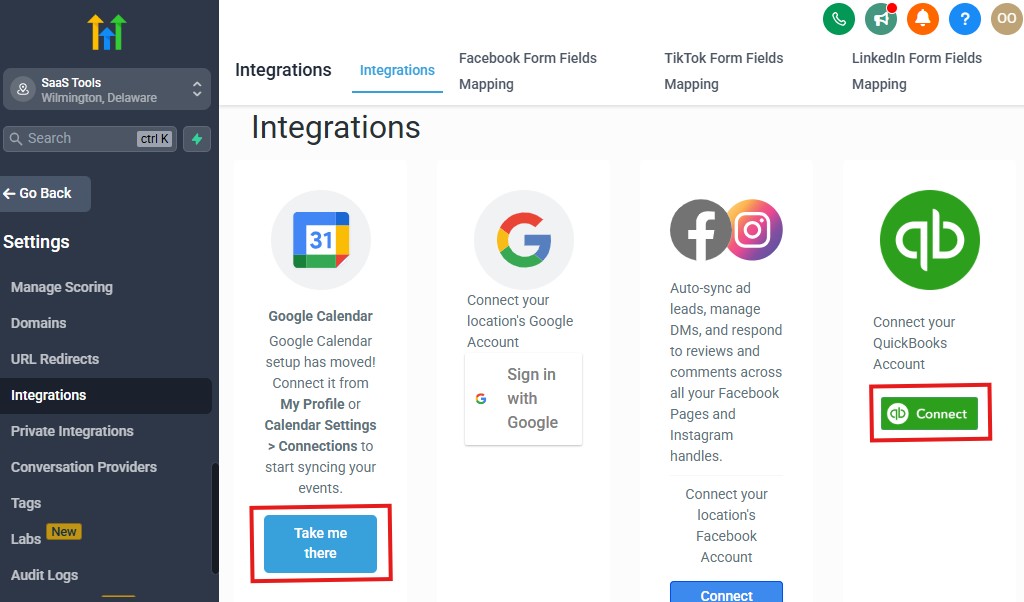
Step 3: Calendar & Scheduling Integrations
Two-way calendar sync with Google Calendar is essential.
This ensures:
- No double bookings
- Real-time updates
- Accurate availability across devices
For online coaching, integrate:
- Zoom for virtual sessions
Use meeting links generated automatically after booking.
Step 4: Communication Integrations
GoHighLevel already handles:
- SMS
- WhatsApp (via supported providers)
Avoid external email tools unless:
- You have advanced email needs
- You manage very large lists
Keeping communication inside one system improves visibility and follow-up.
Step 5: Fitness & Tracking Tools via Zapier
Some fitness tools do not integrate directly.
Use Zapier to:
- Sync data with fitness tracking apps
- Push client data to Google Sheets
- Trigger actions based on external events
Only integrate what adds value to client outcomes.
Step 6: Google Sheets for Reporting & Backup
Integrate Google Sheets to:
- Export client lists
- Track progress metrics externally
- Create custom reports
This is helpful for advanced analysis without cluttering GoHighLevel.
Step 7: Know When NOT to Integrate
Do not integrate:
- Tools that duplicate GoHighLevel features
- Apps that require constant maintenance
- Tools used by only one client
Every integration adds friction.
Best Practices for Fitness Integrations
- Integrate slowly
- Test one integration at a time
- Document workflows
- Remove unused tools quarterly
Advanced Automation for Fitness Trainers
At this stage, your fitness business is no longer running on manual effort.
Leads are captured automatically, clients are onboarded properly, payments are consistent, and communication is centralized.
Now it is time to use automation to scale without burning out.
This section shows you how to use GoHighLevel to build advanced fitness automations that increase revenue, retention, and lifetime client value – without adding more hours to your day.
Step 1: Build a Fully Automated Fitness Challenge System
Fitness challenges are powerful revenue and lead-generation tools.
Automation flow:
- Lead opts in through a challenge funnel
- Automatic welcome message sent
- Payment collected (if paid challenge)
- Daily workout or motivation messages delivered
- Progress check-ins scheduled
- Completion message + upsell offer sent
This allows you to run challenges repeatedly with minimal effort.
Step 2: Create Client Reactivation Automations
Most fitness businesses have inactive or paused clients.
Set up workflows to:
- Detect inactivity (missed sessions, no engagement)
- Send supportive check-in messages
- Offer reactivation incentives
- Book restart consultations automatically
This turns old contacts into new revenue.
Step 3: Automate Upsells & Program Progression
As clients progress, their needs change.
Automation ideas:
- Beginner → Intermediate program upsell
- 1-on-1 coaching → Group training
- Program completion → Long-term membership
Trigger upsells based on:
- Time in program
- Milestones achieved
- Engagement level
Automation ensures timely, relevant offers.
Step 4: Referral Automation for Happy Clients
Referrals convert better than cold leads.
Set automation to:
- Request referrals after milestones
- Send referral links automatically
- Track referred leads
- Reward clients with bonuses or discounts
This builds organic growth.
Step 5: Internal Notifications & Task Automation
Automation is not just client-facing.
Use internal workflows to:
- Notify you of high-value leads
- Alert you when clients miss sessions
- Create tasks for follow-ups
This keeps you proactive, not reactive.
Step 6: Long-Term Retention Workflows
Retention beats acquisition.
Automate:
- Monthly check-ins
- Progress celebrations
- Renewal reminders
- Anniversary messages
These small touches keep clients engaged.
Common Automation Mistakes
- Over-automating too early
- Using generic messages
- Not monitoring workflows
- Forgetting the human element
Automation should support relationships, not replace them.
Frequently Asked Questions
Below are the five most important questions fitness trainers ask before committing fully to using GoHighLevel.
Each answer is practical, direct, and based on real implementation – not theory.
Is GoHighLevel too complex for solo fitness trainers?
No. While GoHighLevel is a powerful platform, you do not need to use every feature to see results.
As a solo fitness trainer, you can start with:
- Lead capture
- Appointment scheduling
- Automated follow-ups
- Payment collection
Once those are working, you can gradually add more automation. Many solo trainers run their entire business efficiently using just these core features.
Can I manage both online and in-person training with GoHighLevel?
Yes. GoHighLevel works very well for hybrid fitness businesses.
You can:
- Use one calendar for in-person sessions
- Use another calendar for online coaching
- Deliver digital programs through memberships
- Track all clients inside one CRM
This allows you to scale online coaching without disrupting your in-person schedule.
Can GoHighLevel replace my current fitness or gym management software?
In many cases, yes – especially for personal trainers and boutique fitness businesses.
GoHighLevel can replace tools used for:
- Lead management
- Client communication
- Scheduling
- Payments
- Program delivery
Large gyms with advanced equipment tracking may still need specialized software, but most trainers can simplify their stack significantly with GoHighLevel.
Can I automate payments and reminders without annoying clients?
Yes – if done correctly.
The key is:
- Using clear, friendly language
- Limiting message frequency
- Sending reminders at logical times
When automated properly, clients appreciate reminders because they reduce missed sessions and confusion.
Is GoHighLevel worth it for fitness trainers long-term?
Yes, especially if you want predictable growth.
GoHighLevel becomes more valuable as your business grows because:
- Automation scales with you
- Client data stays organized
- You avoid hiring admin staff too early
For fitness trainers serious about building a professional, scalable business, GoHighLevel is a strong long-term investment.
Final Thoughts
Most fitness trainers start with one goal – helping people get healthier. Over time, the reality of running a business sets in.
You find yourself managing messages, chasing payments, confirming sessions, following up with leads, and trying to stay organized, all while still delivering great training.
That is where many fitness businesses stall.
Growth becomes tied to how much time and energy you personally have. When you stop following up, leads go cold.
When you get busy, systems break. This is not a motivation problem – it is a systems problem.
Using GoHighLevel allows you to step out of constant manual work and build a fitness business that runs on processes, automation, and clarity.
With the setup covered in this guide, you now have the ability to:
- Capture and manage every lead automatically
- Book consultations and training sessions without back-and-forth messages
- Reduce no-shows with smart reminders
- Collect payments consistently and predictably
- Deliver workout plans and programs professionally
- Track performance, retention, and revenue from one place
- Scale your services without burning out
The biggest shift is not technical – it is strategic. Instead of reacting to daily tasks, you start operating your fitness business like a system.
This does not remove the personal connection that makes great trainers successful. It removes the chaos that holds them back.
If you are serious about building a fitness business that grows beyond word-of-mouth and manual effort.
GoHighLevel gives you the infrastructure to do it – whether you are a solo personal trainer or building a full fitness brand.
At this point, the next step is simple:
Implement one section at a time. Do not rush. Set up your foundation properly, then layer automation gradually. Each improvement compounds.
When your systems work for you, you get back what matters most – time, focus, and the ability to serve more clients at a higher level.