Getting started with GoHighLevel can feel overwhelming, but it doesn’t have to be because I have been there, too.
I have been using GoHighLevel for close to 5 years now, and I understand how to connect the dots and make it all work.
That is why I have created this GoHighLevel Onboarding Checklist to show you how to set it up right away from the beginning.
Whether you’re an agency owner, marketer, or local business, having a clear onboarding checklist helps you set things up the right way from day one.
GoHighLevel is a powerful all-in-one platform, but to unlock its full potential, you need to know what to set up first and why it matters.
This guide walks you step-by-step through every key section of GoHighLevel,
No fluff. Just a streamlined onboarding path to help you get the most out of GoHighLevel – faster.
Key Takeaways:
- All-in-One Solution: GoHighLevel combines CRM, marketing automation, sales funnels, and more into one platform for easier management.
- Automation: Save time and boost efficiency with automated workflows, AI agents, and follow-ups.
- Customizable & Scalable: Easily tailor GoHighLevel to your business needs and scale as you grow.
Let’s dive in!
GoHighLevel Onboarding Checklist – Account Creation
The first thing you need to do is to create an account, and that is what we will be covering first.
This is how to set it up:
Step 1: Create HighLevel Account for 30 Days Free
Since you’re just starting with GoHighLevel, you would need to properly set up your account.
And you can do that for free through our exclusive 30-Day Free Trial link here.
In order to start, head over to gohighlevel.com/30-day-free-tial free trial and click on “30 DAY FREE TRIAL” as you can see below.
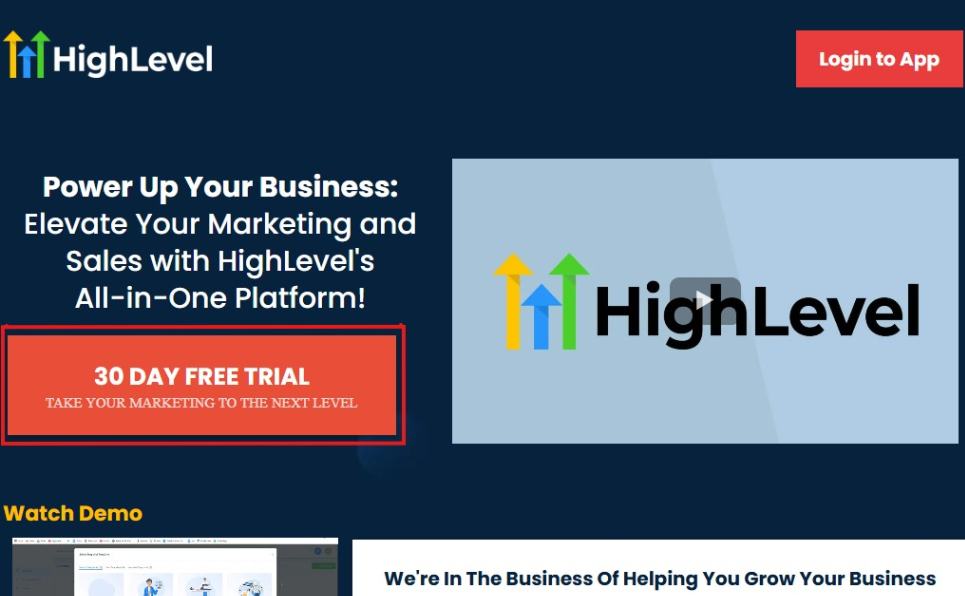
Upon clicking on “30 DAY FREE TRIAL“, a page will pop that looks exactly like the image below.
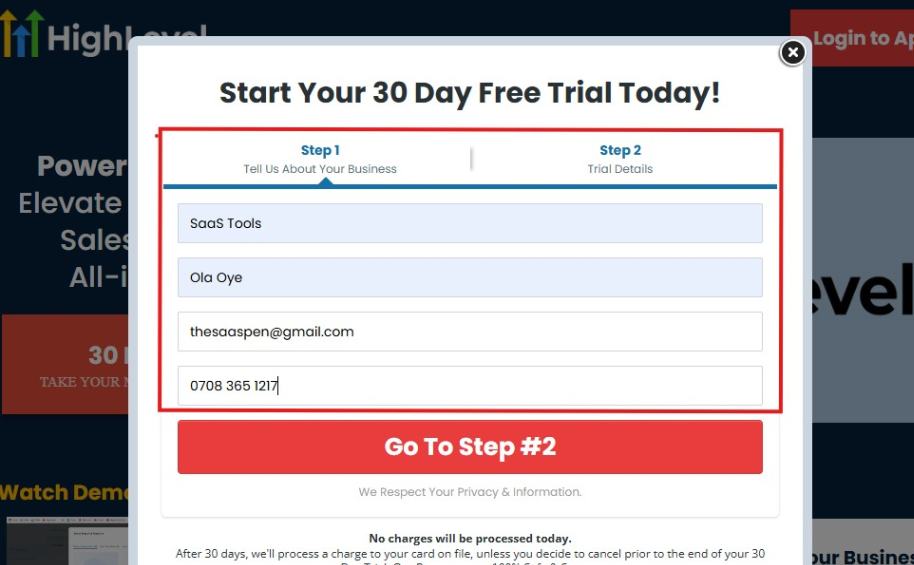
If you take a closer look at the image above, you will see that you need to supply your:
- Business name
- Company name
- Company email
- Phone number
Supply all the pieces of information and click on “Go To Step #2.”
On the next page, you will be required to select the plan you want to opt in for.
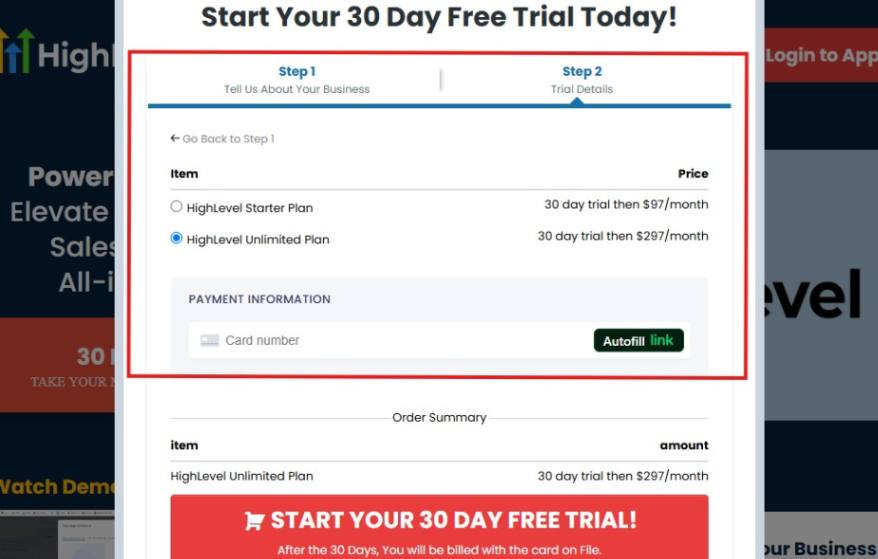
As you can see from the image above, you can either choose from:
- HighLevel Starter Plan
- HighLevel Unlimited Plan
Select the HighLevel Unlimited Plan and continue – you can always upgrade to the SaaS Mode later if you want that or downgrade.
The next thing you want to do is supply your credit card information.
Note: You will not be debited anything today until the end of your trail that is if you don’t cancel. Keep in mind that $1 will be debited and refunded back instantly into your account just to test your card is working.
After you have supplied the information accordingly, click on “START YOUR 30 DAY FREE TRIAL” and you will be asked to confirm you’re not a robot.
After that, the page below will pop up.
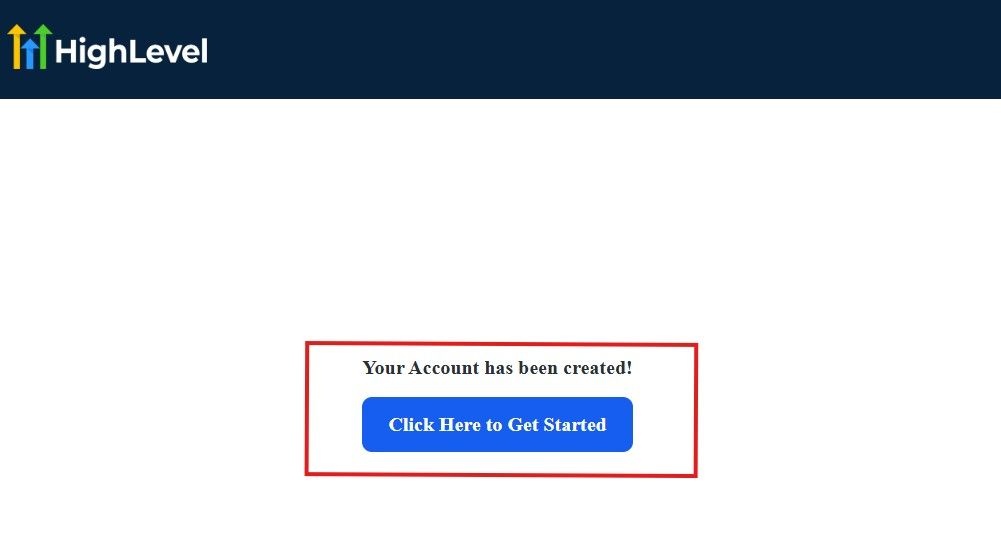
The image above says, “Your Account has been created!” Now, you need to click on the blue button that says “Click Here to Get Started.“
Click on the blue button to start your onboarding process.
Step 2: GoHighLevel Onboarding Process
The onboarding questions help GoHighLevel understand why you have signed up for the platform so that it can tailor your experience accordingly.
This is all you need to do:
After you click on the blue button above, the page below will pop up.
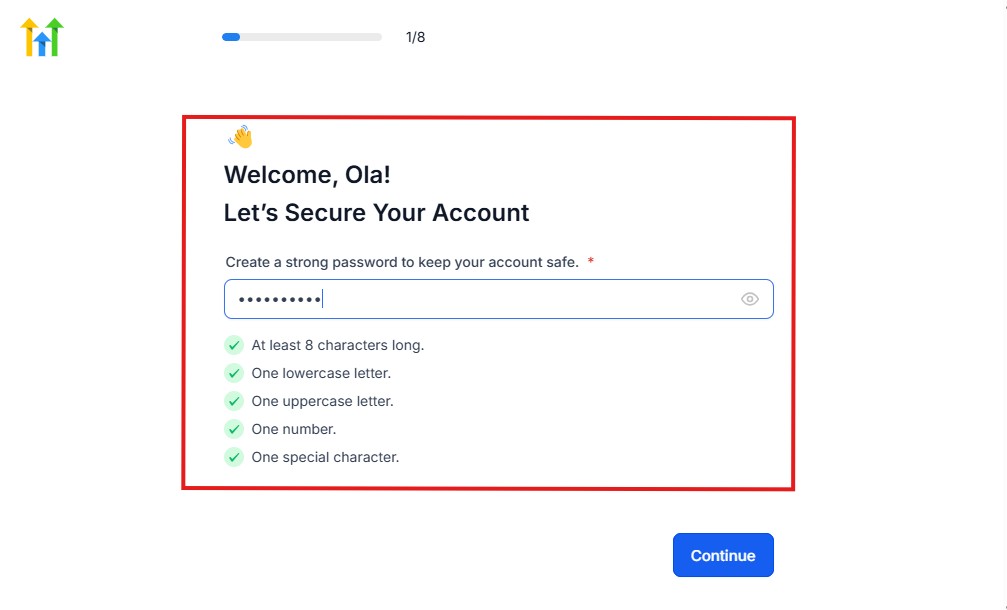
As you can see above, you need to set up your password, and the password has to be:
- At least 8 characters long
- One lowercase letter
- One uppercase letter
- One number
- One special character
If you have input the password and it matches all the description above, everything will be green just the way it’s in the image.
Click on “Continue” there after, and the image below will pop up.
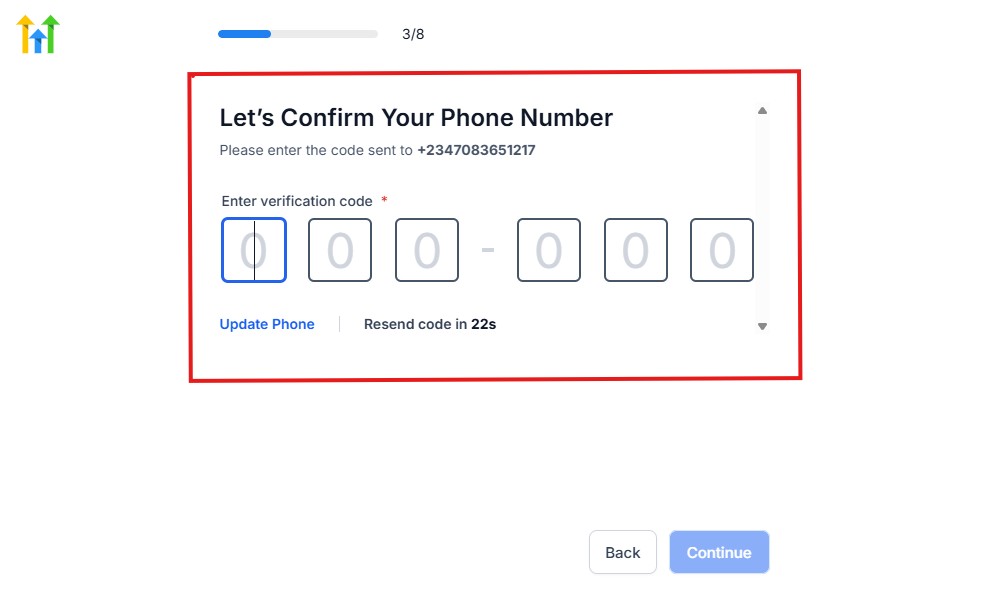
As you can see, a code will be sent to you to confirm your email address and phone number. The process is the same for the 2.
The next thing you need to do is to select how you plan to use GoHighLevel, as you can see below.
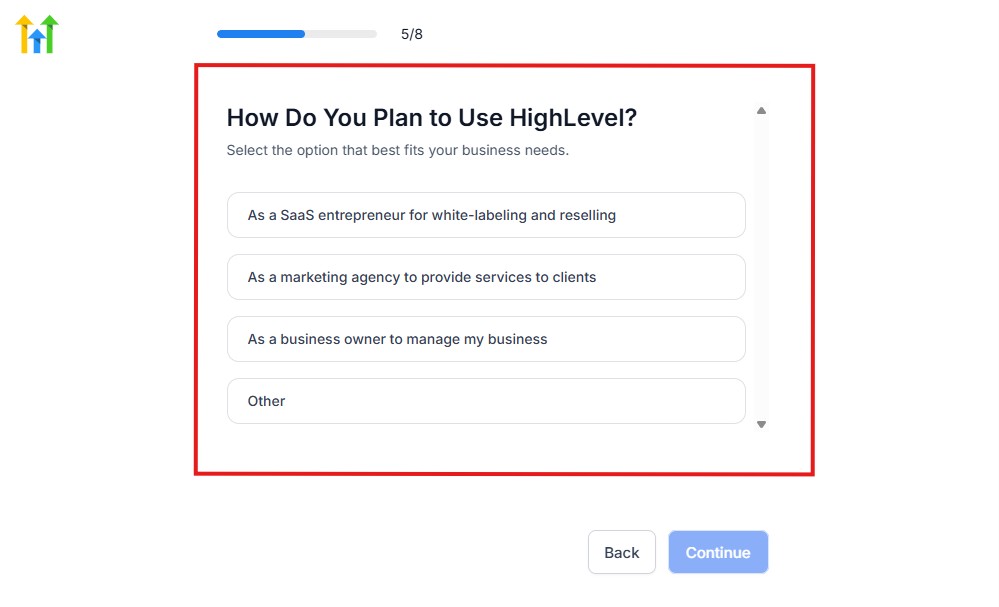
Select what best matches why you have signed up and click on Continue.
On the next page, you will be asked if you plan to resell GoHighLevel or not.
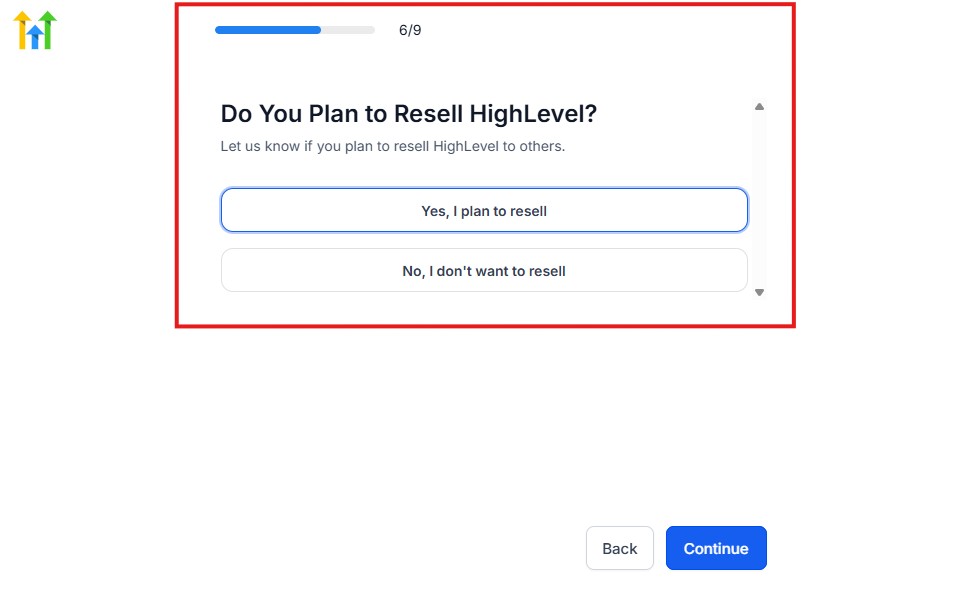
Select the answer based on the reason why you have signed up and click on “Continue”
Then, the page below will pop up.
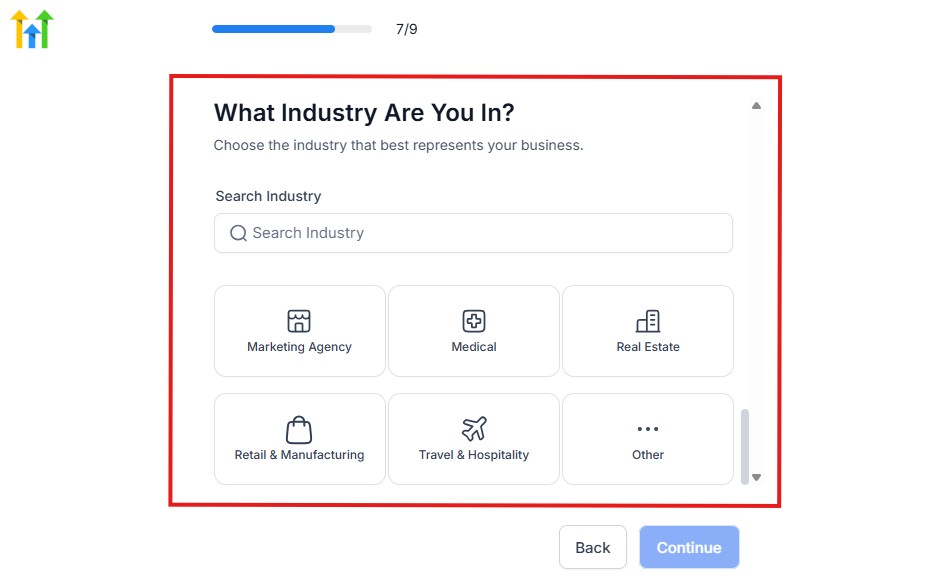
From the image above, you need to select the industry that you fall on. You can also make use of the search button if you can’t find it right away.
Then, click on continue after you select your industry.
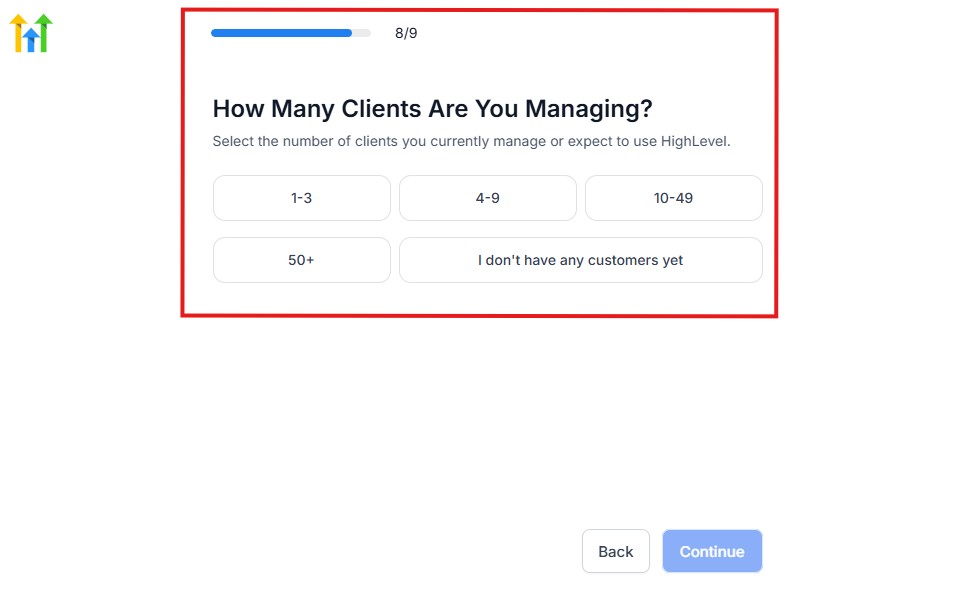
Then, the next thing you need to do is to select the number of clients that you currently have. Select “I don’t have any customers” yet if you currently don’t have one.
On the next page, you will be asked to select the platforms you currently use that you can integrate with GoHighLevel right away.
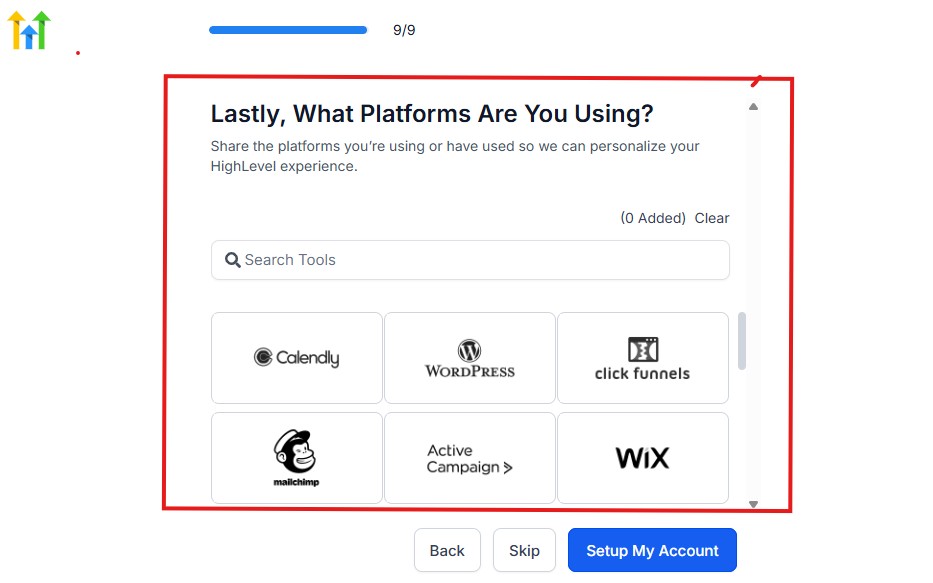
You can use the search button to search for any tools you want to add to your GoHighLevel account.
You can also skip this process and do it later if you want to.
After that, the page below will pop up.
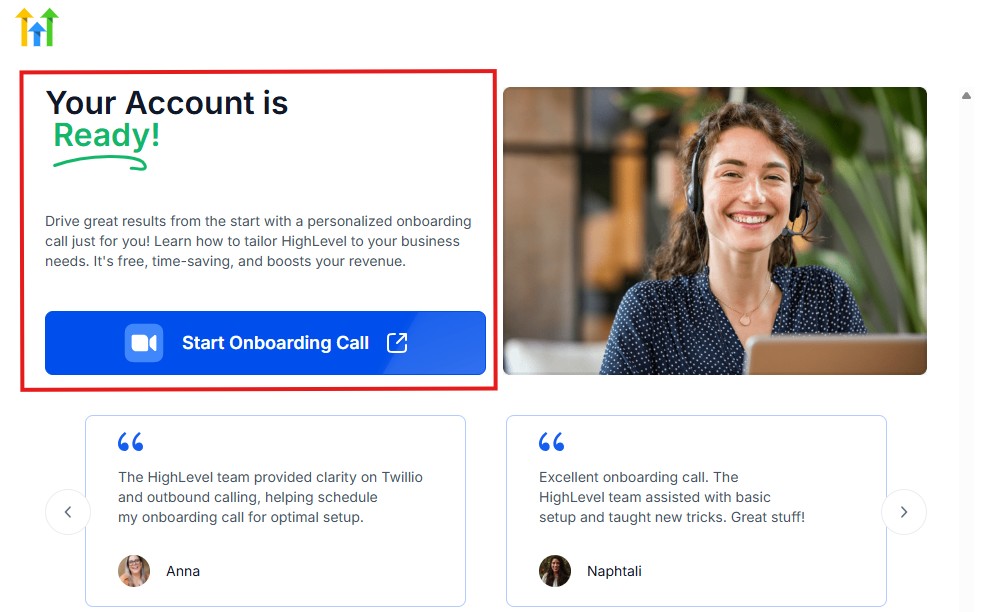
The page above says your account is ready and is asking you to “Start Onboarding Call.”
The “Onboarding Call” allows you to connect with the Go High Level team in order to discuss your account set-up process and everything regarding your plan in using HighLevel.
If you don’t want to start the “Onboarding Call” yet, just stroll down, and you will see the button in the image below.
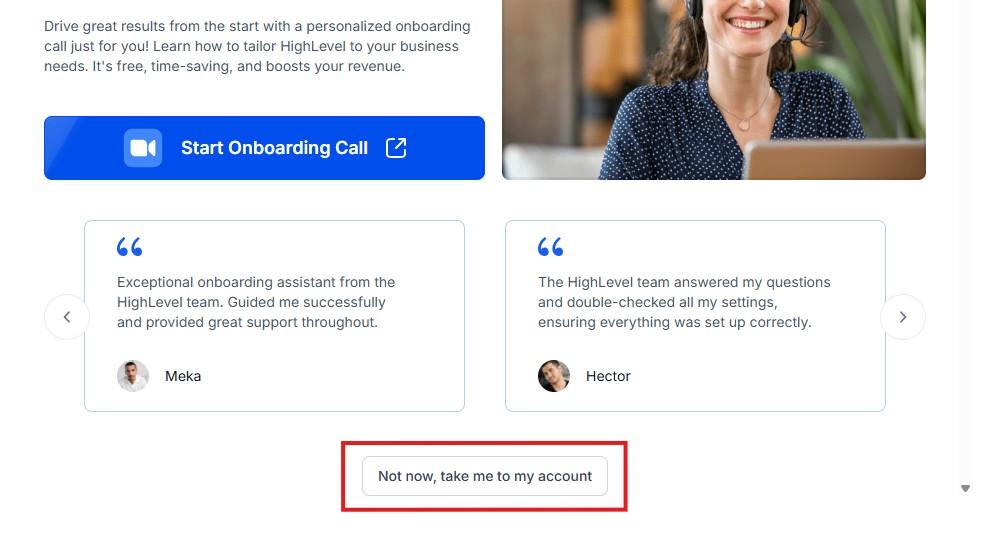
Simply click on “Not now, take me to my account“, and you will have access to your dashboard.
Note: If you have indicated that you want to resell HighLevel, you would have access to the agency dashboard by default, which looks like the image below.
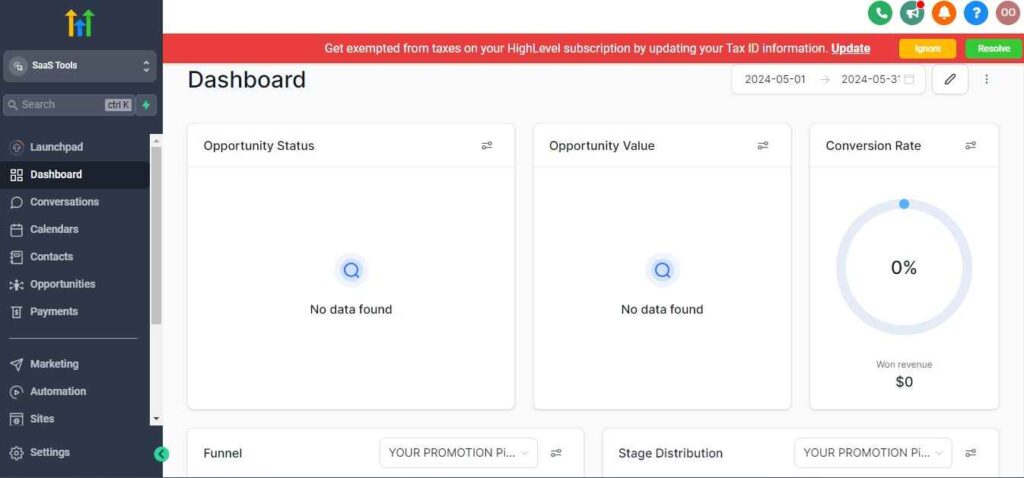
But if you didn’t indicate interest in reselling GHL, your dashboard will look like the image below.

You can switch between these dashboards at any time.
The data you see on the dashboard above are not real data, they’re snapshots that you can use to kickstart your account setup process.
I want to say congratulations. You have successfully set up your Go High Level account.
After you have successfully created your account, the menus below are what you will have on the left-hand side of your GoHighLevel dashboard.
- Launchpad
- Dashboard
- Conversations
- Calendars
- Contacts
- Opportunities
- Payments
- AI Agents
- Marketing
- Automation
- Sites
- Memberships
- Media Storage
- Reputation
- Reporting
- App Marketplace
- Settings
I will break them down in subsequent paragraphs.
📋 1. Launchpad
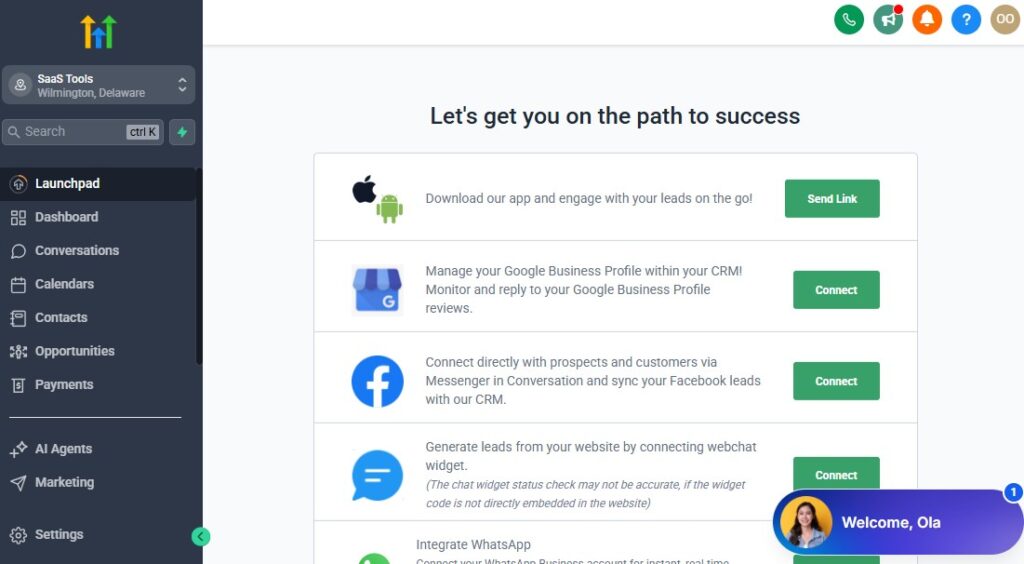
The Launchpad is your starting point inside GoHighLevel. It’s a quick-access setup panel that helps you connect the most important tools and services to get your account up and running.
Think of it as your GoHighLevel setup checklist in one place.
What You Can Do with Launchpad:
- Connect your Google Business Profile
- Set up a business phone number
- Connect your Facebook Business Page
- Install the GoHighLevel tracking code
- Add and verify your custom domain
- Connect your Stripe account to accept payments
How to Use the Launchpad
To use the Launchpad, simply log in to your GoHighLevel account and click on Launchpad from the left-hand menu.
You’ll see a checklist of setup items, each with a quick-connect button beside it.
Go through each item one by one – whether you’re linking your Google account, adding your domain, or setting up Stripe, the platform will guide you through each step with clear prompts.
As you complete each connection, the task will be marked as done, allowing you to track your onboarding progress easily.
Once all items are checked off, your core GoHighLevel environment will be fully set up and ready for action.
📊 2. Dashboard
The Dashboard is your GoHighLevel control center. It gives you a real-time overview of everything happening inside your account – from leads and sales to conversations and task activity.
It’s the first thing you see when you log in, and it helps you stay on top of your business performance at a glance.
What You Can Do with the Dashboard:
- View recent opportunities, sales, and pipeline activity
- Monitor tasks and assigned users
- Track incoming leads and conversations
- See calendar appointments and scheduled events
- Customize widgets to show what matters most to you
How to Use the Dashboard
When you log into GoHighLevel, the Dashboard is the default screen.
It displays a set of widgets showing key metrics like your pipeline value, number of leads, recent conversations, tasks due, and more.
You can customize these widgets based on your business needs – for example, by adding sales data, appointment summaries, or conversation stats.
Everything updates in real time, so you can keep a close eye on how your funnels, automations, and campaigns are performing without jumping between tools.
It’s a simple, powerful way to manage your daily workflow and quickly spot where attention is needed.
💬 3. Conversations
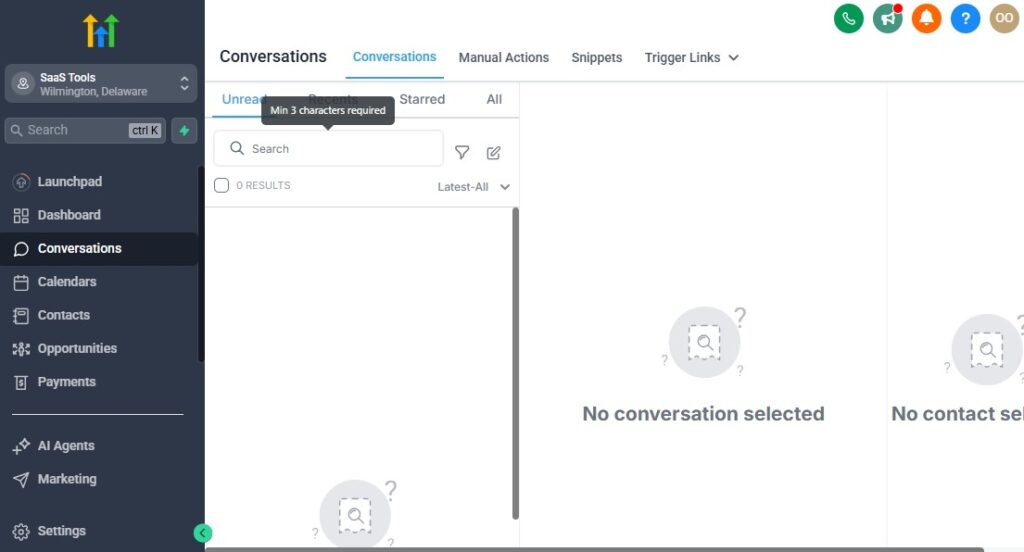
The Conversations tab in GoHighLevel is your central inbox for all communication – SMS, emails, phone calls, Facebook messages, Google messages, and more.
It brings all your client or lead interactions into one streamlined view, so you never miss a message again.
What You Can Do with Conversations:
- Send and receive SMS and emails
- Manage Facebook Messenger and Google Business messages
- View call logs and listen to recordings
- Use templates for quick replies
- Assign conversations to team members
- Track message history with leads and clients
How to Use the Conversations Tab
To access it, click on Conversations from the left-hand menu. You’ll see a list of all recent interactions with your contacts, sorted by the most recent.
Each conversation thread includes every message, email, call, or reply – so you have full context at a glance.
You can respond directly from here using email or text, attach files, or assign the thread to a specific team member.
For faster communication, you can also use message templates or trigger automations straight from the conversation window. It’s your one-stop shop for staying connected and organized.
📅 4. Calendars
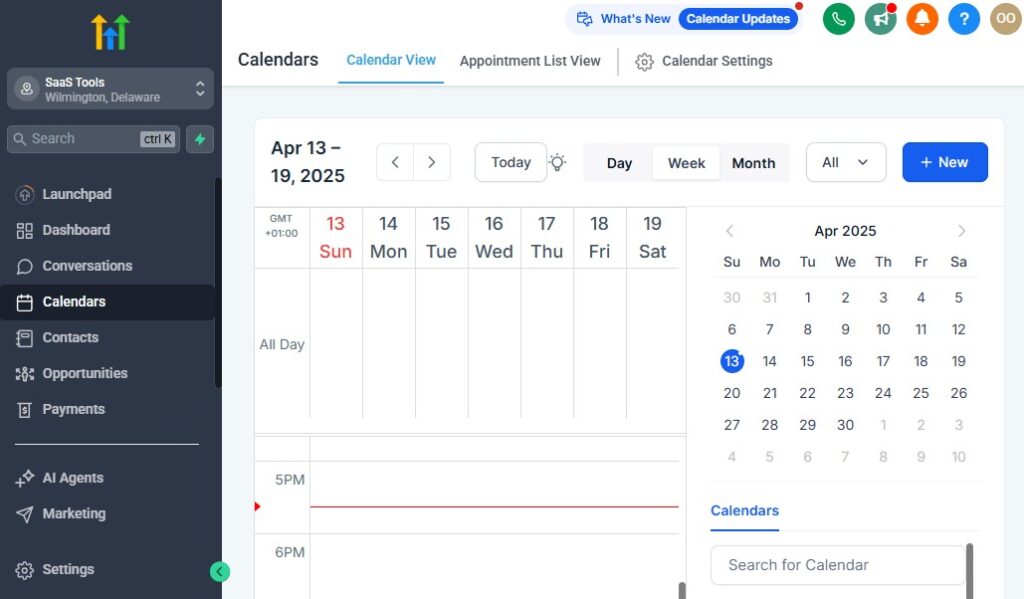
The Calendar in GoHighLevel is your built-in scheduling system. It allows you to manage appointments, create booking links, and sync availability with team members – all while integrating directly with your automation workflows.
It’s perfect for sales calls, client meetings, consultations, or onboarding sessions.
What You Can Do with Calendars:
- Create booking calendars for yourself or your team
- Set availability rules and time buffers
- Send out calendar links for clients to book you
- Automate follow-ups and reminders after a booking
- Sync with Google Calendar for real-time updates
- View all appointments in one place
How to Use the Calendar
To start, click on Calendars in the main menu. You can create a new calendar by choosing between options like round-robin (for team bookings), service-based calendars, or personal calendars.
From there, set your availability, add time zones, and customize booking preferences such as buffers or cancellation policies.
Once your calendar is ready, you can share the booking link with clients or embed it on your site.
When someone schedules an appointment, it appears automatically on your calendar – and you can trigger automated confirmation emails, reminders, and follow-ups to make the process seamless.
👥 5. Contacts
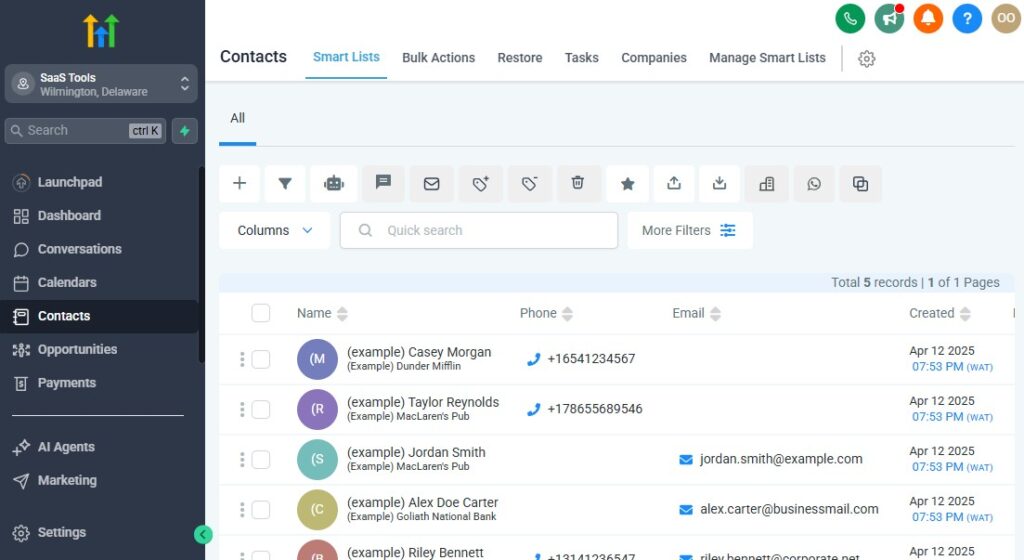
The Contacts section in GoHighLevel is your central database for all leads, clients, and customers. Every person who interacts with your business – through forms, funnels, calls, or campaigns – is stored here, complete with their full activity history.
What You Can Do with Contacts:
- Add or import leads and clients
- View full contact details and communication history
- Assign contacts to pipelines and campaigns
- Tag, filter, and segment your audience
- Trigger automations based on behavior
- Sync contact data across integrations
How to Use the Contacts Section
Go to the Contacts tab in your sidebar, and you’ll see a list of everyone in your system. You can manually add new contacts, import a CSV file, or automatically collect leads through your funnels, forms, and integrations.
Clicking on a contact opens their full profile – including notes, past conversations, tags, appointment history, and any workflows they’re part of.
You can also assign tasks, send messages directly, or move them through a pipeline stage right from their profile.
Using filters, tags, and smart lists, you can organize your contacts for targeted campaigns or automations – giving you full control over lead nurturing and follow-ups.
🧩 6. Opportunities
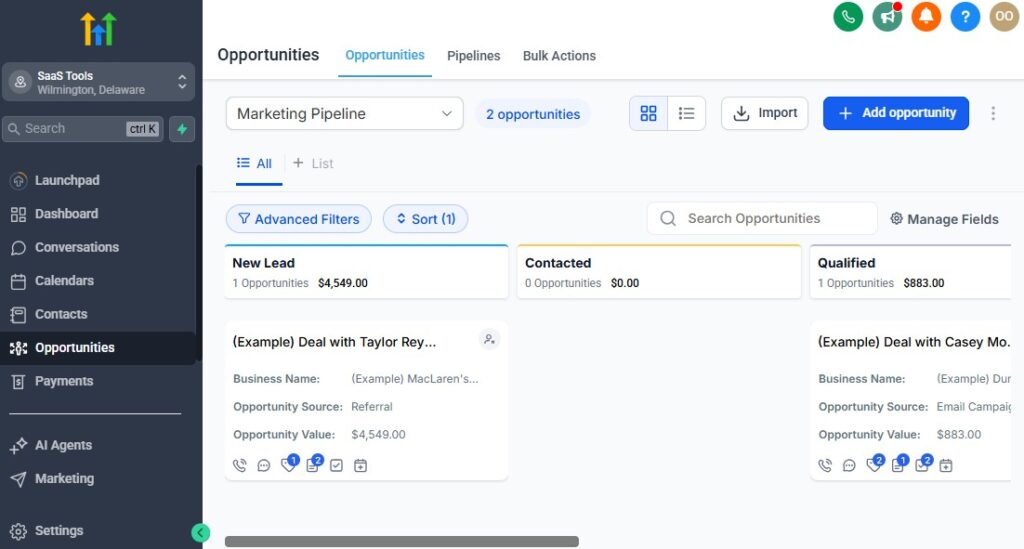
The Opportunities section in GoHighLevel is where you manage and track your sales pipeline.
It helps you monitor your leads and deals as they move through various stages, making it easy to see what’s hot, what’s in progress, and what needs attention.
What You Can Do with Opportunities:
- Track leads through custom pipeline stages
- Assign tasks to specific deals
- Set follow-up reminders and deadlines
- View deal value and expected close dates
- Automate actions based on pipeline movement
- Move deals between pipeline stages with a click
How to Use the Opportunities Section
To get started, head to the Opportunities tab in your left menu. You’ll see an overview of your pipelines — with each stage displayed in a drag-and-drop format.
You can create multiple pipelines based on different sales processes or services (e.g., one for new leads, another for renewals).
Click on any opportunity to view detailed info, including the lead’s contact history, deal value, and next steps.
You can update the opportunity’s status (e.g., from “New Lead” to “In Progress”) and add notes, tasks, or deadlines as needed.
For efficiency, set up automated actions that trigger when a deal reaches a certain stage – like sending a follow-up email or assigning a task.
💳 7. Payment
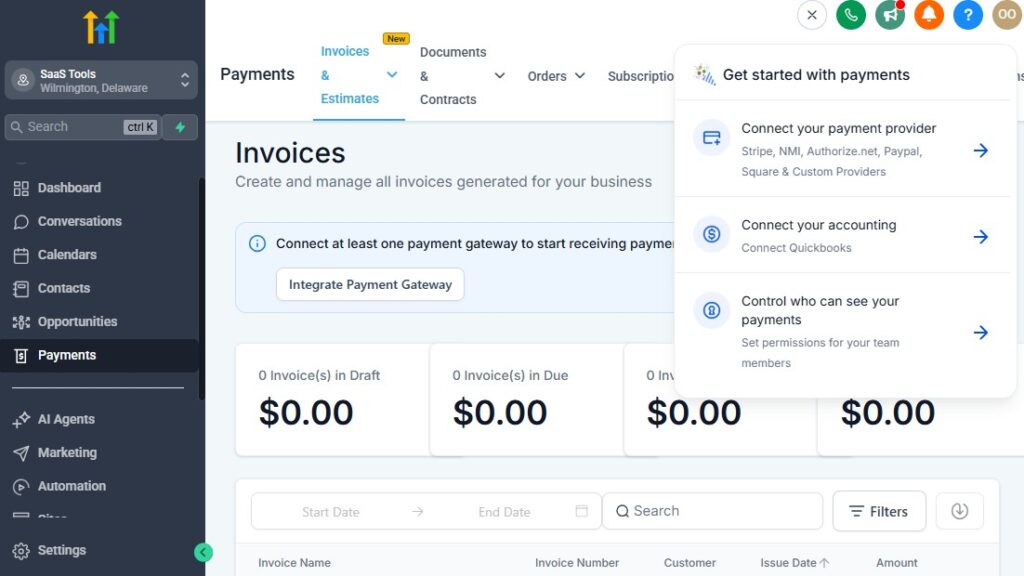
The Payments section in GoHighLevel allows you to manage all of your transactions.
Whether you’re collecting payments for services, selling products, or handling client billing, this section connects to payment processors like Stripe to handle everything securely and seamlessly.
What You Can Do with Payments:
- Connect payment gateways like Stripe or PayPal
- Create and send invoices to clients
- Accept one-time payments or set up recurring billing
- Process credit card transactions
- Track payment history and client balances
- Set up payment reminders and overdue notices
How to Use the Payments Section
To begin, go to the Payments tab from the left-hand menu. First, connect your Stripe (or another payment processor) account to GoHighLevel.
This allows you to securely handle transactions and connect payment methods to your clients.
Once connected, you can create invoices for clients, either as one-time charges or recurring payments, depending on your business model.
When clients make a payment, you’ll see it reflected in their account, and you can automate follow-ups, receipts, and even send reminders if payments are overdue.
For recurring payments, set up subscription plans, and GoHighLevel will automatically handle billing and reminders for you, ensuring a smooth client experience.
🤖 8. AI Agents
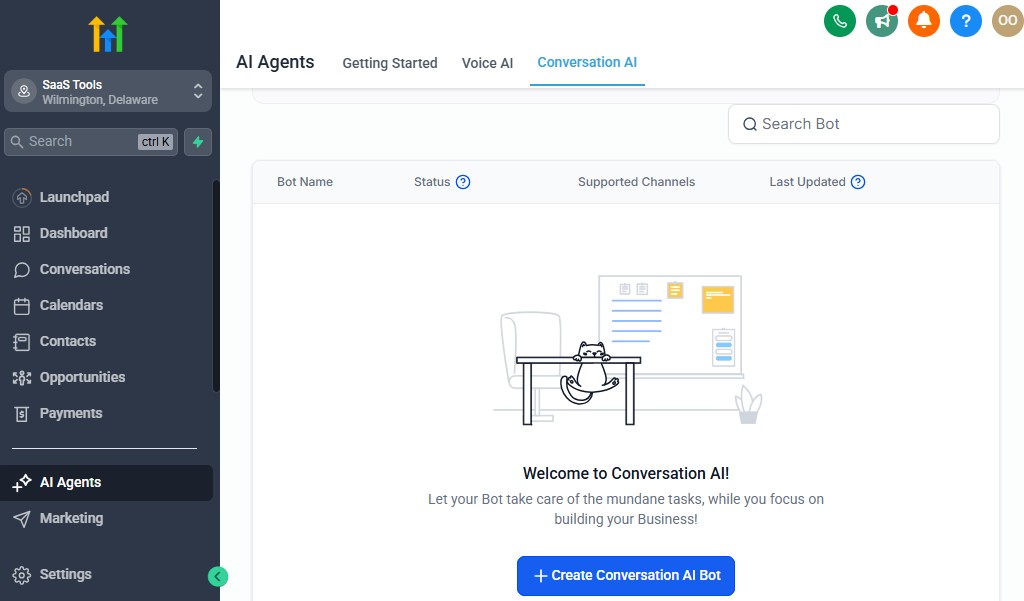
The AI Agents section in GoHighLevel allows you to automate customer interactions using AI-driven chatbots and assistants.
These virtual agents can engage with your leads and clients 24/7, answering questions, capturing information, and guiding prospects through your sales process without requiring constant human intervention.
What You Can Do with AI Agents:
- Set up automated chatbots for websites and funnels
- Capture and qualify leads automatically
- Respond to client questions in real time
- Send automated follow-ups and reminders
- Assign leads to sales teams based on chatbot interactions
- Use AI to handle simple tasks and reduce manual work
How to Use the AI Agents Section
To use AI Agents, navigate to the AI Agents tab in your dashboard.
From here, you can create new chatbots and customize them to handle specific tasks, such as answering FAQs, qualifying leads, or booking appointments.
Set up triggers for your AI agents, like having them activate when a visitor lands on a page or after a user clicks a specific link.
The AI will respond to user inquiries based on predefined rules, capturing relevant data and either answering questions directly or routing the lead to the appropriate team member.
You can also set up follow-up sequences, so once the AI collects lead info, it can automatically send nurturing emails or schedule tasks for your team.
📢 9. Marketing
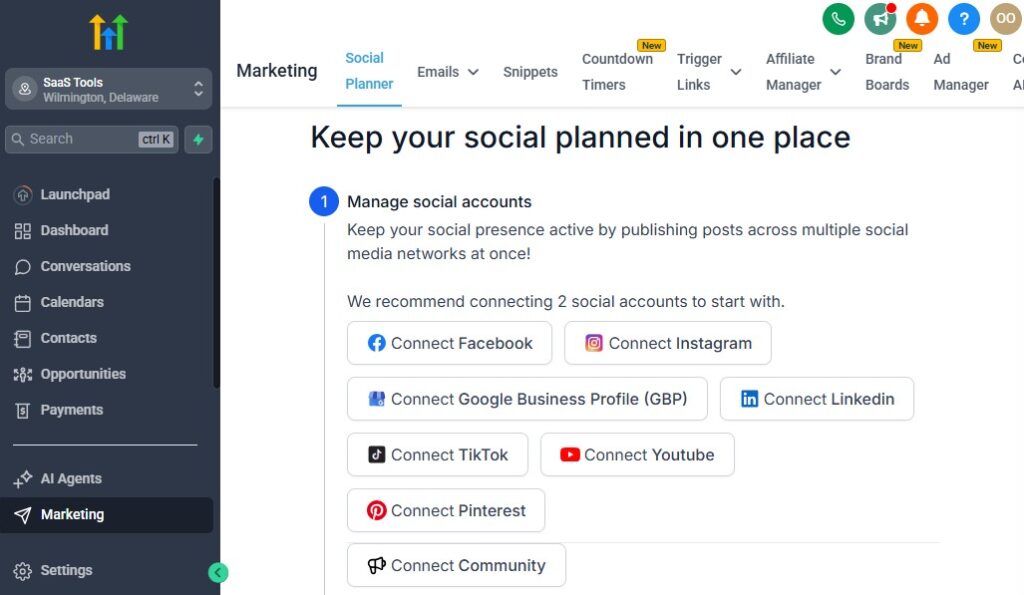
The Marketing section in GoHighLevel is where you create, manage, and track your marketing campaigns.
It includes tools for email marketing, SMS campaigns, social media ads, and more.
This section is designed to help you grow your audience, nurture leads, and drive conversions – all in one place.
What You Can Do with Marketing:
- Create email marketing campaigns and drip sequences
- Run SMS campaigns to engage leads and clients
- Build and schedule social media posts directly from GoHighLevel
- Manage funnels and landing pages for lead generation
- Set up automated marketing workflows to nurture leads
- Track campaign performance and analyze results
How to Use the Marketing Section
To get started, head to the Marketing tab in the left-hand menu. Here, you can create and manage your email and SMS campaigns by choosing from templates or building your messages from scratch.
For emails, set up drip sequences to send automated messages over time based on specific triggers (like a new subscriber or a cart abandonment).
You can also design and launch landing pages or funnels to collect leads or promote offers.
Once your campaigns are running, you can monitor their performance using built-in analytics that track open rates, click-through rates, and conversions, helping you optimize and improve over time.
By combining email, SMS, and social media tools, GoHighLevel allows you to run multi-channel marketing campaigns that drive engagement and sales, all from a single platform.
🔁 10. Automation
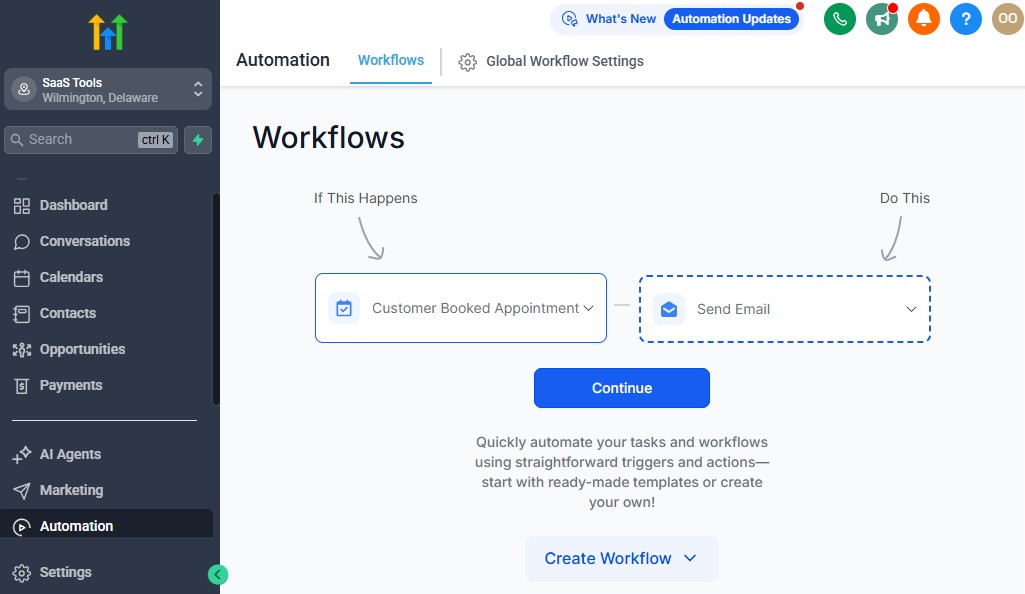
The Automation section in GoHighLevel allows you to set up workflows that run automatically, saving you time and ensuring that no lead or client is forgotten.
From lead nurturing to follow-up sequences, automations handle repetitive tasks, so you can focus on higher-priority work.
What You Can Do with Automation:
- Create automated workflows for lead nurturing
- Set up follow-up sequences for emails, SMS, and calls
- Trigger actions based on contact behavior (e.g., form submission, email open)
- Manage task assignments and reminders for your team
- Automate appointments and reminders
- Create conditional logic to tailor workflows to each lead
How to Use the Automation Section
To set up automation, click on the Automation tab. Here, you’ll create new workflows by choosing triggers (e.g., when a lead submits a form) and then defining the actions you want to happen automatically (e.g., send a welcome email or assign a task to a team member).
You can also use conditional logic to build more advanced workflows, like sending different messages based on the lead’s behavior or segment.
Once your workflows are live, GoHighLevel will handle everything from follow-up emails to lead assignment without you needing to lift a finger.
Automation keeps your processes running smoothly, ensures timely follow-ups, and helps you stay organized, even when managing a large number of clients.
🌐 11. Sites
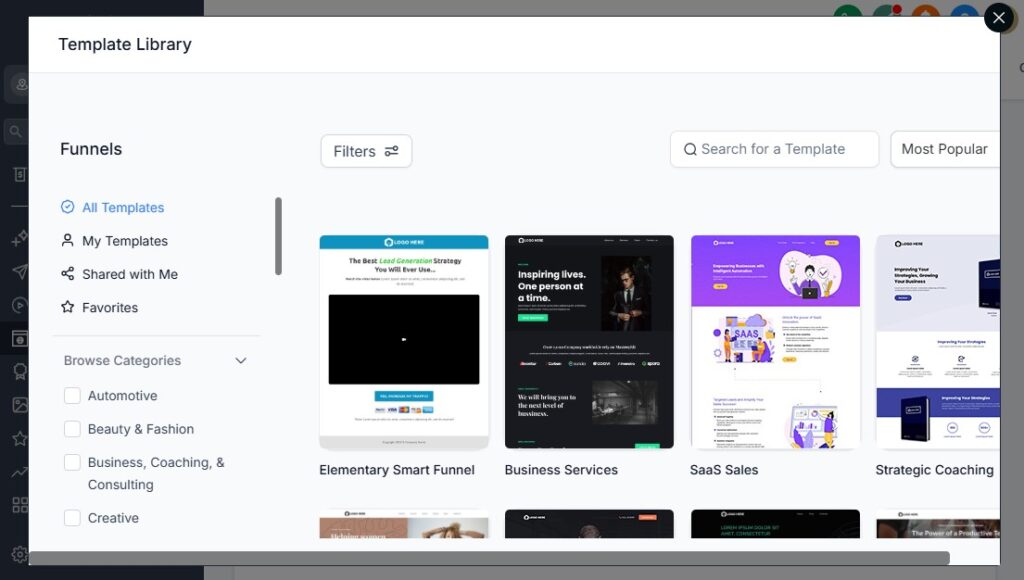
The Sites section in GoHighLevel is where you can build and manage your websites and landing pages.
Whether you need a full website, a simple landing page, or a complex funnel, this section gives you the tools to create professional, responsive pages that are optimized for conversions.
What You Can Do with Sites:
- Create landing pages and sales funnels
- Build a full website with multiple pages
- Choose from pre-designed templates or build from scratch
- Add forms, buttons, and media like images and videos
- Connect your domain to the pages you create
- Use conversion tracking to measure page performance
How to Use the Sites Section
To get started, click on the Sites tab in your dashboard. Here, you can choose between building a landing page or a full website.
Select a template, or start from scratch and customize your design using the drag-and-drop builder. Add elements like text, images, forms, and videos to make your pages more engaging.
Once your site or landing page is ready, you can publish it with your custom domain, ensuring it looks professional and is fully integrated with your GoHighLevel account.
You can also track the performance of your pages using conversion tracking, allowing you to optimize for higher engagement and sales.
🎓 12. Memberships
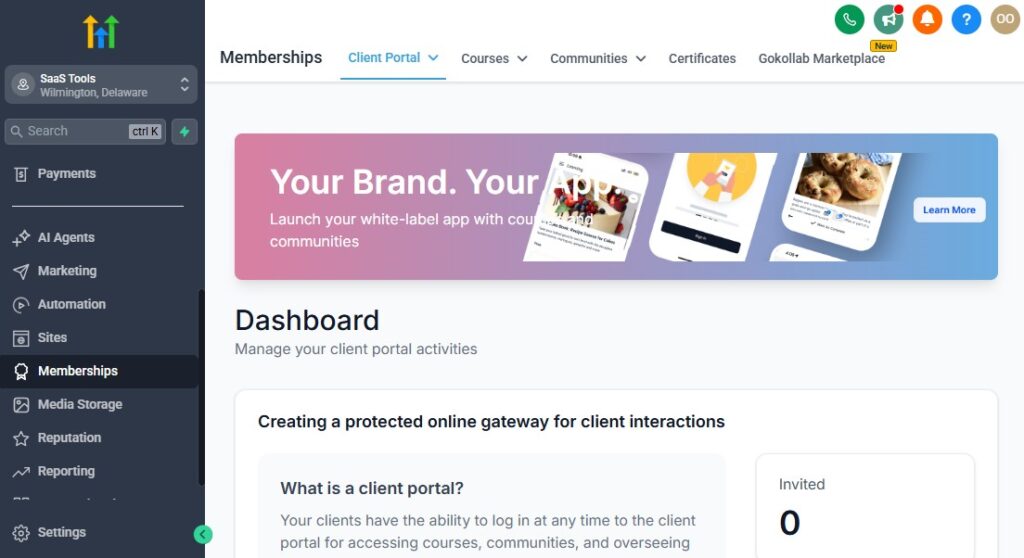
The Memberships section in GoHighLevel allows you to create and manage online courses, membership sites, or exclusive content for your audience.
Whether you’re offering digital products, training programs, or premium content, this section enables you to manage members and deliver content seamlessly.
What You Can Do with Memberships:
- Build membership sites for your courses or content
- Create protected content that only paying members can access
- Set up drip content for course delivery
- Offer subscriptions for ongoing access to content
- Manage memberships, including renewals and cancellations
- Track member progress and engagement
How to Use the Memberships Section
To get started, go to the Memberships tab and click to create a new membership site or course.
You can build out your content using videos, PDFs, quizzes, and more. Set up access rules – either giving members full access immediately or using drip content to release materials over time.
You can charge for access by connecting a payment processor like Stripe, and set up automated billing for recurring memberships.
Additionally, GoHighLevel allows you to track member progress, send them reminders, and even offer certificates upon completion if you’re running a course.
It’s a great way to provide ongoing value to your community or customer base, whether you’re running training programs, coaching services, or exclusive content for paying members.
🗂️ 13. Media Storage
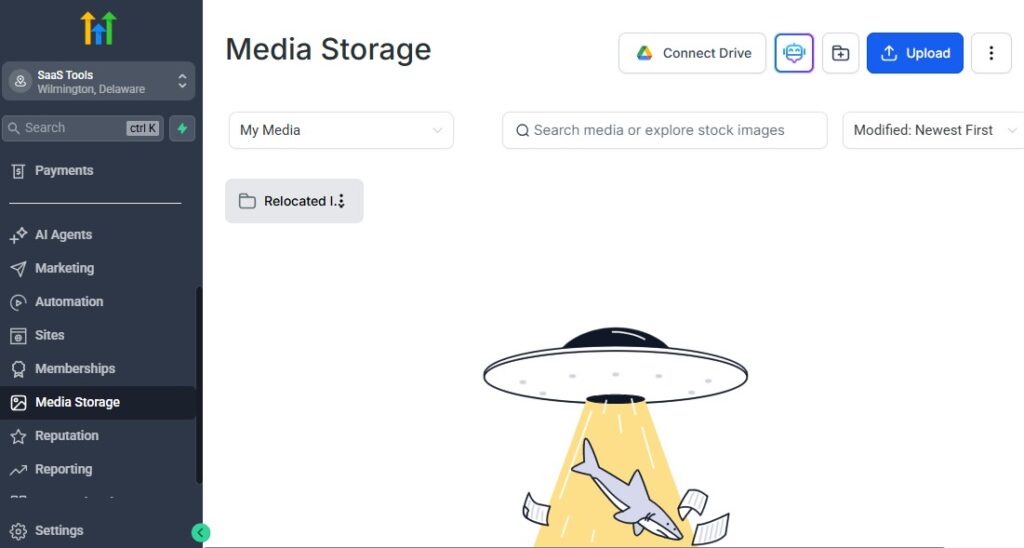
The Media Storage section in GoHighLevel allows you to store and organize all your media files such as images, videos, documents, and other assets.
It’s your central hub for accessing and managing the media you use in your campaigns, landing pages, emails, and other marketing efforts.
What You Can Do with Media Storage:
- Upload and store images, videos, and documents
- Organize media by folders for easy access
- Use stored media in emails, landing pages, and funnels
- Track the size and usage of your media files
- Access media quickly for seamless integration into campaigns
How to Use the Media Storage Section
To use the Media Storage section, simply go to the Media tab in the GoHighLevel dashboard. From here, you can upload new files directly or drag and drop them into the storage area.
You can organize your media by creating folders for different projects or campaigns.
Once your media is uploaded, you can easily use it in your marketing efforts.
For example, when creating a landing page or email, you can click to insert media from your library directly into your content.
This streamlines the process and keeps your assets organized, making it easier to find and use them when needed.
Learn More:
🌟 14. Reputation
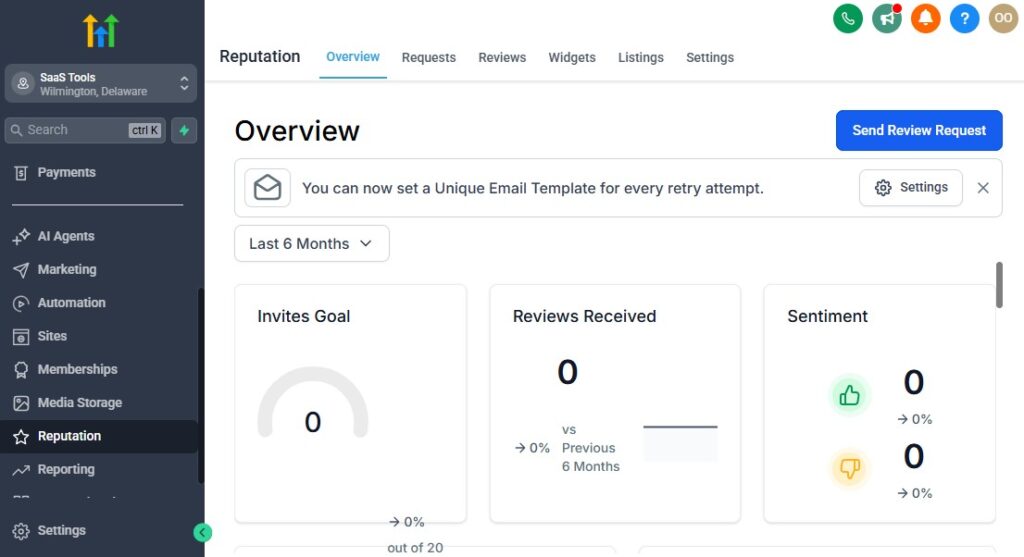
The Reputation section in GoHighLevel is where you can manage your online reviews and reputation.
This tool helps you monitor what clients are saying about your business, encourage positive reviews, and address negative ones quickly.
It’s designed to help you maintain a strong online presence and build trust with your audience.
What You Can Do with Reputation:
- Monitor and track online reviews from multiple platforms (Google, Facebook, etc.)
- Automate review requests after client interactions
- Set up reputation management campaigns to collect feedback
- Respond to negative reviews to improve your reputation
- Display positive reviews on your website or landing pages
- Measure your overall rating and sentiment analysis
How to Use the Reputation Section
To start, navigate to the Reputation tab in your GoHighLevel account.
Here, you can connect your business’s review platforms (like Google My Business or Facebook) so that all your reviews are visible in one place.
From this dashboard, you can monitor what’s being said about your business and respond to reviews directly.
You can set up automated workflows to ask customers for reviews after certain actions, like completing a purchase or booking a service.
GoHighLevel also allows you to run reputation campaigns to gather more feedback and enhance your online image.
Additionally, if you receive a negative review, you can manage it proactively by replying directly from this section to resolve the issue and protect your brand’s reputation.
📈 15. Reporting
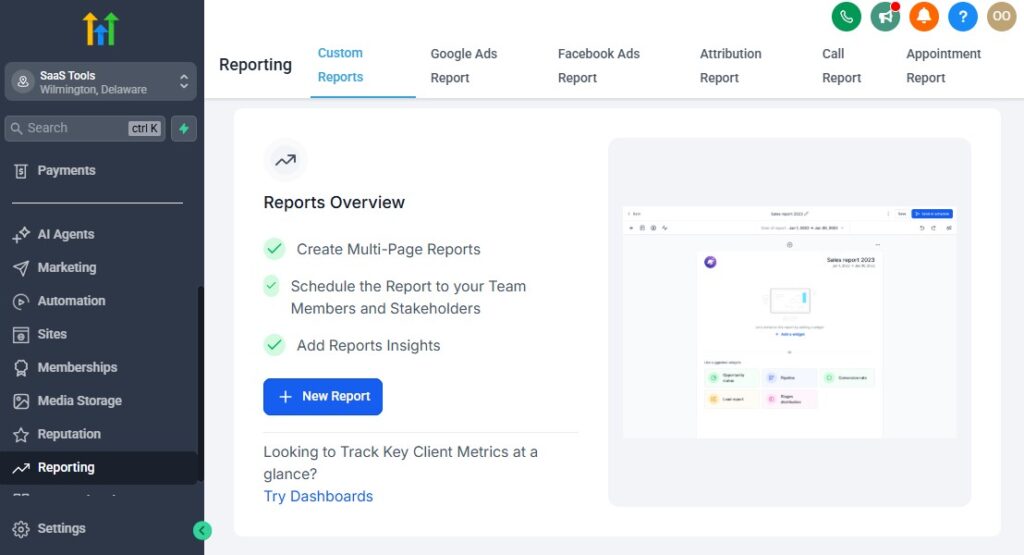
The Reporting section in GoHighLevel is where you can access in-depth insights and data about your business’s performance.
This section allows you to track key metrics for your marketing campaigns, sales funnels, reputation, and more, helping you make informed decisions and optimize your strategies.
What You Can Do with Reporting:
- View overall business performance metrics
- Track the success of marketing campaigns (email, SMS, ads)
- Monitor conversion rates and ROI for funnels and campaigns
- Analyze sales pipelines and deal stages
- Generate custom reports for specific data points
- Export reports for team sharing or client presentations
How to Use the Reporting Section
To access reporting, simply click on the Reporting tab from the left menu. Here, you’ll find various dashboards that display your business’s performance across different areas.
For instance, you can see how your email campaigns are performing, how many leads are converting in your sales pipeline, and even which reviews you’ve collected in your reputation management efforts.
You can filter your reports by time periods (daily, weekly, monthly) or by specific campaigns, allowing you to measure results more accurately.
If you need to present the data to your team or clients, you can generate custom reports that focus on specific metrics and easily export them for sharing.
🛒 16. App Marketplace
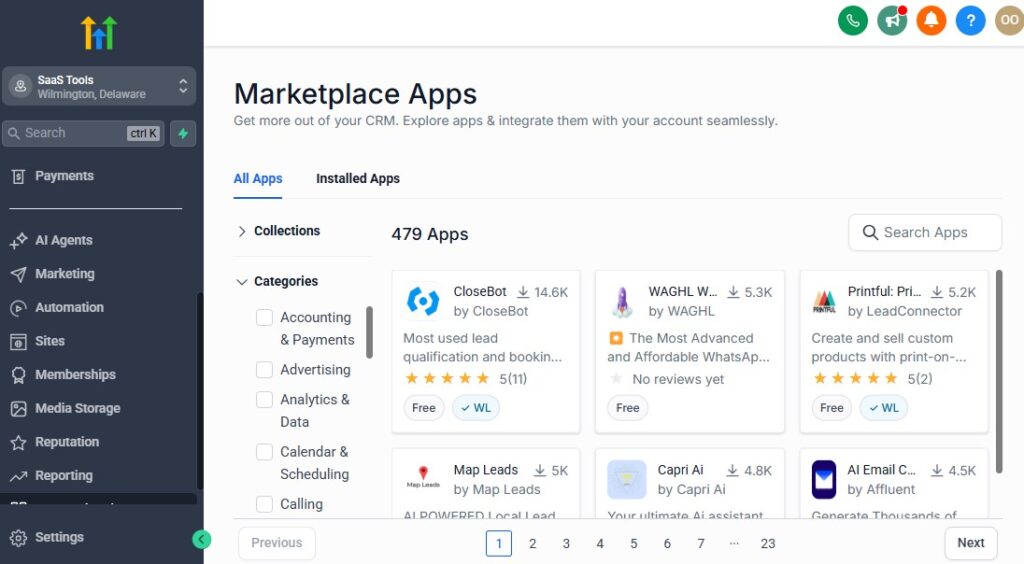
The App Marketplace in GoHighLevel is where you can discover, add, and integrate third-party applications and tools to enhance the functionality of your GoHighLevel account.
It’s designed to allow you to connect with other services and software that complement your workflow, making it a more powerful all-in-one platform.
What You Can Do with the App Marketplace:
- Browse and install third-party apps that integrate with GoHighLevel
- Enhance your CRM with tools like Zapier, Twilio, and more
- Find marketing apps, payment integrations, and analytics tools
- Streamline workflows with pre-built app integrations
- Extend your GoHighLevel account’s functionality without needing separate accounts
- Discover tools to improve team collaboration and customer communication
How to Use the App Marketplace
To access the App Marketplace, click on the App Marketplace tab from the GoHighLevel dashboard.
From there, you’ll see a list of available apps and integrations. You can browse through different categories, such as marketing, payment processing, or analytics, and install the apps that suit your needs.
Once you’ve selected an app, follow the prompts to integrate it into your account.
For example, if you want to connect Zapier, you’ll be prompted to log in to your Zapier account and link the app to GoHighLevel, allowing you to automate tasks between GoHighLevel and other platforms you use.
Using the App Marketplace, you can add powerful features and integrations that make GoHighLevel work even harder for your business.
⚙️ 17. Settings
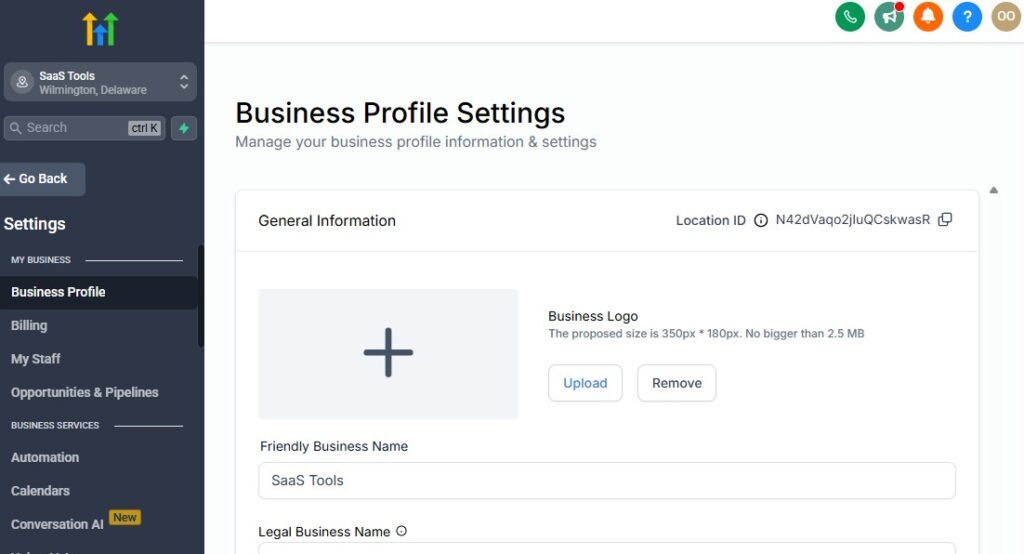
The Settings section in GoHighLevel is where you can customize and manage the platform’s configuration to suit your business needs.
From user roles to integrations and system preferences, this section allows you to fine-tune every aspect of your GoHighLevel account to ensure everything works smoothly.
What You Can Do with Settings:
- Manage account preferences and user permissions
- Set up integrations with external tools and platforms
- Configure email and SMS settings
- Customize branding elements like logos and colors
- Set up team roles and assign specific permissions
- Adjust payment settings and manage billing info
- Configure notifications and alerts for tasks and deals
How to Use the Settings Section
To access the Settings section, click on the Settings tab in the left menu. From here, you can make various adjustments based on your business needs.
For instance, you can set up your email and SMS configurations to ensure your communications are sent through your preferred services, like Twilio for SMS or SendGrid for emails.
If you’re managing a team, you can use the user management tools to create roles and assign permissions, allowing different team members to access specific parts of the platform based on their responsibilities.
Additionally, you can integrate GoHighLevel with external tools like Stripe, Zapier, or Google Analytics, and adjust your notification settings to keep you informed about critical events like new leads or completed payments.
Frequently Asked Questions
What is GoHighLevel?
GoHighLevel is an all-in-one CRM and marketing automation platform that helps businesses streamline their workflows. It combines features like sales funnels, email/SMS marketing, automation, AI agents, reputation management, and more, making it easier to manage leads, clients, and marketing efforts in one place.
Can I integrate GoHighLevel with other tools?
Yes, GoHighLevel integrates with a variety of third-party tools, such as Zapier, Stripe, Google Analytics, and more. You can find these integrations in the App Marketplace and connect them directly to your account for seamless workflow management.
How do I cancel my GoHighLevel account?
To cancel your GoHighLevel account, go to the Settings section, find the Billing tab, and select the option to cancel your subscription. If you’re on a trial, you can simply choose not to continue after the trial period ends.
Can I use GoHighLevel for email marketing?
Yes! GoHighLevel allows you to create and send email campaigns, set up drip sequences, and automate follow-ups. It also tracks performance, helping you optimize future email marketing efforts.
🎯 Final Thoughts
GoHighLevel is a powerful all-in-one platform that simplifies marketing, sales, and client management.
Whether you’re a small business owner or running a large agency, GoHighLevel offers the tools and automation you need to streamline your processes, improve client engagement, and drive growth.
From building landing pages and managing reputations to automating workflows and tracking results, GoHighLevel helps you manage it all in one place.
By using the features and integrations provided, you can optimize your marketing efforts, save time, and focus on scaling your business.
So, if you’re looking to consolidate your tools into one comprehensive solution, GoHighLevel could be the perfect fit for your business.