Running a Social Media Marketing Agency (SMMA) today means doing far more than posting content:
- You’re managing clients
- tracking leads
- sending reports
- collecting payments
- and constantly switching between tools
All while trying to keep campaigns profitable and clients happy.
The truth is, most agency owners aren’t struggling with creativity – they’re struggling with systems. Too many tools, too many moving parts, and not enough automation to keep things running smoothly.
That’s where GoHighLevel for Social Media Marketing Agencies (SMMA) changes the game.
GoHighLevel is an all-in-one CRM and automation platform designed to help agencies:
- simplify operations
- automate client communication
- and scale with confidence.
It replaces tools like ClickFunnels, Mailchimp, Calendly, and Trello, combining them into a single powerful dashboard.
Whether you manage five clients or fifty, GoHighLevel helps you:
- Capture and nurture leads automatically.
- Manage client accounts from one dashboard.
- Generate branded reports and performance updates effortlessly.
- Automate follow-ups, reminders, and review requests.
- Even offer your own white-label SaaS product for recurring revenue.
In this helpful guide, you’ll learn step-by-step how to use GoHighLevel to build, automate, and grow a more profitable SMMA – without adding more software, staff, or stress.
TL;DR: GoHighLevel for Social Media Marketing Agencies (SMMA)
If you’re running an SMMA and still juggling multiple tools for funnels, emails, client reports, and follow-ups – it’s time to simplify.
GoHighLevel gives you everything your agency needs in one place:
- ✅ Manage clients, pipelines, and campaigns from a single dashboard.
- ⚙️ Automate client onboarding, reporting, and communication.
- 💬 Send follow-ups via SMS, email, or voicemail – all automatically.
- 📊 Track leads, conversions, and ad performance in real time.
- 💸 Use SaaS Mode to resell GoHighLevel under your own brand for recurring income.
💡 Bottom line: GoHighLevel helps social media marketing agencies (SMMAs) save time, scale faster, and deliver better results – without hiring extra staff or paying for multiple subscriptions.
👉 Start your free 30-day GoHighLevel trial today and see how it transforms the way you run your agency.
What Is GoHighLevel (and Why It’s Perfect for SMMA Owners)
If you’ve been in the agency world for a while, you’ve probably used (and paid for) multiple tools – a CRM for leads, ClickFunnels for funnels, Mailchimp for emails, Calendly for bookings, and maybe even Zapier to connect them all.
GoHighLevel for SMMA replaces all of them.
It’s an all-in-one marketing, sales, and automation platform built specifically for agencies and digital marketers. Everything you need to attract, convert, and retain clients lives inside one system – no endless logins, no confusing integrations, and no extra monthly costs.
At its core, GoHighLevel combines:
- CRM (Client Relationship Management): Keep track of every client, lead, and deal.
- Marketing Automation: Send automated SMS, emails, and follow-ups that convert.
- Sales Funnels & Websites: Build funnels, landing pages, and websites with drag-and-drop ease.
- Calendars & Bookings: Schedule meetings and client calls without third-party tools.
- Reporting & Analytics: Monitor campaign performance and ROI for every client.
- Reputation Management: Collect reviews and boost credibility automatically.
💡 Why It’s a Game-Changer for SMMAs
Running an SMMA is all about delivering results – fast. But most agency owners waste valuable hours managing admin work, client updates, and tool chaos.
Here’s where GoHighLevel for SMMA stands out:
✅ 1. Built for Agencies (Not Just Marketers)
Unlike traditional CRMs, GoHighLevel was designed from the ground up for agency owners. You can manage multiple clients under one account, each with their own funnels, contacts, automations, and reports.
It’s like having an entire marketing tech stack for every client – neatly organized and ready to scale.
⚙️ 2. White-Label Power
Want your agency to stand out?
GoHighLevel lets you white-label the platform – meaning you can brand it as your own software.
Your clients log in to your dashboard (with your logo and domain), giving you a professional edge and creating an extra stream of recurring revenue.
💬 3. Automation That Saves Hours
Every SMMA owner knows follow-ups, onboarding emails, and report updates can drain your time.
GoHighLevel’s workflow automation lets you create sequences that handle these tasks automatically – while keeping every interaction personal.
Example:
When a lead fills out a contact form → They instantly get a “Thank you” text → A team member gets notified → The lead gets booked for a discovery call automatically.
No follow-up slips through the cracks.
📊 4. Client Reporting Made Easy
Instead of pulling data from five different platforms, GoHighLevel’s dashboard shows real-time results – ad conversions, leads generated, calls booked, and more.
You can share branded reports with clients weekly or monthly, proving ROI without manual work.
💸 5. Affordable, Scalable, and Future-Proof
GoHighLevel gives you enterprise-level tools at a small-agency price.
You pay once, use it for unlimited clients, and grow without worrying about extra software subscriptions.
That’s why thousands of SMMA owners now call it their agency operating system – the one tool that runs everything.
In short:
If you’re serious about growing your SMMA in 2026 and beyond, GoHighLevel is the smartest investment you can make.
It gives you control, consistency, and automation – all in one platform designed to make your agency run like a well-oiled machine.
How to Use GoHighLevel for Social Media Marketing Agencies
Let’s get straight to the point – first, we’ll set up your account, then I’ll walk you through all the strategies you can use.
This is how to set it up:
Step 1: Create HighLevel Account for 30 Days Free
Since you’re just starting with GoHighLevel, you would need to properly set up your account.
And you can do that for free through our exclusive 30-Day Free Trial link here.
In order to start, head over to gohighlevel.com/30-day-free-tial free trial and click on “30 DAY FREE TRIAL” as you can see below.
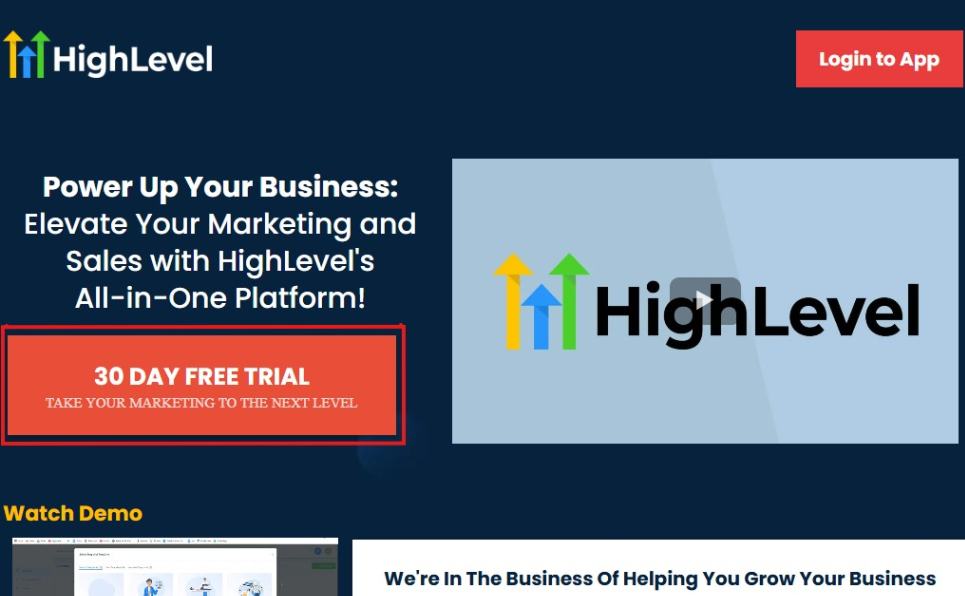
Upon clicking on “30 DAY FREE TRIAL“, a page will pop that looks exactly like the image below.
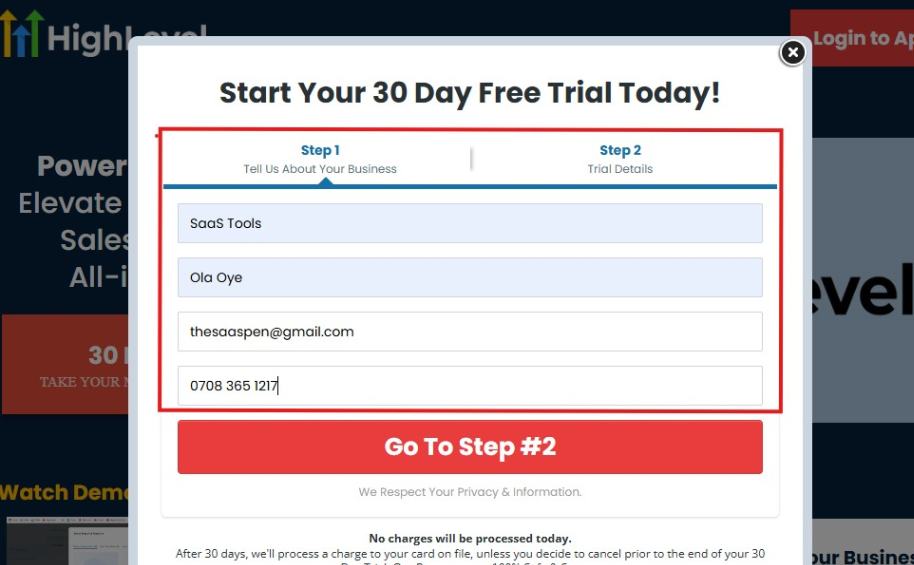
If you take a closer look at the image above, you will see that you need to supply your:
- Business name
- Company name
- Company email
- Phone number
Supply all the pieces of information and click on “Go To Step #2.”
On the next page, you will be required to select the plan you want to opt in for.
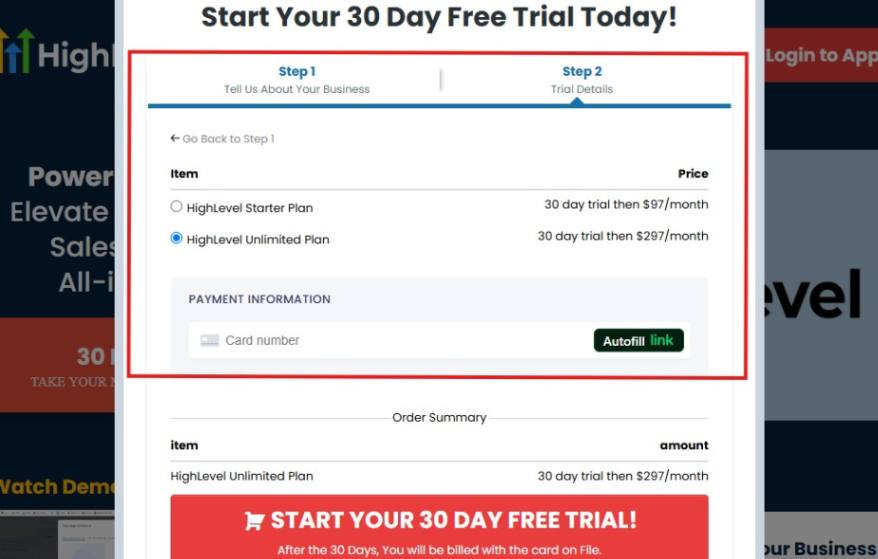
As you can see from the image above, you can either choose from:
- HighLevel Starter Plan
- HighLevel Unlimited Plan
Select the HighLevel Unlimited Plan and continue – you can always upgrade to the SaaS Mode later if you want that or downgrade.
The next thing you want to do is supply your credit card information.
Note: You will not be debited anything today until the end of your trail that is if you don’t cancel. Keep in mind that $1 will be debited and refunded back instantly into your account just to test your card is working.
After you have supplied the information accordingly, click on “START YOUR 30 DAY FREE TRIAL” and you will be asked to confirm you’re not a robot.
After that, the page below will pop up.
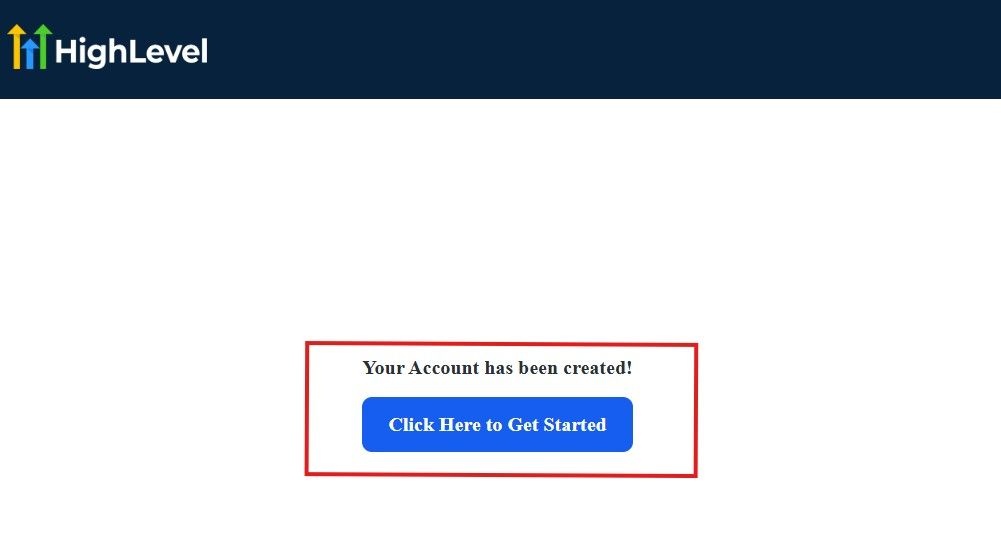
The image above says, “Your Account has been created!” Now, you need to click on the blue button that says “Click Here to Get Started.“
Click on the blue button to start your onboarding process.
Step 2: GoHighLevel Onboarding Process
The onboarding questions help GoHighLevel understand why you have signed up for the platform so that it can tailor your experience accordingly.
This is all you need to do:
After you click on the blue button above, the page below will pop up.
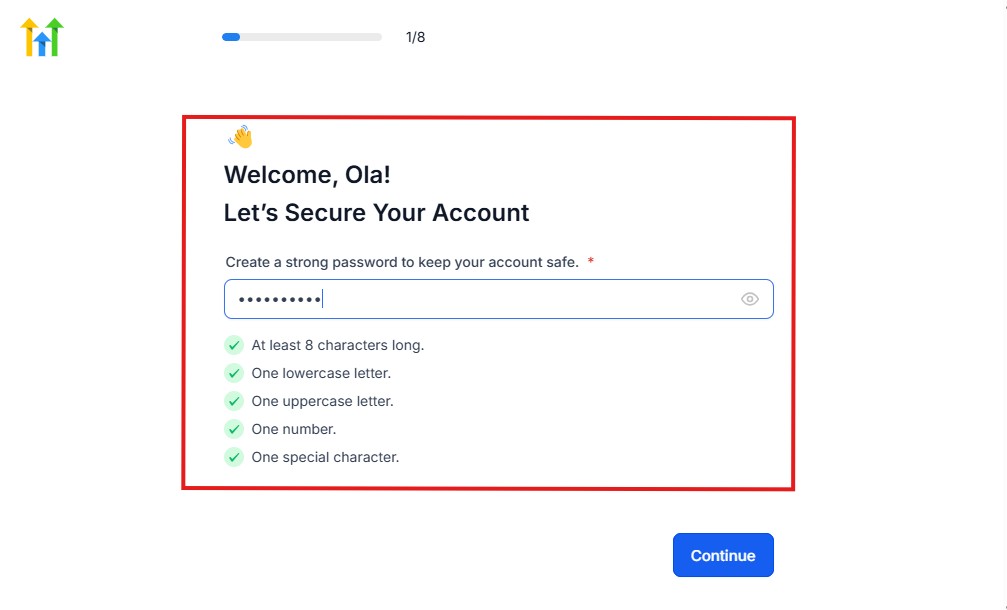
As you can see above, you need to set up your password, and the password has to be:
- At least 8 characters long
- One lowercase letter
- One uppercase letter
- One number
- One special character
If you have input the password and it matches all the description above, everything will be green just the way it’s in the image.
Click on “Continue” there after, and the image below will pop up.
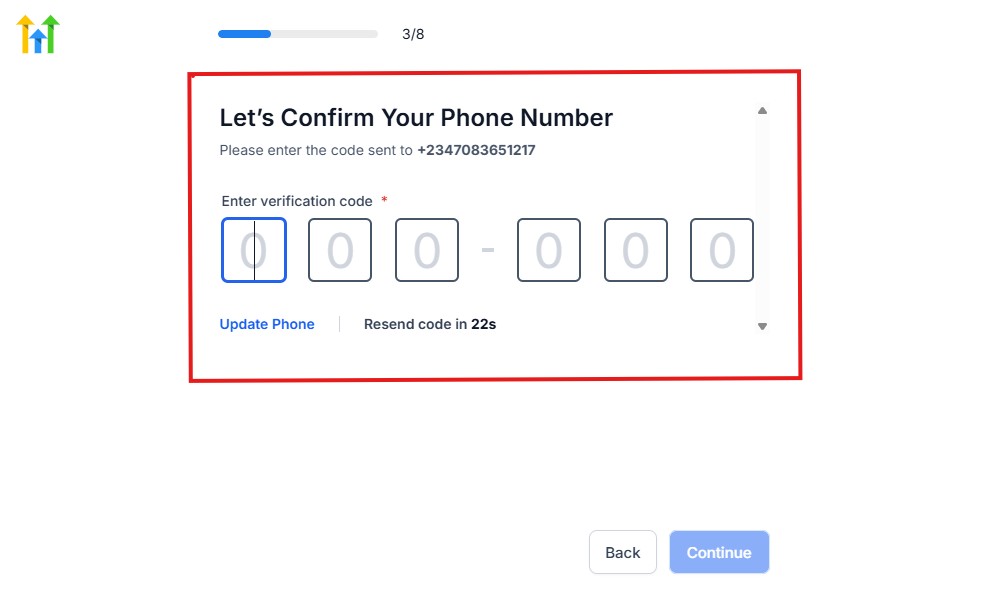
As you can see, a code will be sent to you to confirm your email address and phone number. The process is the same for the 2.
The next thing you need to do is to select how you plan to use GoHighLevel, as you can see below.
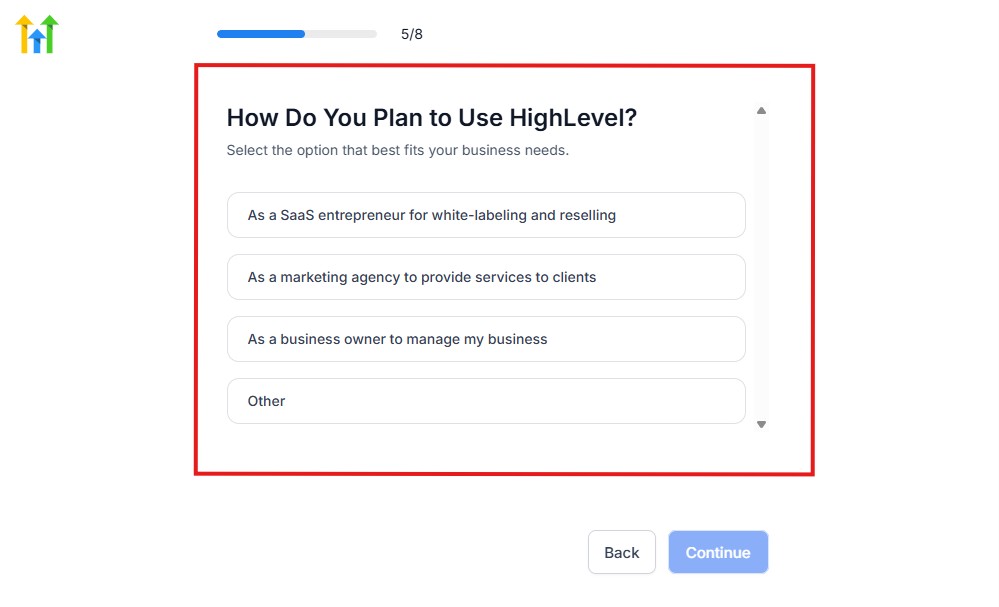
Select what best matches why you have signed up and click on Continue.
On the next page, you will be asked if you plan to resell GoHighLevel or not.
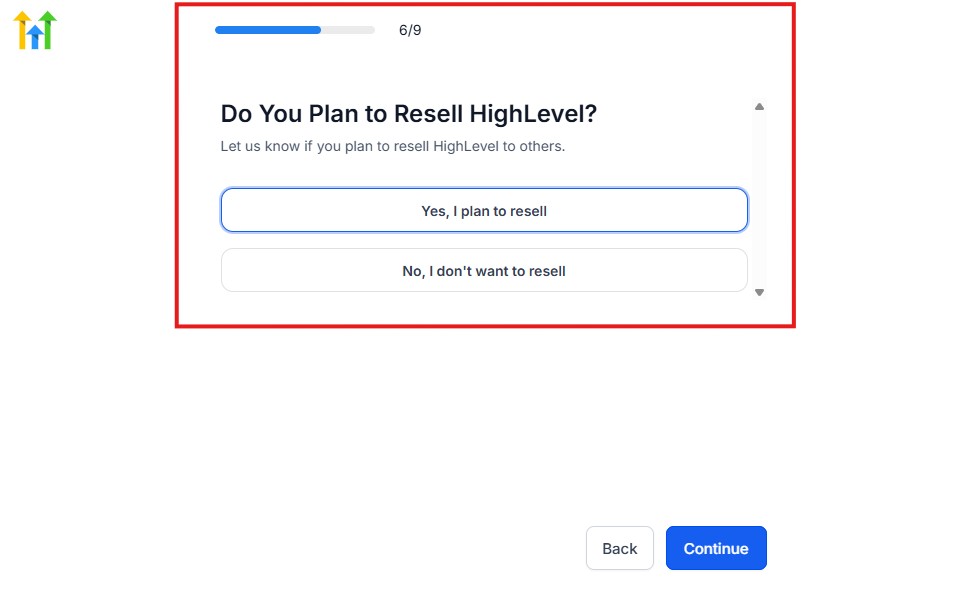
Select the answer based on the reason why you have signed up and click on “Continue”
Then, the page below will pop up.
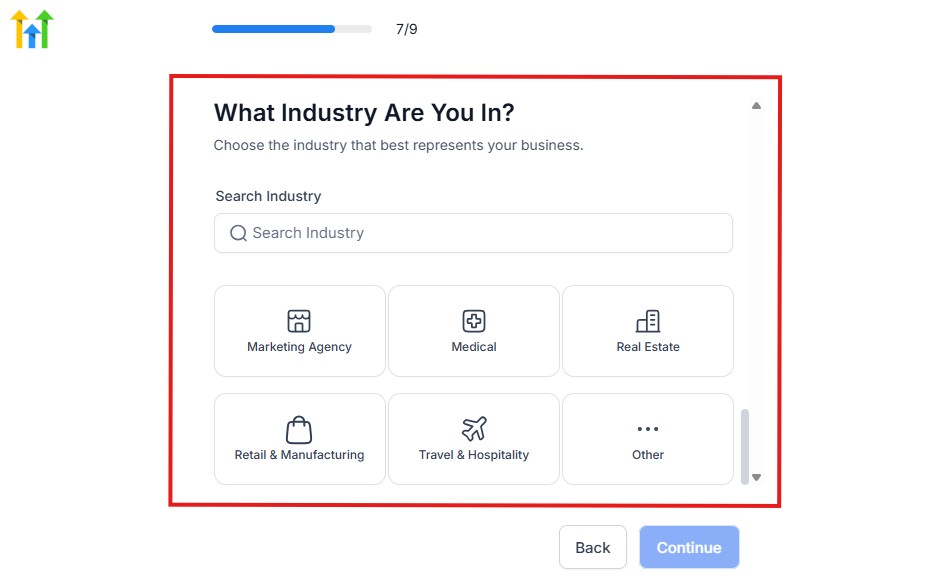
From the image above, you need to select the industry that you fall on. You can also make use of the search button if you can’t find it right away.
Then, click on continue after you select your industry.
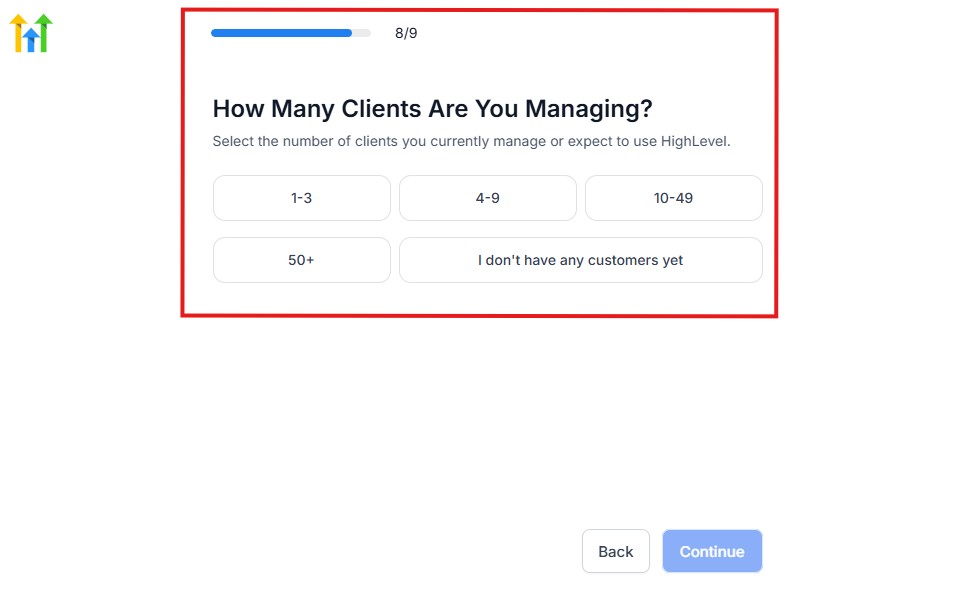
Then, the next thing you need to do is to select the number of clients that you currently have. Select “I don’t have any customers” yet if you currently don’t have one.
On the next page, you will be asked to select the platforms you currently use that you can integrate with GoHighLevel right away.
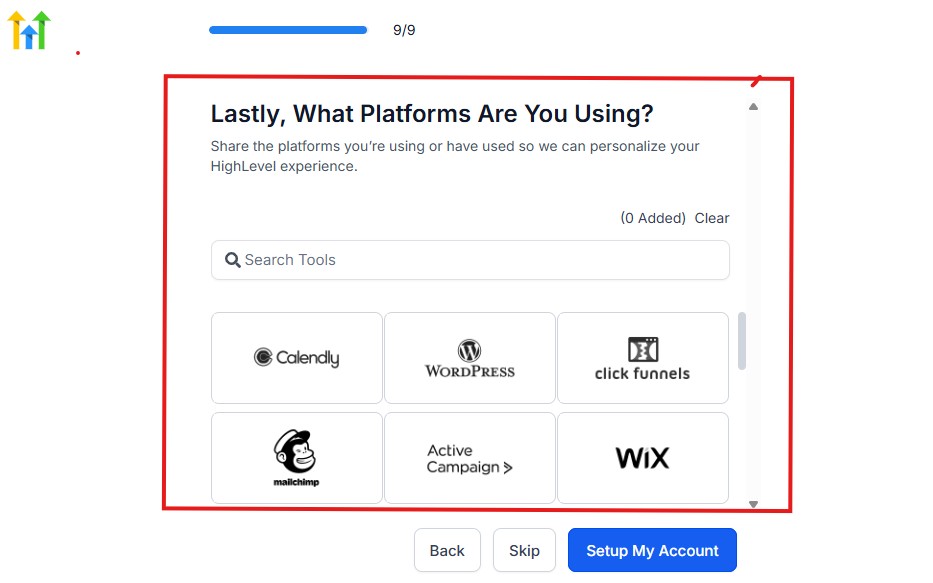
You can use the search button to search for any tools you want to add to your GoHighLevel account.
You can also skip this process and do it later if you want to.
After that, the page below will pop up.
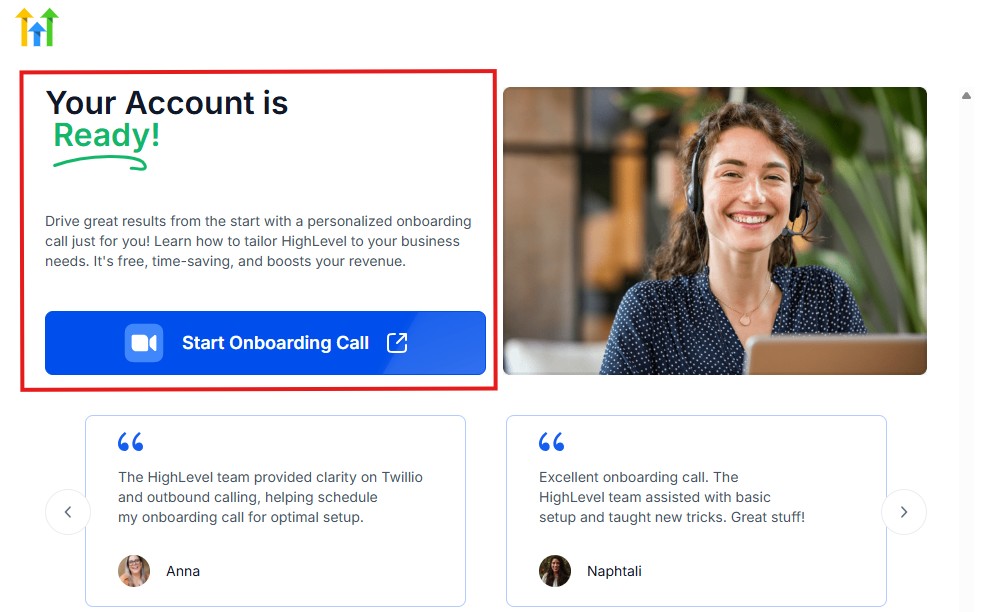
The page above says your account is ready and is asking you to “Start Onboarding Call.”
The “Onboarding Call” allows you to connect with the Go High Level team in order to discuss your account set-up process and everything regarding your plan in using HighLevel.
If you don’t want to start the “Onboarding Call” yet, just stroll down, and you will see the button in the image below.
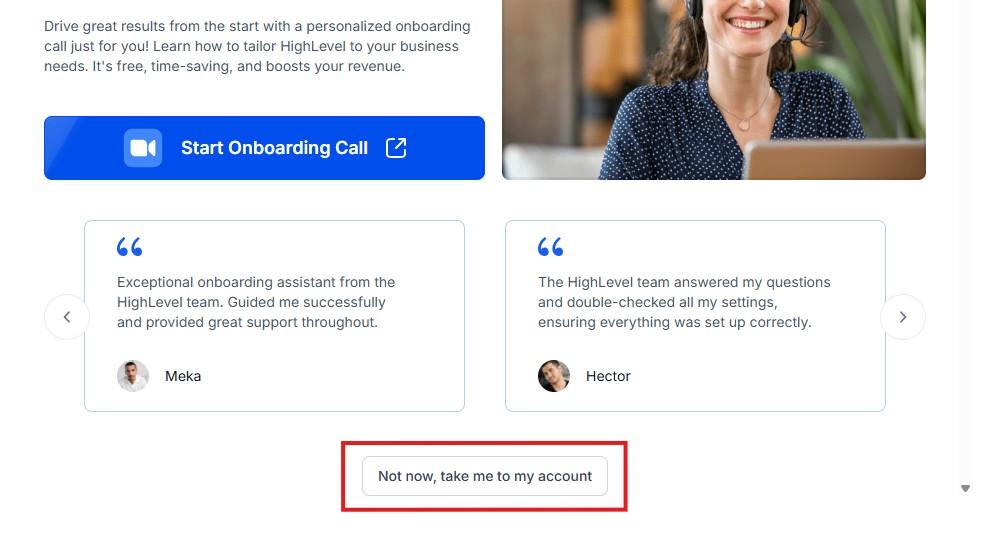
Simply click on “Not now, take me to my account“, and you will have access to your dashboard.
Note: If you have indicated that you want to resell HighLevel, you would have access to the agency dashboard by default, which looks like the image below.
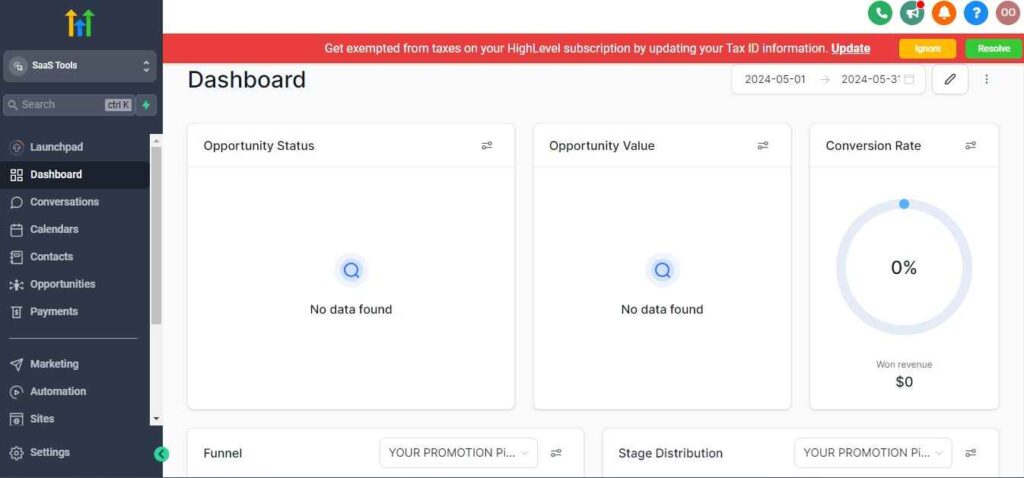
But if you didn’t indicate interest in reselling GHL, your dashboard will look like the image below.

You can switch between these dashboards at any time.
The data you see on the dashboard above are not real data, they’re snapshots that you can use to kickstart your account setup process.
I want to say congratulations. You have successfully set up your Go High Level account.
💡 Tip: Choose your plan based on your business model. If you’re looking to scale and offer GoHighLevel to clients under your own brand, Agency Pro is the better long-term investment.
Step 3: White Label Your Platform (Optional but Powerful)
With white labeling, you can customize GoHighLevel with your agency’s branding.
This means:
- Your logo instead of GoHighLevel’s
- A custom domain (like
dashboard.youragency.com) - Branded login pages, emails, and notifications
This not only enhances your professional appearance but also allows you to offer a branded experience to clients.
To white label:
- Go to Agency Settings > Company
- Upload your logo and update your business info
- Set your custom domain (requires domain configuration)
💡 Clients will love logging into a platform that feels like it was built just for them.
Step 4: Set Up Your Agency Settings
In your dashboard, navigate to Agency Settings, where you can configure:
- Time zone and currency
- Support email/phone (for client communication)
- Payment settings if you’re using Stripe for SaaS billing
- SMTP & Twilio integrations (for sending emails/SMS)
These settings apply across all client accounts and are essential for smooth communication and tracking.
Step 5: Connect Your Core Integrations
To make GoHighLevel work at full power, you’ll want to connect your essential tools:
- Stripe: To accept payments and run SaaS billing
- Mailgun or SMTP: For email sending
- Twilio: For sending SMS and handling calls
- Google Calendar: For booking appointments
💡 Don’t worry – GoHighLevel offers step-by-step guidance inside the dashboard for each integration.
Step 6: Add Team Members (If Needed)
If you work with a team, you can invite them to your agency dashboard with specific roles and permissions.
Go to Agency Settings > Team and add each member’s name, email, and user role (e.g., admin, sales rep, support).
🧩 Bonus Tip: Organize with Custom Snapshots
Snapshots allow you to save pre-built templates, funnels, workflows, and settings – so you can quickly launch new client accounts with everything ready to go.
You can either:
- Build your own snapshot from scratch
- Use GoHighLevel’s templates
- Import snapshots shared by others
This is a huge time-saver, especially for social media agencies managing multiple clients.
Now that your agency dashboard is set up, you’re ready to start building out sub-accounts for your clients – where the real work happens.
Creating & Managing Sub-Accounts for Social Media Clients
Sub-accounts are where all your client-specific work happens inside GoHighLevel.
Each client you manage will have their own dedicated sub-account – fully separated from others.
This is where you’ll handle campaigns, CRM, automations, funnels, and more.
Setting up sub-accounts correctly is key to staying organized and delivering a seamless experience for your clients.
🔧 Step 1: Create a New Sub-Account
To create a sub-account:
Go to your Agency Dashboard
Click on “Sub-Accounts” in the left menu
Select “+ Add Account”
Choose one of the following:
- Start from a Snapshot (recommended if you have pre-built templates)
- Start from Scratch for a custom build
Fill in your client’s business info (name, email, phone, industry, location, etc.)
Once created, GoHighLevel will generate a fully functional workspace for that client.
💡 Pro Tip: If you work with clients in the same niche (e.g., fitness or real estate), using a custom snapshot saves hours of setup time.
🏷️ Step 2: Organize the Account for Social Media Work
After creating the sub-account, set it up with your client’s social media needs in mind:
- CRM: Import or add leads gathered from social campaigns
- Custom Fields: Add fields like “Instagram Handle” or “Facebook Ad Source”
- Tags & Smart Lists: Use tags to track ad campaign sources, content types, or funnel stages (e.g., “IG-Lead,” “TikTok-Engaged”)
This structure keeps your social leads organized and easy to follow up with.
🔐 Step 3: GoHighLevel for SMMA – Invite Your Client
If you want your client to have access to their sub-account:
- Go to the client’s sub-account
- Click Settings > My Staff > + Add Employee
- Add your client’s email, name, and role
- Assign limited permissions so they only see what they need
🔒 You control how much your client can see – everything from full access to limited reporting or communication only.
🛠️ Step 4: Set Up Branding and Custom Domains
To offer a fully branded experience:
- Add your client’s logo in their sub-account
- Use a custom domain for their landing pages (e.g.,
social.yourclient.com) - Configure email/SMS sending profiles specific to the client
This builds trust and makes your service look even more professional.
📁 Step 5: Manage All Sub-Accounts Efficiently
From your Agency Dashboard, you can:
- View all client accounts at a glance
- Switch between sub-accounts instantly
- Monitor usage, messages, and appointment stats
- Access reporting and CRM across clients
💡 Use filters and search tools inside your agency view to find clients quickly—especially helpful when you’re managing dozens of accounts.
CRM & Pipeline Management
For a social media marketing agency, leads come from many sources – Instagram ads, Facebook forms, TikTok promotions, landing pages, DMs, and more.
Without a central system to track and follow up, opportunities get lost.
That’s where GoHighLevel’s CRM and pipeline tools come in.
They help you stay organized, track every lead, and move them through a structured sales or onboarding process with ease.
📥 Step 1: Understand the CRM Dashboard
Inside each sub-account, GoHighLevel’s CRM (Customer Relationship Management) dashboard gives you a clear view of:
- All your leads and contacts
- Their activity and communication history
- Tags, custom fields, and notes
- Their stage in your sales or engagement funnel
You can easily search, filter, and sort contacts to stay on top of your client’s pipeline.
💡 Example: A contact who filled out a Facebook lead ad form can be automatically tagged as “FB Lead” and added to a follow-up workflow.
📊 Step 2: Create a Custom Pipeline for Social Media Leads
Pipelines are visual workflows that help you track where each lead is in the process.
For social media clients, this could include stages like:
- New Lead
- Booked Strategy Call
- Call Completed
- Proposal Sent
- Onboarded
- Campaign Live
To set this up:
- Go to Settings > Pipelines
- Click “+ Add New Pipeline”
- Name your pipeline (e.g., “Social Media Client Funnel”)
- Add your custom stages
Now, every lead can be moved through the pipeline just by dragging and dropping.
🔁 Step 3: Automate Lead Flow into the Pipeline
Leads from social media ads, landing pages, or contact forms can be automatically added to your pipeline.
This keeps everything hands-free and organized.
Here’s how:
- Connect Facebook or Instagram Lead Ads using the GoHighLevel integration
- Link funnels, forms, or surveys to pipeline stages
- Use workflows to trigger movement based on actions (e.g., after a form is submitted, move the lead to “Booked Call”)
📌 Example: A TikTok ad leads to a landing page → User fills out the form → They are automatically added to your pipeline and scheduled for a strategy call.
🧩 Step 4: Use Tags & Smart Lists for Better Segmentation
Tags help you identify the type or source of each lead. For example:
- “IG Lead”
- “Interested in Content Creation”
- “Warm Lead”
Smart Lists allow you to group contacts by these tags, so you can send targeted emails, SMS, or assign them to the right workflow.
💬 Step 5: GoHighLevel for SMMA – Track Every Interaction
Each contact record in the CRM shows a complete timeline of:
- Emails
- SMS messages
- Phone calls
- Notes
- Form submissions
This gives you or your team full context when following up or reviewing client conversations.
🔍 You’ll never lose track of who said what or when again.
✅ Quick Benefits for Social Media Agencies:
- Track leads from all your ad platforms in one place
- Know exactly where each prospect stands in the sales cycle
- Automate movement and follow-up, reducing manual work
- Improve client reporting with clear pipeline metrics
Automation & Workflows for Social Media Campaigns
As a social media marketing agency, you’re likely managing dozens of moving parts: leads from ads, booking follow-ups, sending welcome messages, posting reminders, and nurturing prospects.
Doing it all manually is time-consuming – and frankly, unnecessary.
GoHighLevel’s Automations & Workflows allow you to streamline your entire process so your agency runs on autopilot, even while you’re focused on strategy and creativity.
🔄 What Are Workflows?
Workflows in GoHighLevel are visual automation builders.
They let you create rules like:
- “When someone submits a Facebook form, send them an SMS.”
- “If a lead doesn’t respond in 24 hours, send a follow-up email.”
- “After a strategy call is booked, assign the lead to a team member.”
You simply set triggers (what starts the automation) and actions (what happens next).
✨ Step-by-Step: Build an Automated Lead Follow-Up
Let’s walk through a basic (but powerful) workflow for new social media leads.
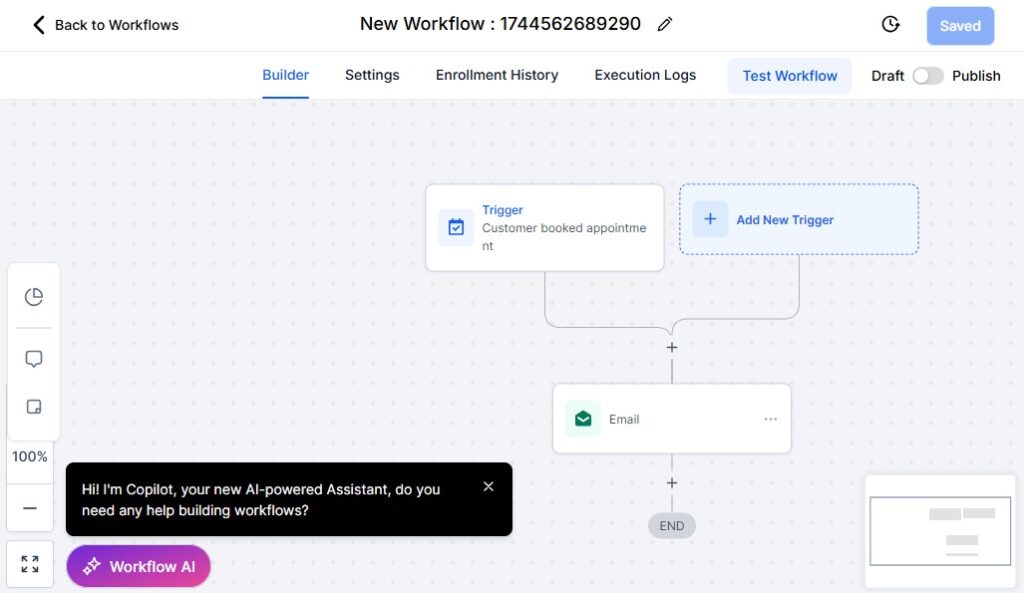
🧱 Step 1: Create a New Workflow
- Go to the client’s sub-account
- Navigate to Automation > Workflows
- Click “+ Create Workflow”
- Choose “Start from Scratch”
🚨 Step 2: Add a Trigger
Choose your lead source:
- Facebook Lead Form Submission
- Website Form Submission
- Instagram DM Keyword
- Funnel Form Completion
Example: Trigger = “Form Submission” from a Facebook ad campaign
⚙️ Step 3: Add Actions
Now build the follow-up sequence:
- Send SMS: “Thanks for your interest! We’ll reach out shortly.”
- Wait 5 minutes
- Send Email: “Here’s more info about how we help brands grow on social.”
- Assign to User: Send to your sales rep or onboarding manager
- Add to Pipeline: Move to “New Lead” stage
- Create Task: Set a reminder to call in 24 hours
You can continue adding actions based on how engaged the lead is or what they do next.
🔁 Advanced Automation Ideas for Social Media Agencies
Here are a few use cases your agency will love:
- Missed Call Text Back: Automatically text someone if they call and you miss it
- Onboarding Sequence: Guide new clients through onboarding with emails, SMS, and calendar links
- Review Requests: After a campaign ends, send a thank-you + Google review request
- Lead Nurturing: If a lead doesn’t book a call in 3 days, send a follow-up series
- Recurring Reminders: Remind clients to approve posts or submit creative assets
💡 Automations free up hours each week and ensure no lead or task slips through the cracks.
📊 Track Workflow Performance
Inside each workflow, you can:
- See how many contacts entered
- Track how many completed each step
- Measure conversion rates and drop-offs
Use this data to optimize timing, message copy, and trigger conditions.
🔐 Bonus: Use Workflows for Internal Processes Too
You’re not limited to just lead follow-up.
Use automations to:
- Notify your team when a client signs up
- Create tasks for content scheduling
- Alert the account manager if a lead hasn’t been contacted
With GoHighLevel’s automation engine, you can:
- Respond instantly to leads from any social media platform
- Personalize communication at scale
- Keep leads warm, clients informed, and your team organized
This is your competitive edge—agencies that automate, win.
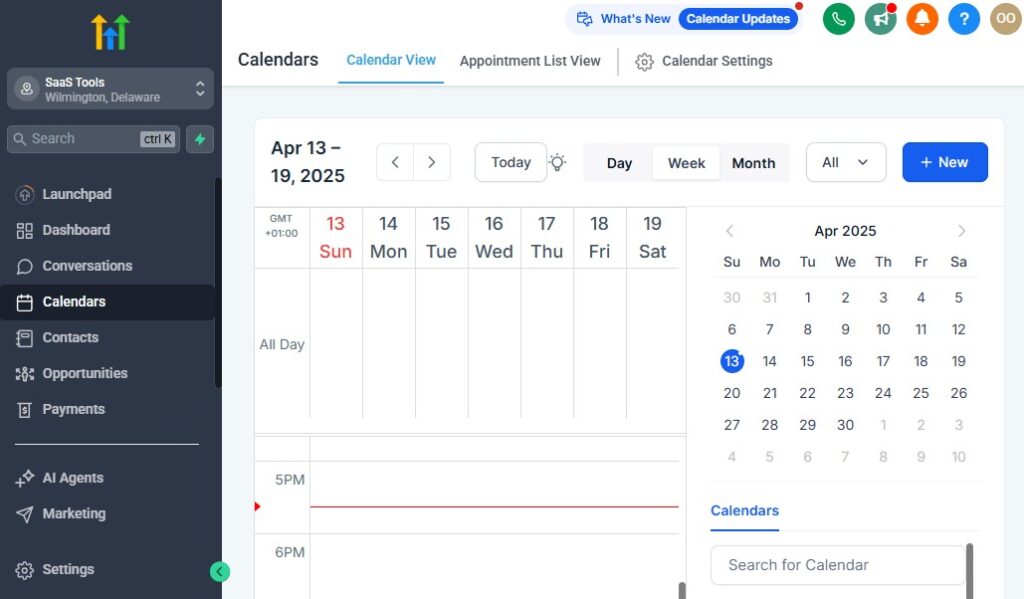
Booking Social Media Strategy Calls
Getting leads to book a strategy call is one of the most important steps in converting followers or ad clicks into paying clients.
GoHighLevel’s Calendar tool makes it incredibly easy to manage, automate, and personalize this process.
You’ll eliminate the back-and-forth, reduce no-shows, and make your agency look polished and professional.
🗓️ Step 1: Set Up a Calendar
Inside the client’s sub-account, go to Calendars > Calendar Settings
Click “+ New Calendar”
Choose a “Round Robin” (for teams) or “Simple” (for single users) calendar
Set:
- Availability hours
- Buffer times
- Minimum notice
- Time zone preferences
💡 Tip: Use a name like “Free Strategy Session” to make it more appealing.
🖼️ Step 2: Customize the Booking Experience
Make your booking page client-friendly by customizing:
- Header text and colors to match your agency brand
- Form questions like name, email, company name, Instagram handle, or campaign goals
- Confirmation page or redirect URL (can point to a thank-you video or info page)
This is your chance to impress right from the booking screen.
🔗 Step 3: Embed or Share the Calendar Link
You can:
- Embed the calendar on your website or landing page
- Send the calendar link in your DMs, SMS, or email campaigns
- Attach it to automations (e.g., after a lead fills a form, trigger the calendar)
📌 Example: A lead clicks on your Instagram ad → fills out a form → instantly sees a calendar to book their free consultation.
🔔 Step 4: Automate Reminders & Confirmations
Use Workflows to send:
- Immediate confirmation SMS or email
- 24-hour and 1-hour reminders
- Rescheduling options if needed
- Thank-you messages after the call
This dramatically increases show-up rates and improves the client experience.
💬 “Hey Sarah, just a reminder – your strategy session with [Your Agency] is tomorrow at 2 PM. Let us know if you need to reschedule!”
🧠 Bonus: Use Multiple Calendars for Different Needs
For example:
- One calendar for initial discovery calls
- Another for content approval meetings
- One more for existing client check-ins
You can manage all of these separately and link them to the right workflows.
💡 Why This Matters for Your Agency:
- You’ll book more qualified calls with less effort
- Leads feel taken care of with automated reminders
- You’ll reduce no-shows and wasted time
- Everything syncs with your CRM and pipeline
Funnels, Landing Pages & Lead Capture for Social Campaigns
As a social media marketing agency, your job isn’t just to create content – it’s to turn views and clicks into real, measurable leads.
That’s where funnels, landing pages, and forms come in.
With GoHighLevel, you can build high-converting, mobile-friendly pages that capture leads directly from your Facebook, Instagram, TikTok, or LinkedIn campaigns – all without needing third-party tools.
🎯 Why Funnels Matter for Social Media Campaigns
A social media funnel gives you control over the user journey after the click. Instead of sending traffic to a generic website, you can:
- Deliver a focused message (no distractions)
- Capture leads with forms or pop-ups
- Trigger automated follow-ups instantly
📌 Example: “Click our Instagram ad → Land on a free audit funnel → Fill out the form → Get booked for a strategy call within minutes.”
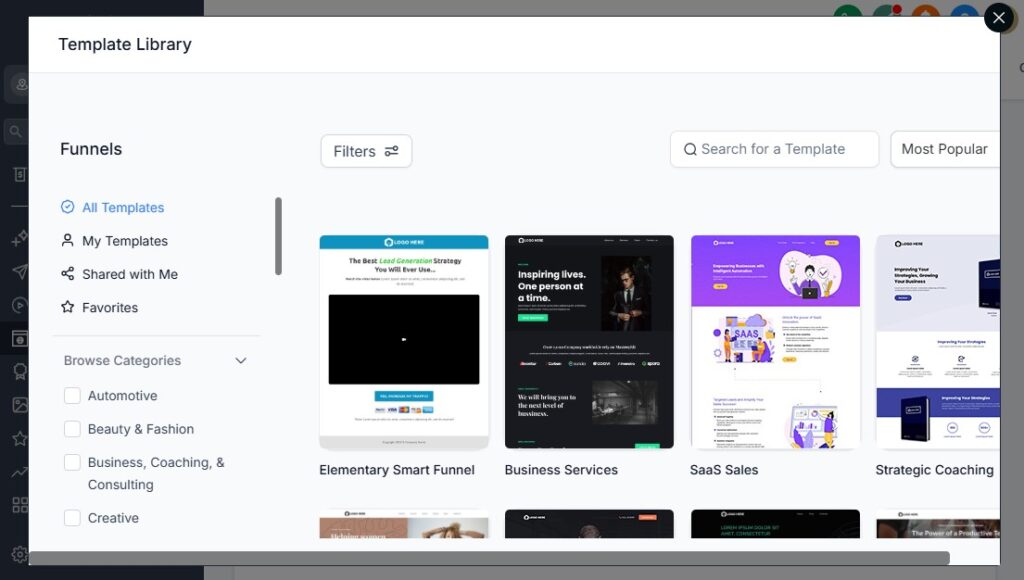
🛠️ Step 1: Create a New Funnel – GoHighLevel for SMMA
- Go to the client’s sub-account
- Navigate to Sites > Funnels > + New Funnel
- Choose “Blank Funnel” or use a template from the GoHighLevel library
- Name your funnel (e.g., “IG Ad Campaign – Free Strategy Session”)
📄 Step 2: Add and Design Funnel Steps
A basic funnel includes:
- Landing Page: Pitch your offer (free strategy call, audit, eBook, etc.)
- Form Step: Collect name, email, phone number, business type, and goals
- Thank You Page: Confirm the submission + next steps or calendar booking
Drag and drop elements like headlines, images, videos, forms, and timers to create a clean, modern layout.
💡 Use social proof like testimonials, logos, or quick results to boost credibility.
🧩 Step 3: Connect Forms and Triggers
Every form on your landing page should trigger a workflow.
Here’s how:
Create a custom form in Sites > Forms
Add fields that match your client’s campaign goals
Inside the form settings, choose:
- Add to CRM as contact
- Trigger workflow for follow-up
- Add to pipeline (e.g., “New Social Lead” stage)
📲 Example: “Jane fills out your TikTok funnel → Receives SMS + email → Booked for a call in 10 minutes.”
🌐 Step 4: Add a Custom Domain (Optional but Recommended)
To keep things branded and professional:
- Go to Settings > Domains
- Add a subdomain like
start.myclient.comorsocial.youragency.com - Connect your funnel to this domain
This builds trust and improves conversion rates.
🔁 Step 5: Test the Entire Flow
Before launching your campaign:
- Go through the funnel as if you’re a lead
- Make sure all forms work, tags are applied, and automations trigger
- Double-check mobile responsiveness
📊 Bonus: Use A/B Testing – GoHighLevel for SMMA
You can create variations of your funnel pages to test different headlines, images, CTAs, or lead forms. This helps you optimize campaigns based on real data – not guesswork.
🚀 The Result?
- More leads from your ad spend
- Clean, conversion-optimized funnels for each client
- Fully automated follow-up and nurturing
- A clear path from social ad → qualified lead → booked call
Learn More:
- What is GoHighLevel? (Features, Use Cases, Pricing & More)
- GoHighLevel Review: (My Experience After 5 Years)
- GoHighLevel Pricing: (+ Discount Codes)
- GoHighLevel Features: (Full List of Tools)
- GoHighLevel Onboarding Checklist: (Complete Tutorial)
- GoHighLevel for Agencies: (Detailed Tutorial)
- GoHighLevel for Small Businesses: (2026 Helpful Tutorial)
- GoHighLevel for Service Businesses: (2026 Helpful Tutorial)
- GoHighLevel for Local Businesses: (2026 Helpful Tutorial)
Client Reporting & Dashboards – GoHighLevel for SMMA
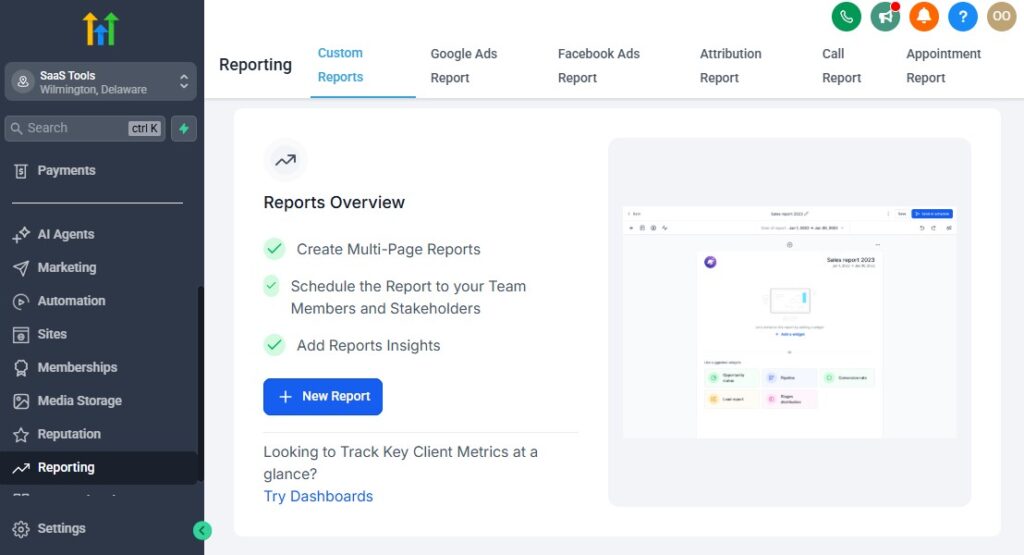
As a social media marketing agency, showing your clients the impact of your work is crucial.
GoHighLevel’s reporting and dashboard tools make it easy to track campaign performance, monitor key metrics, and provide your clients with detailed insights – without the need for complicated spreadsheets or third-party tools.
📊 Step 1: Set Up a Client Dashboard
To create a customized dashboard for each client:
- Go to Dashboard in your client’s sub-account
- Click “+ New Dashboard”
- Choose the widgets you want to display (e.g., leads generated, appointments booked, revenue tracked, etc.)
Widgets can be rearranged to prioritize the data that matters most to your client.
💡 Pro Tip: Keep it clean and simple! Focus on key metrics like lead generation, conversions, and engagement.
📈 Step 2: Select Relevant Reporting Metrics
GoHighLevel provides a variety of reporting widgets that pull data from all your marketing channels:
- Leads: Track how many leads are generated via Facebook, Instagram, etc.
- Sales/Revenue: Measure the value of each lead or client brought in.
- Appointments: See how many calls or consultations are booked.
- Funnel Performance: Monitor how well your landing pages and forms are converting.
You can also customize the reports to fit your client’s goals, whether that’s social engagement, lead volume, or sales.
🧑💼 Step 3: Share Dashboards with Clients
Once the dashboard is set up:
- Go to Settings > Share Dashboard
- Generate a link to send to your client or set up automated reports that are sent regularly (e.g., weekly, monthly)
- You can restrict access to only certain metrics if needed
This gives your client real-time access to their campaign data without you needing to send manual updates.
📩 Step 4: Automate Reporting Emails
If you prefer to send reports via email, set up an Automated Report Workflow:
- Go to Automation > Workflows
- Create a workflow that triggers an email report on a set schedule (e.g., every Monday at 9 AM)
- Use custom templates to add branding and an easy-to-read summary
This keeps your clients informed, builds trust, and saves you time.
🔄 Step 5: Track Campaign Results with Conversions
For a more comprehensive view:
- Use conversion tracking to monitor how leads move from your funnel to booked calls or sales
- View source data to see where leads are coming from (e.g., Facebook, Instagram, TikTok)
- Use tagging to segment leads by source or behavior and analyze how different channels are performing
✅ Why This Matters for Your Agency:
- Transparency: Clients love seeing tangible results, and dashboards provide clear, accessible data.
- Efficiency: Automated reporting frees up your time, so you don’t have to manually generate reports.
- Trust: Real-time data builds client confidence in your strategies and results.
- Actionable Insights: Dashboards help you make data-driven decisions for improving campaigns.
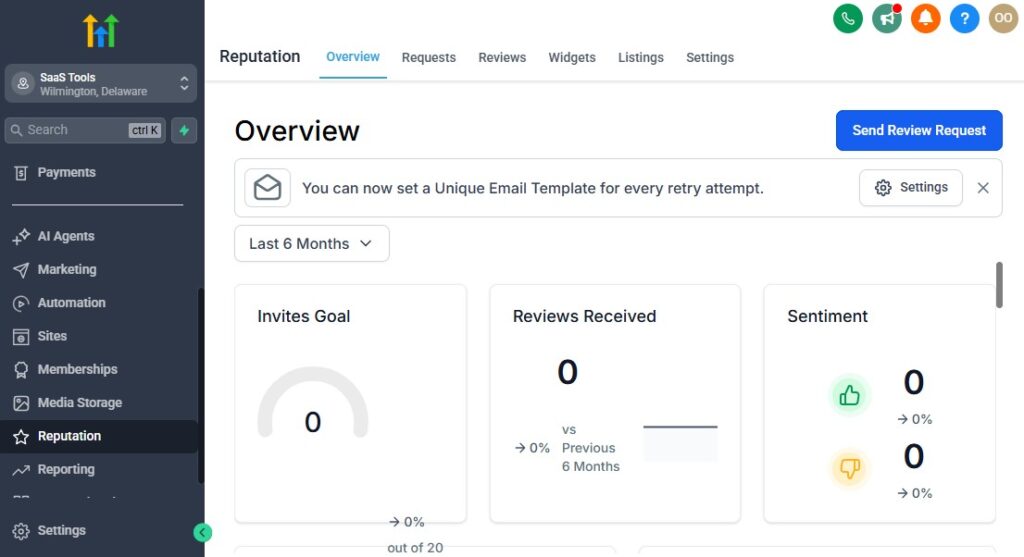
Reputation Management for Social Media Agencies
For any business, a strong online reputation is key to success.
As a social media agency, one of your roles is to help clients build and maintain a positive image on platforms like Google, Facebook, and others.
GoHighLevel’s Reputation Management tools make it easy to collect reviews, respond to feedback, and improve your clients’ online presence – all from one central dashboard.
🌟 Step 1: Set Up Review Requests – GoHighLevel for SMMA
The first step in reputation management is asking for reviews.
GoHighLevel automates this process so your clients can gather positive reviews with minimal effort.
- Go to Reputation > Reviews in your client’s sub-account
- Click “+ Request Review”
- Select the platform (e.g., Google My Business, Facebook, etc.)
- Customize the message (e.g., “Thanks for working with us! We’d love your feedback on Google.”)
💡 Pro Tip: Make the review request feel personal by mentioning specifics about the work you did or the positive experience.
📲 Step 2: Automate Review Requests via SMS & Email
Once the request message is set up, you can create automated workflows to send review requests after specific interactions, such as:
- After a strategy call is completed
- Once a campaign has gone live
- After a client pays their invoice
This ensures your clients are continuously building their online reputation.
📈 Step 3: Monitor and Respond to Reviews
GoHighLevel’s Reputation Management Dashboard consolidates all reviews from platforms like Google and Facebook. From here, you can:
- Monitor reviews in real-time
- Respond directly from the dashboard (e.g., thanking happy clients, addressing negative feedback)
This allows you to manage your clients’ reputation without logging into multiple platforms.
🔄 Step 4: Set Up Automated Responses to Reviews
For clients who prefer to automate responses, GoHighLevel allows you to set auto-replies to positive or negative reviews. For example:
- Positive Review Auto-Reply: “Thank you for your kind words! We love working with you, and we’re excited to continue growing together.”
- Negative Review Auto-Reply: “We’re sorry to hear you weren’t satisfied. We take your feedback seriously and would love to discuss how we can make things right.”
This ensures a timely response to every review, without the need to do it manually.
🎯 Step 5: Build Reputation Reports
For clients who want to see how their reputation is growing:
- Use dashboards to track the number of reviews, average rating, and sentiment over time.
- Set up automated reports that can be sent weekly or monthly, showcasing progress and areas for improvement.
📊 Example: Track how many reviews your client’s business received last month and compare their average rating to competitors.
🧠 Step 6: Use Reputation Management to Improve Social Media Strategy
Your client’s reputation directly impacts their social media strategy. For example:
- High reviews improve credibility on social media platforms, leading to more engagement and trust.
- Negative reviews can help you address issues and refine messaging to align with audience expectations.
With GoHighLevel, you can integrate reputation management with social media campaigns for a more comprehensive online presence.
✅ Why Reputation Management Matters for Your Agency:
- Build Trust: Positive reviews increase consumer trust and credibility on social platforms.
- Improve Visibility: Great reviews boost your client’s rankings on Google and other search engines.
- Client Satisfaction: Responding promptly to reviews shows your clients you care about their feedback.
- Efficiency: Automating requests and responses saves your agency valuable time while maintaining an active online presence.
Integrations for Social Media Marketing Agencies Tools
To create a seamless experience for your clients and run efficient campaigns, integrating GoHighLevel with other popular social media tools is essential.
GoHighLevel offers a wide range of integrations that connect with your social media platforms, CRM systems, email marketing tools, and more – saving you time and improving the results of your campaigns.
🛠️ Step 1: Connecting Social Media Platforms
GoHighLevel supports direct integration with major social platforms such as Facebook, Instagram, and Google.
This helps you:
- Track leads from Facebook and Instagram ads
- Automate posting or social media engagement directly from GoHighLevel
- Capture leads from Facebook Lead Ads or Instagram DMs
How to Connect Facebook & Instagram Ads:
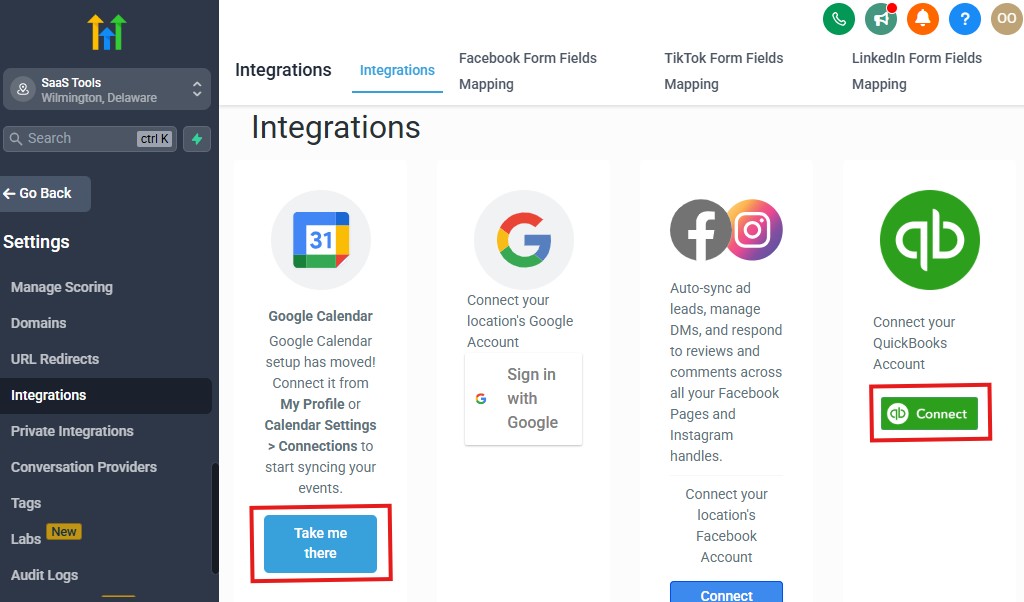
- Go to Settings > Integrations
- Select Facebook Ads and follow the prompts to link your Facebook account
- Once connected, you can capture leads from Facebook forms or connect GoHighLevel’s automations to follow up on new leads
💬 Step 2: Integrating Email & SMS Tools
GoHighLevel also integrates with email platforms like Gmail, SMTP, and popular SMS tools.
This ensures your social media campaigns can trigger automated emails, follow-ups, and SMS messages seamlessly.
How to Connect Email & SMS Tools:
- Navigate to Settings > Integrations
- Click on Email & SMS and choose the tool you want to integrate (e.g., Twilio for SMS, Gmail for email)
- Follow the integration prompts to authorize your account
Now, you can send personalized follow-ups and drip campaigns directly from GoHighLevel after a lead engages with your social media content.
📅 Step 3: Calendar & Scheduling Integrations
Social media leads often need to book calls or consultations.
GoHighLevel’s Calendar Integration syncs with Google Calendar or any other scheduling platform to ensure your clients can easily book appointments without going back and forth.
How to Integrate Google Calendar:
- Go to Settings > Calendars
- Choose Google Calendar and follow the prompts to connect your account
- Sync your availability, booking preferences, and client calls into your calendar
This allows you to automate appointment scheduling and prevent double-bookings, while keeping all client interactions organized in one place.
📊 Step 4: CRM & Analytics Tool Integrations
For a deeper dive into your campaigns’ performance, GoHighLevel integrates with analytics and CRM tools like Google Analytics and Zapier to pass data between different platforms.
How to Integrate Google Analytics:
- Go to Settings > Integrations
- Click on Google Analytics
- Input your Tracking ID to link your GoHighLevel account with Google Analytics
This helps you track campaign traffic, user behavior, and conversion rates directly from your social campaigns.
🔄 Step 5: Use Zapier to Connect with Other Tools
For even more flexibility, Zapier enables you to connect GoHighLevel with hundreds of third-party tools.
Whether it’s connecting to CRMs, email platforms, e-commerce systems, or social media tools, Zapier acts as a bridge to automate and streamline workflows.
How to Use Zapier: – GoHighLevel for SMMA
- Go to Settings > Integrations > Zapier
- Create a Zap (automation) by selecting the trigger event and the action you want to take
- Follow the prompts to connect GoHighLevel with your desired platform (e.g., integrating GoHighLevel with Slack for real-time lead notifications)
This integration helps you automate processes between tools, saving time and reducing manual effort.
🚀 Bonus: Use Third-Party Social Media Tools
If you need advanced tools for managing social media content, GoHighLevel integrates with social media management platforms like Buffer or Hootsuite. This makes scheduling posts, tracking engagement, and analyzing social performance easier than ever.
How to Integrate Buffer/Hootsuite:
- Go to Settings > Integrations
- Choose Buffer or Hootsuite
- Follow the steps to connect your account and start scheduling posts directly from GoHighLevel
✅ Why These Integrations Matter for Your Agency:
- Efficiency: Integrating with your favorite tools ensures everything is connected, reducing the need to switch between platforms.
- Seamless Campaign Management: Track, nurture, and convert leads without leaving GoHighLevel.
- Better Data Management: Centralize your data from social media, email marketing, and CRMs for more insightful analysis and reporting.
- Automation: With Zapier and other integrations, you can automate time-consuming tasks, leaving you more time to focus on creative and strategic work.
Selling GoHighLevel as a White-Labeled Social Media Platform
GoHighLevel provides a unique opportunity for social media agencies to white-label the platform, allowing you to rebrand it as your own.
By doing this, you can offer a powerful, all-in-one solution to your clients while keeping your agency’s brand front and center.
This gives you the chance to enhance your service offering and even charge a premium for the white-labeled platform.
🌐 Step 1: Activate White Labeling
To get started, you need to enable White Labeling in GoHighLevel:
- Go to Settings > Agency Settings
- Under the White Labeling section, click Enable White Labeling
- Upload your logo and select your brand colors
- Set a custom domain name (e.g., platform.youragency.com) to fully rebrand the platform for your clients
This step ensures that the platform looks and feels like it’s yours, not GoHighLevel’s, creating a seamless experience for your clients.
💻 Step 2: Customize the Dashboard and Interface
To give your clients a consistent brand experience:
- Change the app name to your agency’s name (e.g., “Your Agency CRM”)
- Modify the login page to feature your branding, logo, and messaging
- Remove any GoHighLevel branding so your clients only see your agency’s name
These small tweaks make a big difference in how professional and personalized the platform feels to your clients.
🧑💻 Step 3: Set Up Client Sub-Accounts Under Your Brand
Once white labeling is activated, you can create sub-accounts for your clients.
These sub-accounts are fully branded under your agency’s name, but your clients will use them as their own personalized platforms.
- Go to Sub-Accounts > Create New Sub-Account
- Fill in your client’s details and choose the plan that fits their needs
- Customize the sub-account to reflect your client’s branding if needed (e.g., logo, custom domain)
This ensures each client gets their own branded platform, while you maintain control over their account’s settings.
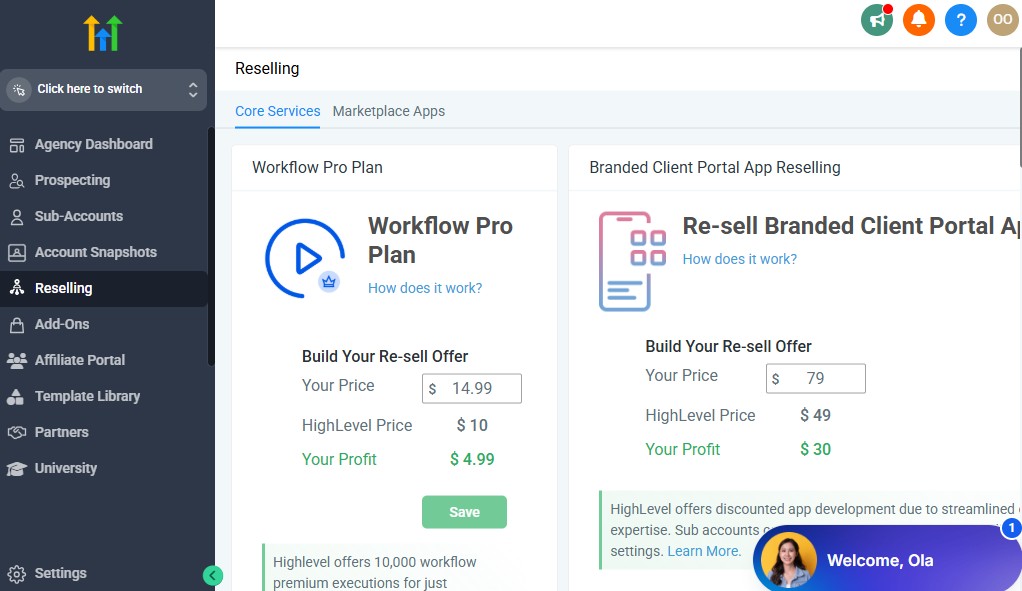
🧩 Step 4: Package Your White-Labeled Offering
One of the best parts of white-labeling GoHighLevel is that you can create your own pricing and service packages.
You can offer different subscription tiers based on the features you provide.
For example:
- Basic Plan: Includes CRM, Email & SMS marketing, and social media integrations
- Advanced Plan: Adds advanced reporting, reputation management, and custom funnels
- Premium Plan: Includes everything plus unlimited users, custom dashboards, and dedicated support
You can charge a monthly subscription fee for access to the platform, either per user or based on feature tiers. This helps you create a recurring revenue model for your agency.
💡 Step 5: Market Your White-Labeled Platform to Clients
Once everything is set up, it’s time to promote your white-labeled GoHighLevel platform as an exclusive, all-in-one solution for your clients.
Here’s how to sell it effectively:
- Emphasize convenience: Highlight the fact that your clients can manage all their social media campaigns, CRM, appointments, and automations in one place.
- Showcase time savings: Explain how using a white-labeled platform reduces the need for multiple tools and logins.
- Offer value: Position the platform as a premium offering that helps them manage and grow their business more effectively.
📢 Example: “Streamline your entire marketing process. Our custom-branded platform is designed specifically for businesses like yours to drive leads, manage campaigns, and increase sales – all from one easy-to-use dashboard.”
🔄 Step 6: Ongoing Support and Updates
When you sell GoHighLevel as a white-labeled platform, you also need to provide ongoing support to your clients. This could include:
- Offering training sessions on how to use the platform
- Providing customer support for any technical issues
- Updating the platform with new features as GoHighLevel releases them
By providing excellent support and keeping the platform up-to-date, you’ll build stronger relationships with your clients and enhance your reputation as a trusted provider.
✅ Why White Labeling GoHighLevel Benefits Your Agency:
- Increased Revenue: White-labeling allows you to offer a premium product with higher margins, creating new revenue streams.
- Brand Authority: By offering a branded platform, you position your agency as a one-stop solution for your clients’ marketing needs.
- Client Retention: A custom, branded platform helps you retain clients by integrating them deeper into your services.
- Scalability: As your agency grows, white-labeling allows you to easily onboard more clients without needing to switch platforms or use multiple tools.
Frequently Asked Questions
FAQs about GoHighLevel for SMMA (Social Media Marketing Agencies)
What is GoHighLevel used for in an SMMA?
GoHighLevel helps Social Media Marketing Agencies (SMMAs) manage leads, automate client communication, track campaigns, and streamline operations – all from one dashboard.
It replaces multiple tools like ClickFunnels, Mailchimp, and Calendly, saving you both time and monthly costs.
Can I use GoHighLevel to manage multiple clients as an SMMA?
Yes. GoHighLevel is built specifically for agencies and supports unlimited client sub-accounts.
Each client has their own workspace with funnels, automations, and reports – all managed under your main agency dashboard.
Is GoHighLevel good for beginners starting an SMMA?
Yes. GoHighLevel is beginner-friendly and offers templates for funnels, automations, and client pipelines.
Even if you’re new to running an SMMA, you can launch campaigns, track leads, and onboard clients quickly without coding or complex integrations.
Can I white-label GoHighLevel for my own agency brand as an SMMA?
Yes – this is one of its biggest advantages. With white-label mode, you can customize the platform with your logo, brand colors, and domain name.
Your clients will see your agency’s software, not GoHighLevel, giving you a more professional image and extra recurring income potential.
How does GoHighLevel compare to other SMMA tools?
GoHighLevel combines the features of several popular tools in one system:
- Funnels (ClickFunnels)
- CRM (HubSpot or Pipedrive)
- Email & SMS automation (ActiveCampaign)
- Bookings (Calendly)
- Reporting (AgencyAnalytics)
Instead of paying for all of these separately, you get everything in GoHighLevel – at a fraction of the cost.
How much does GoHighLevel cost for SMMA owners?
Pricing starts at $97/month for a single account and $297/month for the Agency Unlimited plan, which allows you to manage multiple clients.
If you want to resell GoHighLevel as your own software (SaaS Mode), the Pro Plan costs $497/month.
What is SaaS Mode in GoHighLevel?
SaaS Mode lets you resell GoHighLevel under your own brand – turning your agency into a software company.
You can create custom pricing plans, offer branded logins, and collect recurring monthly revenue from clients using your version of GoHighLevel.
Do I need tech skills to use GoHighLevel as an SMMA owner?
Not at all. GoHighLevel’s drag-and-drop editors and prebuilt templates make it easy for anyone to get started. Even if you’re not tech-savvy, you can build funnels, automations, and client systems in hours – not weeks.
Is GoHighLevel worth it for my SMMA in 2026?
Yes. If you want to automate client management, scale faster, and increase profitability, GoHighLevel is one of the best investments you can make for your agency.
It simplifies your workflow, improves client retention, and helps you build predictable recurring revenue – all from one platform.
Final Thoughts
Getting started with a new platform can feel overwhelming – but GoHighLevel is built to make your life easier, not harder.
As a social media marketing agency, you’re constantly juggling content, campaigns, leads, client communication, and reporting.
GoHighLevel brings all of that into one streamlined system – saving you time, reducing chaos, and helping you deliver even better results to your clients.
Whether you’re a solo marketer or running a growing team, GoHighLevel gives you the tools to scale without sacrificing quality.
You’ll be able to automate repetitive tasks, manage multiple client accounts easily, and create a seamless experience for you and your clients.
So don’t wait for the perfect time – the best way to learn is by doing.
Start exploring GoHighLevel today, follow this guide step by step, and you’ll be surprised at how quickly your agency operations become more efficient, professional, and profitable.